Virtual Terminal integrated use
Additional guide for Virtual Terminal Handbook: How it works with specific Rossware applications
This document simplifies using the Virtual Terminal (VT) within Rossware applications. There's another guide for using the VT specifically:
More resources that provide details about the RosswarePay system:
You might also find the section in the ServiceDesk's main manual useful, as it discusses the topic of FundsControl:
Using the Virtual Terminal in ServiceDesk, generally
The main place to find the new Virtual Terminal in ServiceDesk is in the FundsJournal form (Ctrl+F9). This is used when making a new "Bankcard" entry.
As usual, you can make a new entry directly from this form. Click the "Add New Item" button and fill in the details.
But this way is rarely used.
More often, you get to the same point through other methods, such as:
In the FinishedForms POS, you're getting payment from the customer. Just hit the "Receive Funds" button. This takes you to the same screen as before, but now, some boxes are already filled in for you.
In a PVR Type-II process, you've marked the “Funds Collected” box, which gives a result similar to what's explained in #1.
To record funds received in a JobRecord (F7), simply click the "enter funds Rcvd" button.
You'll start at the top of the FundsJournal form with a row of boxes. The first two are pre-filled with the Invoice Number and Customer Name. The next two are empty, with the cursor in the third box for you to input the payment type.
This is the usual setup.
As always, you'll input a letter to indicate payment type (e.g., “c” for cash, “b” for bank card, etc.) and then input the amount in the next box. Once filled, press 'Enter' to save.
Now comes the exciting new part. When you hit 'Enter,' the Virtual Terminal pops up if you've chosen “b” for bank card payment.
Here, you can swipe a card (if your computer has a swiper) or manually input card details, then process the transaction. Once done, close the form. ServiceDesk will update the FundsJournal entry to show the transaction has been processed.
It's straightforward. Remember, you'll automatically be in the right place after moving from any operational context (i.e., POS, Type-II PVR, or entering funds directly from a JobRecord).
What's more? There are two additional ways to open the Virtual Terminal:
Let's say you have bankcard entries in the FundsJournal still needing processing. Right-click on any entry in the View/Edit Items > Bankcard > Receipts > Undeposited/Unverified screen. You'll see an option to "Toggle" the item as processed if it hasn't been done yet. Simply choose this option to process the bank card. It's as simple as that.
If you need to use the Virtual Terminal for a transaction without integrating the results into a ServiceDesk process, you can do this by pressing Shift+F9 on your keyboard. You can also find this option in the 'Work-in-progress' section of the main menu.
How to create and use “Stored-Card-Information” in ServiceDesk
"Stored-card-information" is a system where you collect a customer's full card details once, save them, and use them for future transactions.
In more detail, this system saves the information in a secure online vault, which meets PCI standards. This vault doesn't allow direct access to the information. You can only access it using a special key or "token". This token is used to complete a transaction securely, but doesn't reveal the information to anyone or any other software. This is sometimes called "tokenization".
In ServiceDesk, there are two instances where you can create and use these tokens.
First, you can gather and connect a token to a QuickEntryTemplate (QET). Once a token is attached to a QET, you can make a transaction using that token whenever the QET client pays for a job.
Second, you can gather and connect a token to any regular customer through a JobRecord set up for them.
We'll explain the QET instance and then the regular-customer/JobRecord instance.
For token use as connected to QETs:
Ensure your QET entry has a two or three-character "High Volume Client" abbreviation specified in the middle of the QET. This is essential for storing tokens for QET clients.
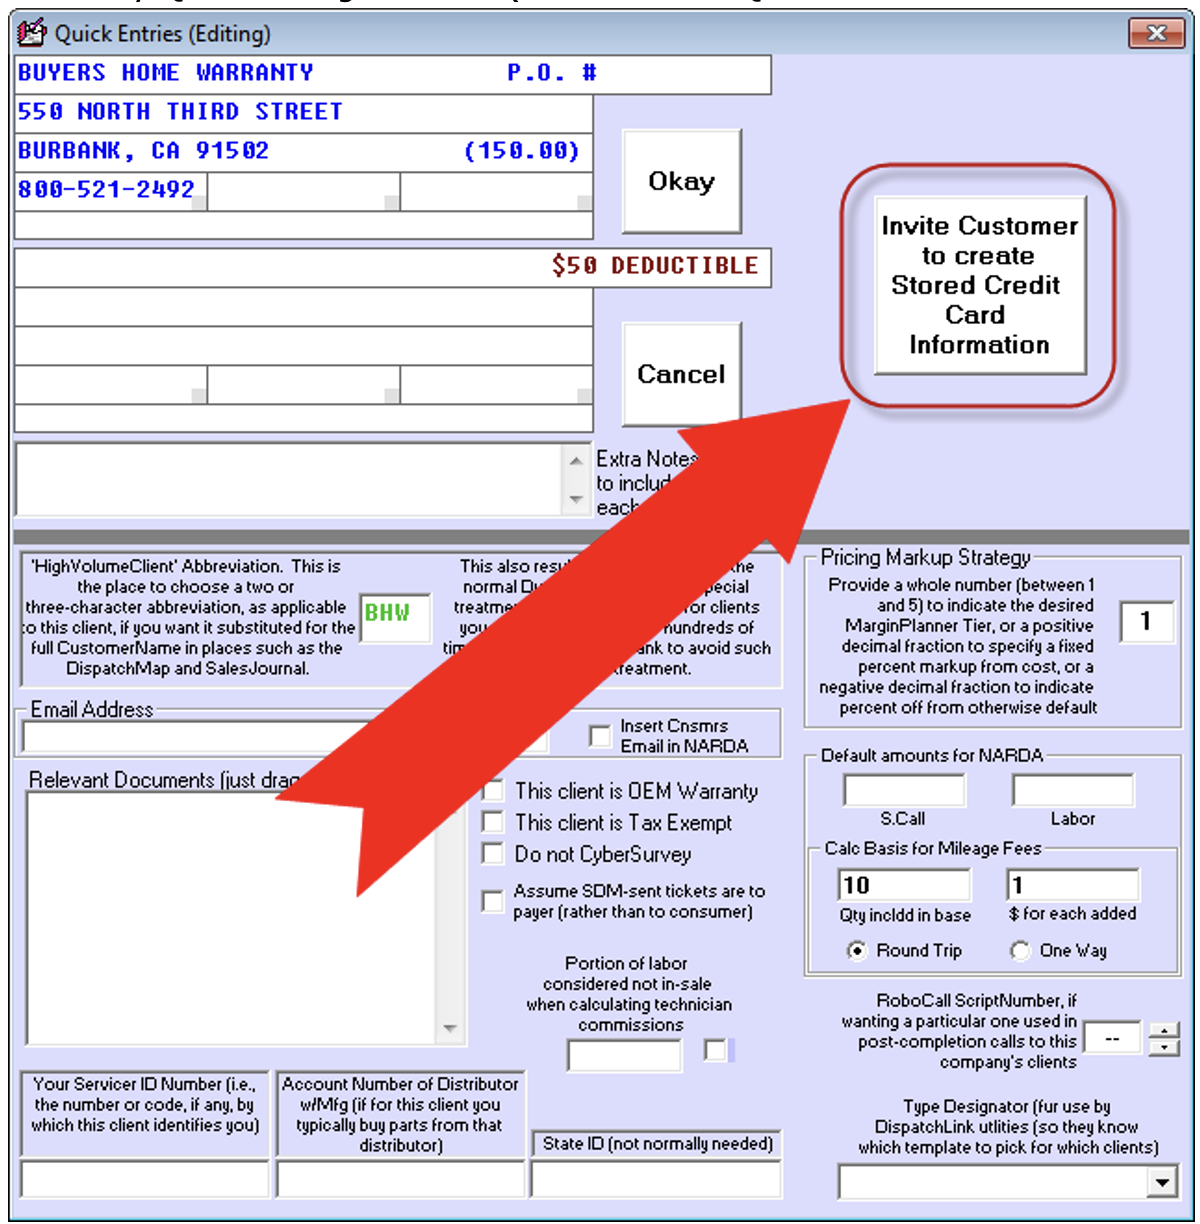
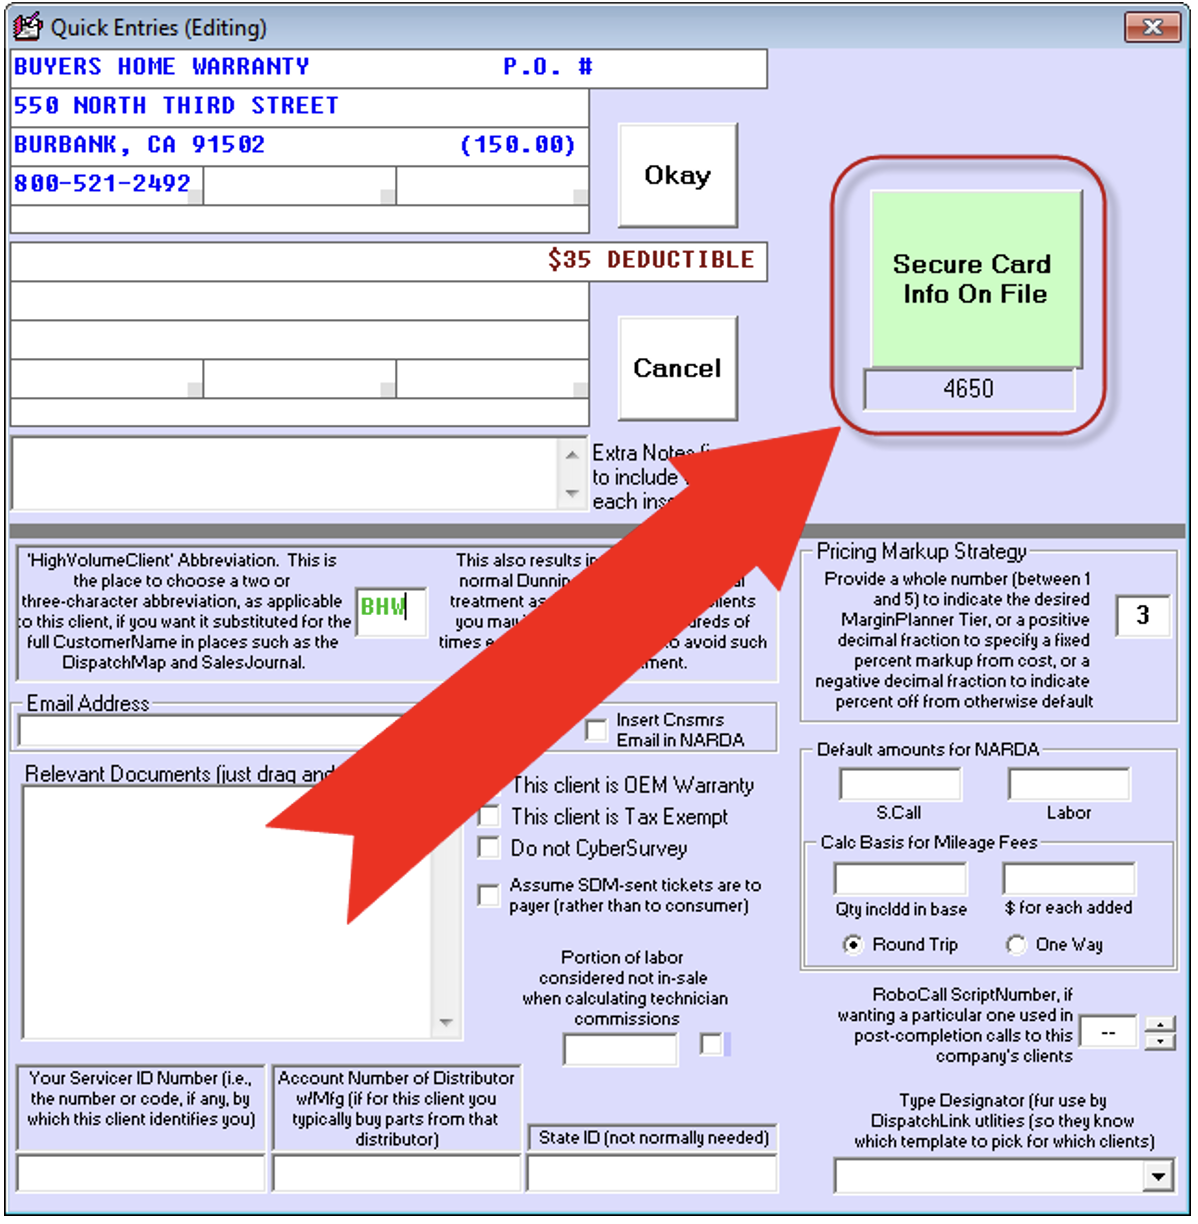
From any QET’s editing interface (Alt-F1) > select QET-of-interest > click- 'Edit.'
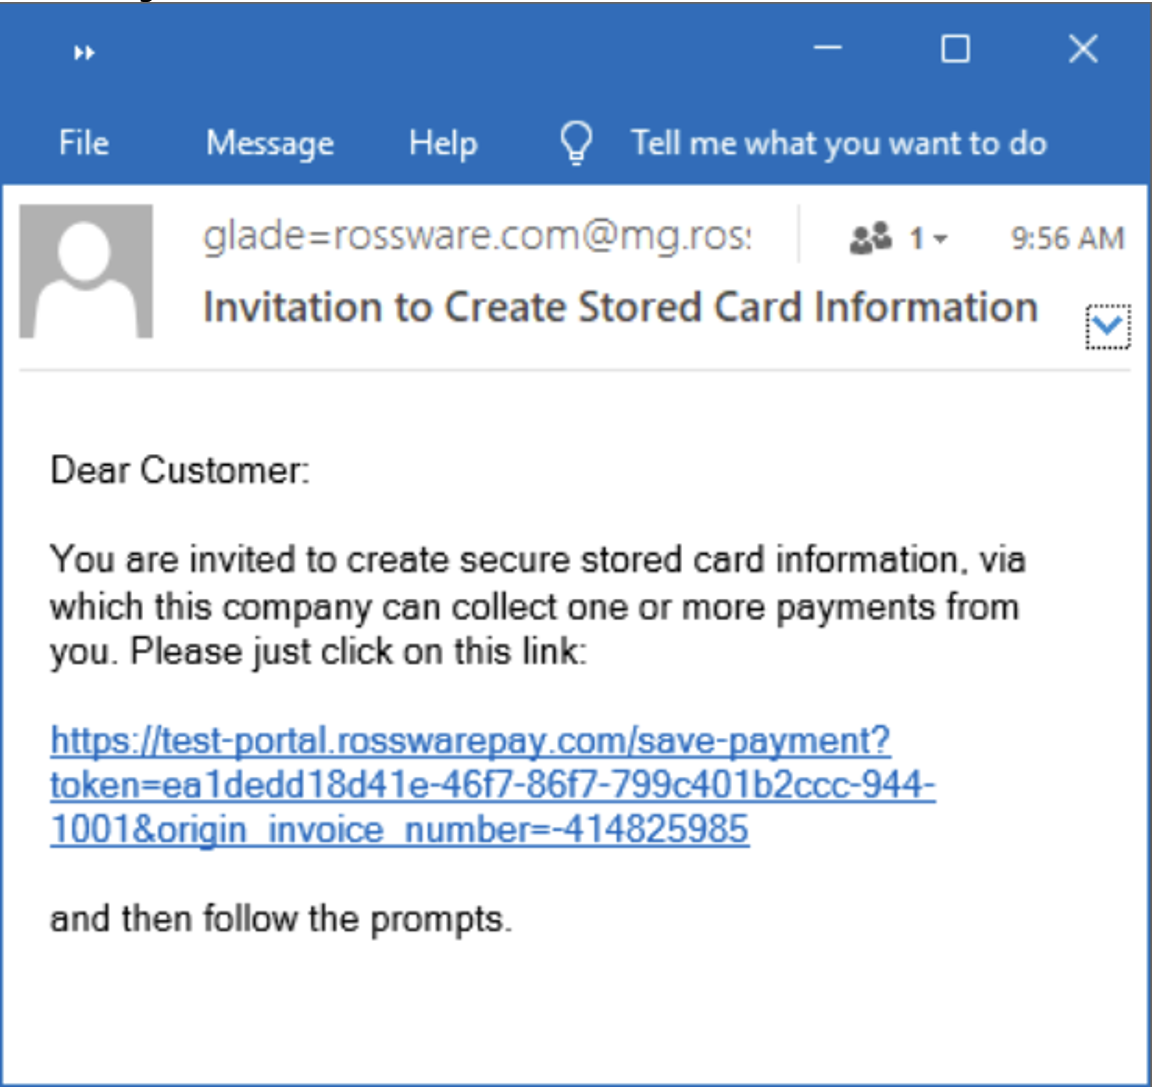
Click the button to send an invitation to the entity in the QET. You can choose to send the invitation by email or text. You'll need to enter an email address or phone number. Next, you'll see a screen where you can change the pre-written message before you send it. Based on your choice, the person will get a message like this:
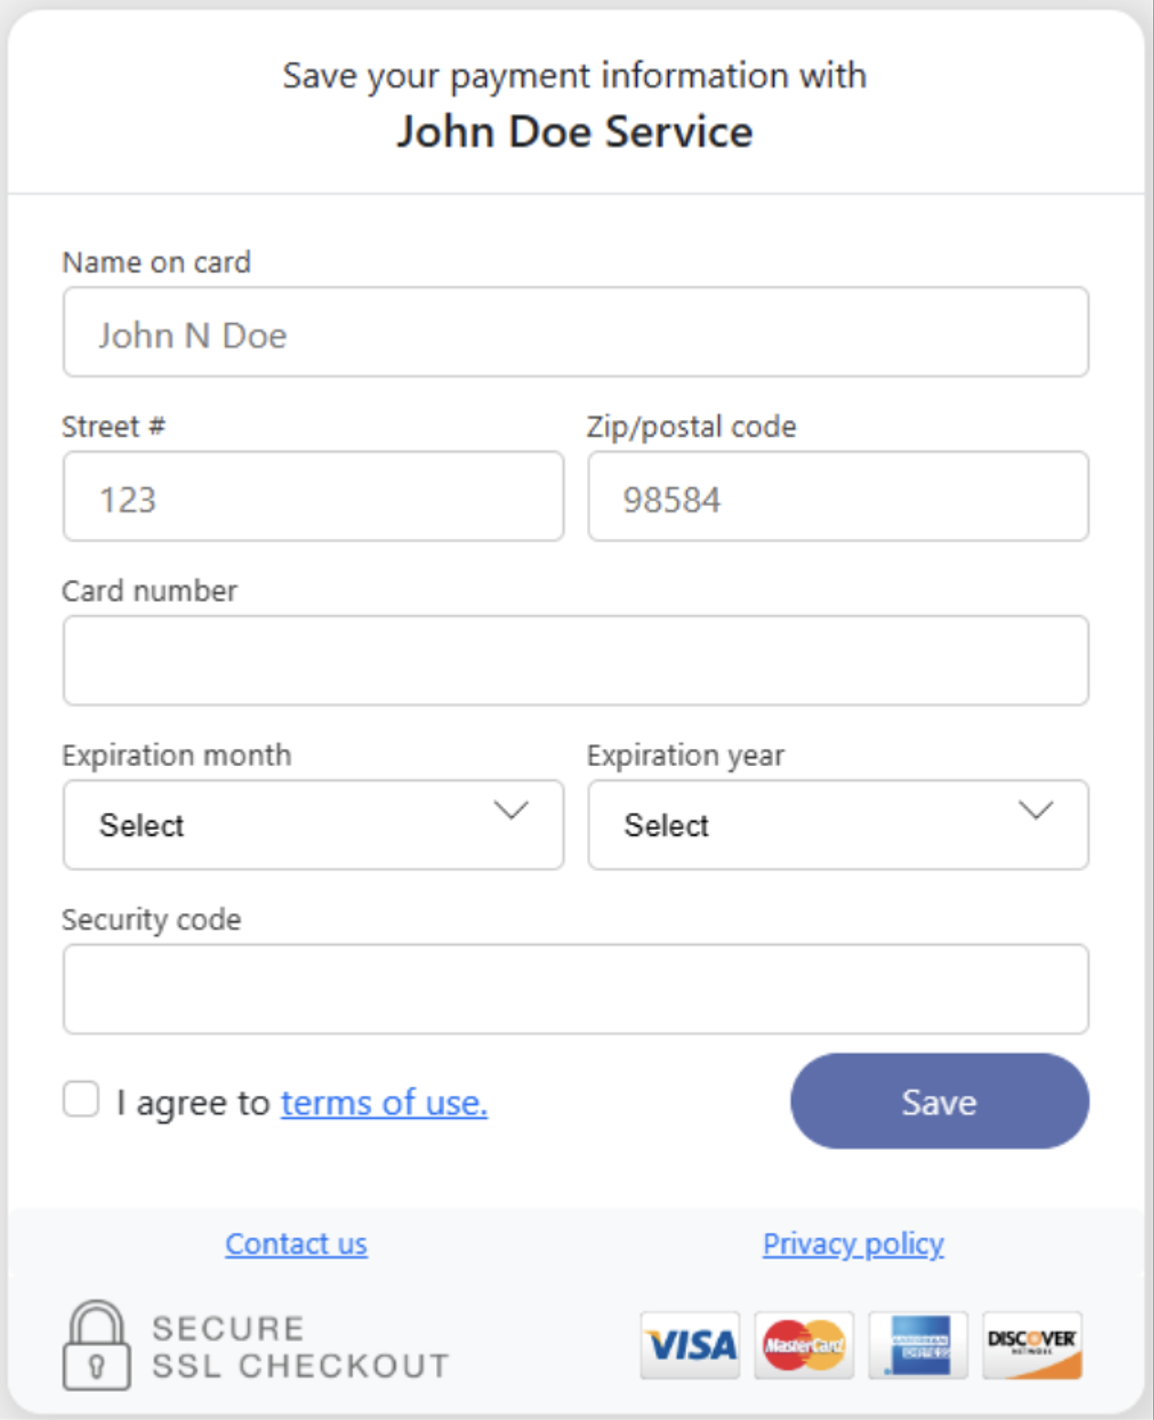
If the link is clicked on, the recipient will see a web interface similar to this:
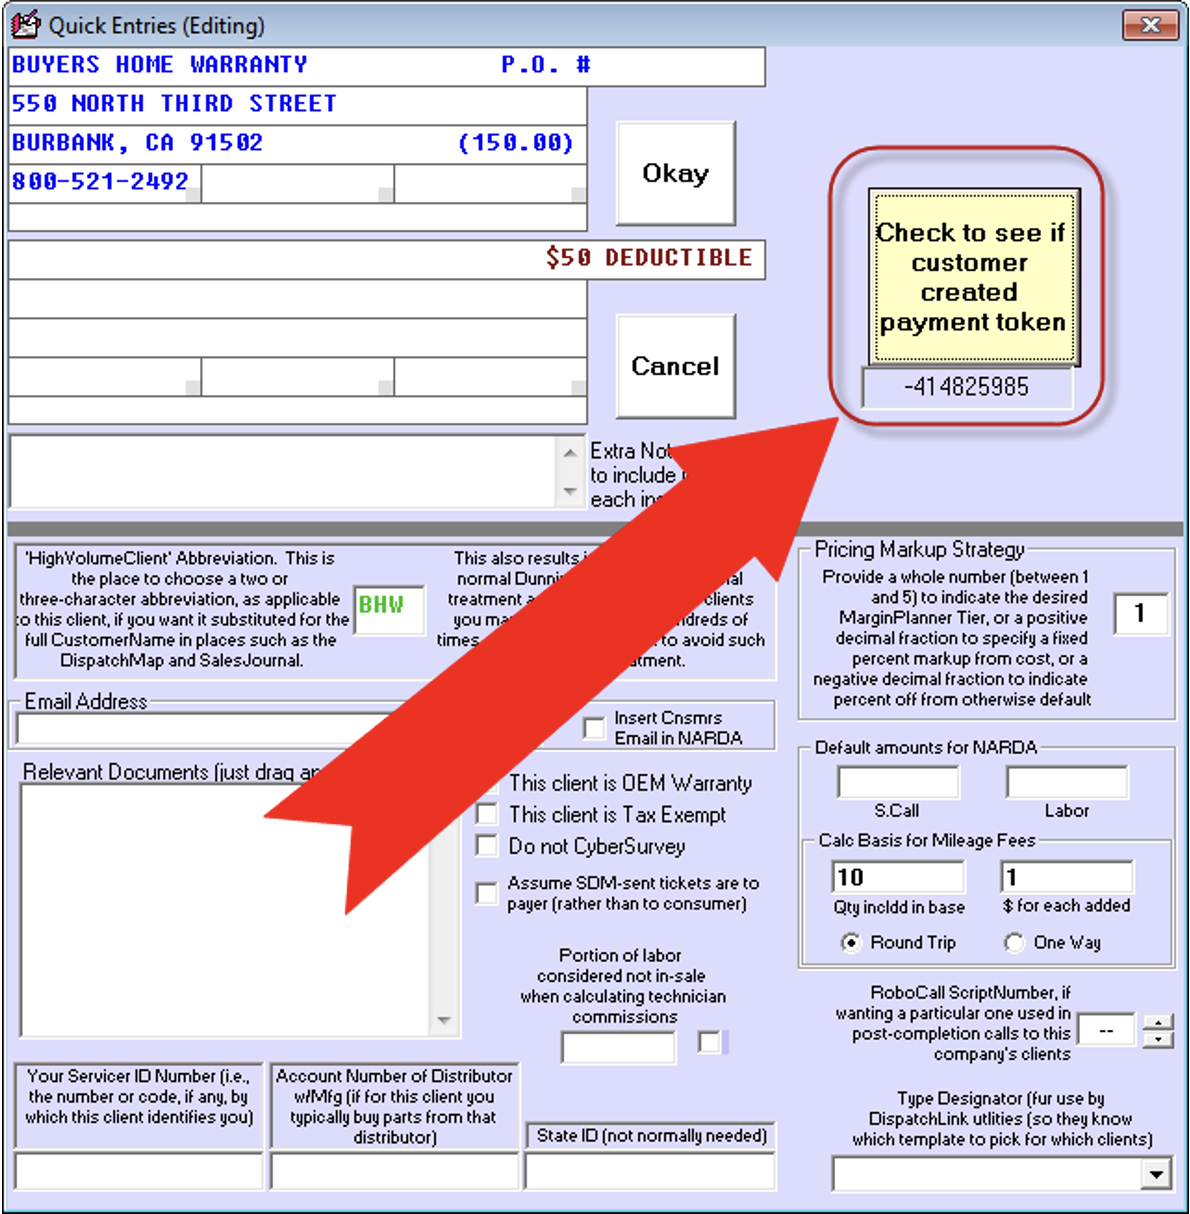
In the meantime, that button in the QET edit interface will have changed to look similar to this:
The button changes color and lets you check if your customer has created their token. If they haven't, a pop-up will let you know. If they have, a happy message will pop up, and the interface will look like this:
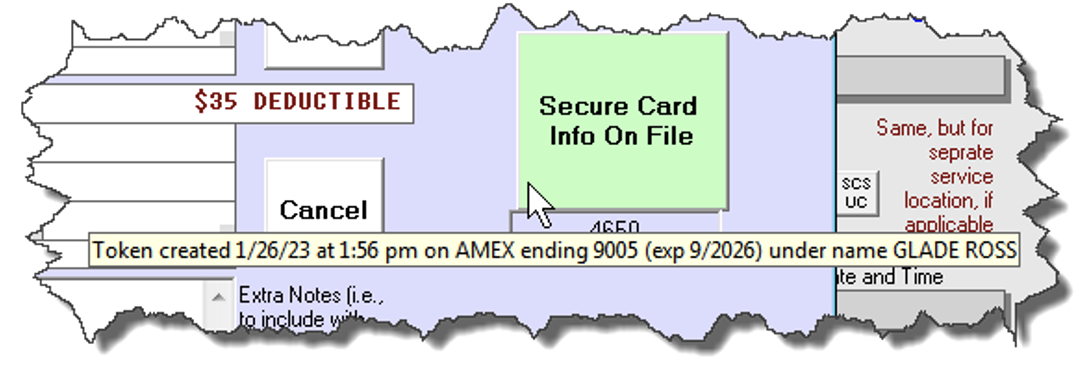
And, if you float your mouse pointer over the button, you'll see non-sensitive info regarding the stored card:
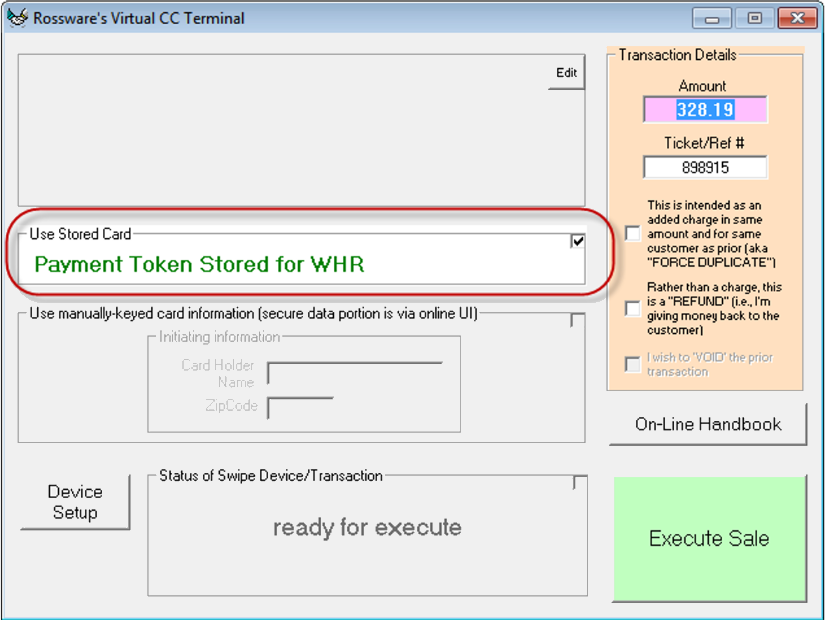
Most importantly, when you go to run a bankcard transaction connected with a JobRecord that has this QET client setup as the paying party, your Virtual Terminal is going to fill in like this:
You can safely make a payment using the stored information without revealing any sensitive details.
Also, if you hover your mouse over this area, a ToolTip will appear to show you the non-sensitive parts of the card information that are kept:
This allows you to verify, before running a transaction, that it will indeed be against the card that you expect it to be against.
For token use as connect to regular customers via a JobRecord:
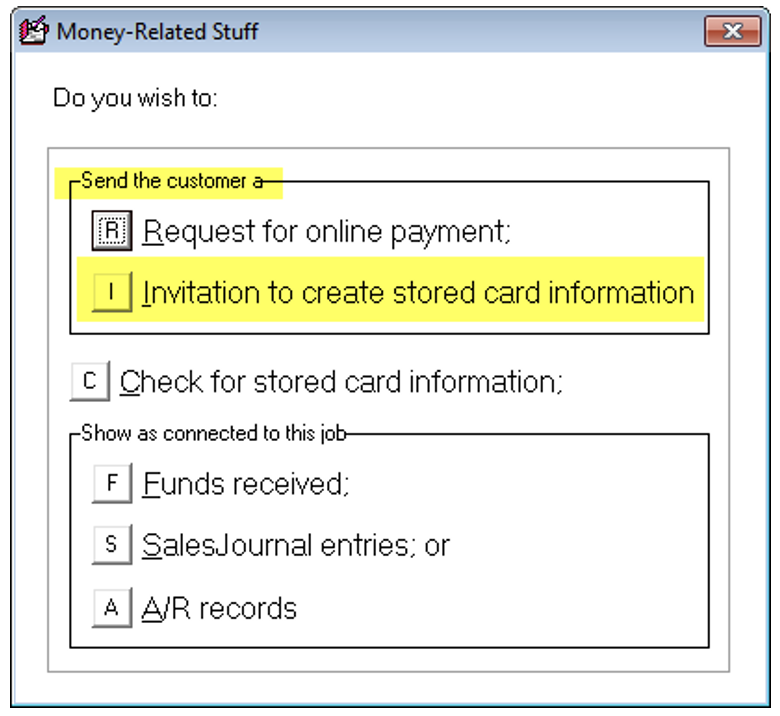
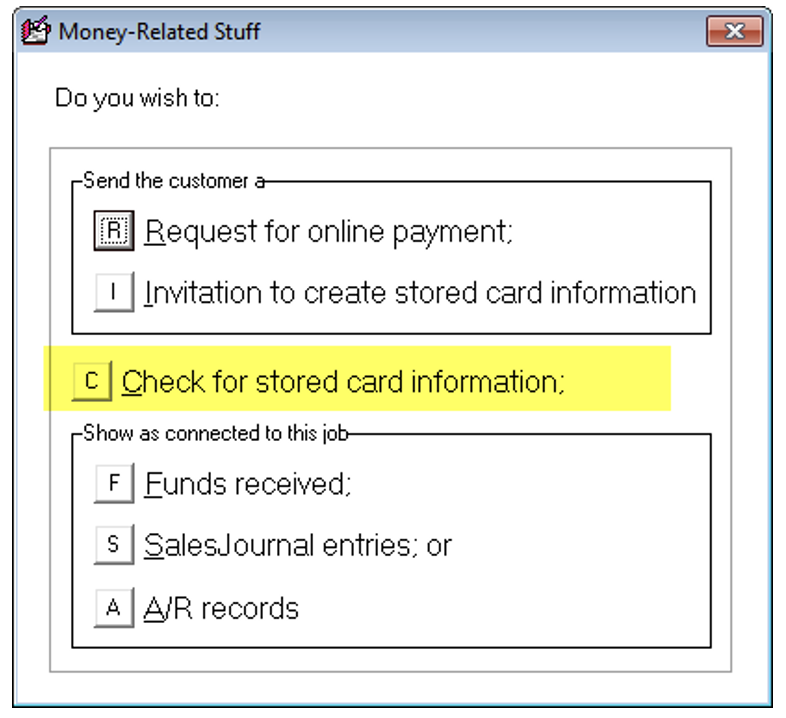
This is easy. Just right-click the "enter funds Rcvd" button in any JobRecord (F7). A dialog will pop up showing you a list of different options related to funds:
The highlighted option above lets you create an invitation. It's similar to the QET situation, but the system checks the JobRecord for email or text message recipients and can insert them automatically.
You can click on the highlighted option below in this or any other JobRecord linked to the same customer. This allows you to check if the customer has created a token whenever you want to.
Clicking will open a window that tells you if a customer already has a token.
If a token exists, it'll be available in the Virtual Terminal when you charge any job where the same person is the payer, just like in the QET scenario. Basically, the system finds the token and proposes it in the Virtual terminal for a charge.
Knowing how the system links other JobRecords for the same customer with the JobRecord that sent an invite and made a token is crucial. When searching for a relevant token from any JobRecord, ServiceDesk checks your entire database for all JobRecords with at least two matching details in the name, address, phone number, or email fields. It then searches for a token related to any of those JobRecords. If a token is found, it suggests using it for the current JobRecord. This way, you can collect a token once on a specific JobRecord and use it for all future jobs for that customer, with their permission.
In the future, we plan to offer token creation in other contexts, but this is the present structure as of early February 2023
Virtual Terminal in SD-Mobile
Even though the Android and iOS versions are slightly different from the Windows version (which shares the same Virtual Terminal as ServiceDesk), all versions of SD-Mobile have a user-friendly Virtual Terminal. It's pretty straightforward to use.
The Virtual Terminals in SD-Mobile can enter card info manually or use a variety of card readers. All transaction data is automatically and accurately sent back to ServiceDesk.
Virtual Terminal in SD-RevenueBuilder
Click here to read the SD-RevenueBuilder guide
Manually keying data
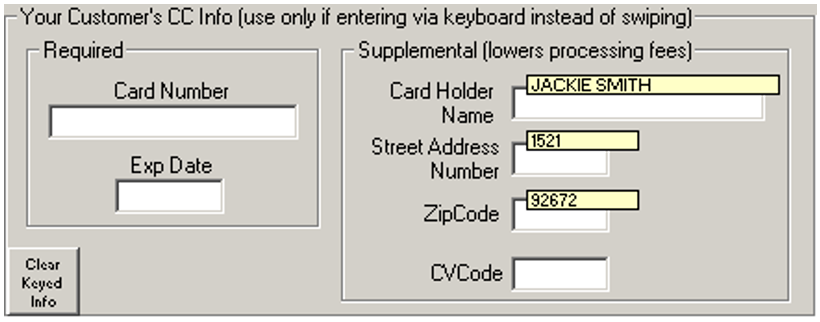
From the details given, our VT lets you use saved card details (tokens), input data yourself, or use card readers. If you're keying in card details, there's a helpful feature to note.
Usually, when you open the key-entry window, you'll see three small yellow boxes appear (or fewer, if on RosswarePay):
The yellow boxes show the customer's name, street number, and zip code from the JobRecord. The system doesn't automatically put this text in the boxes because the card details might differ. So, these boxes remind your operator to confirm the details with the customer. If the details are correct, the operator clicks on the box, and the system fills in the information. If not, the operator types in the correct details. The same process applies to the street number and zip code. We want to make it simple to add the information and ensure it's accurate for the specific card.
Semi-Automated reconciliation of funds
Read about RosswarePay's automated reconciliation of funds in this guide.

