Using the SD-Backup utility on a server
Using a flash (thumb) drive, or external hard drive:
Plug the flash drive or external hard drive into your computer. Next, to make it visible to the RSS server, Here's how:
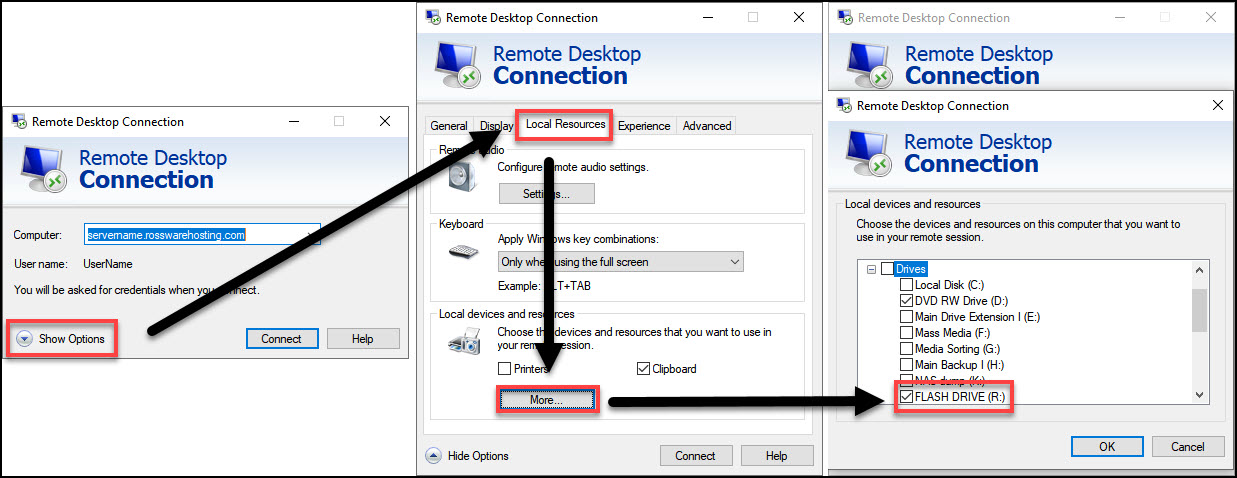
Open the Remote Desktop Connection program.
Before connecting, click 'Show Options' (at the bottom left).
Now, click on the 'Local Resources' tab, and then the 'More…' button under 'Local devices and resources'.
A window for 'Local devices and resources' will open.
Select the correct flash drive or external hard drive.
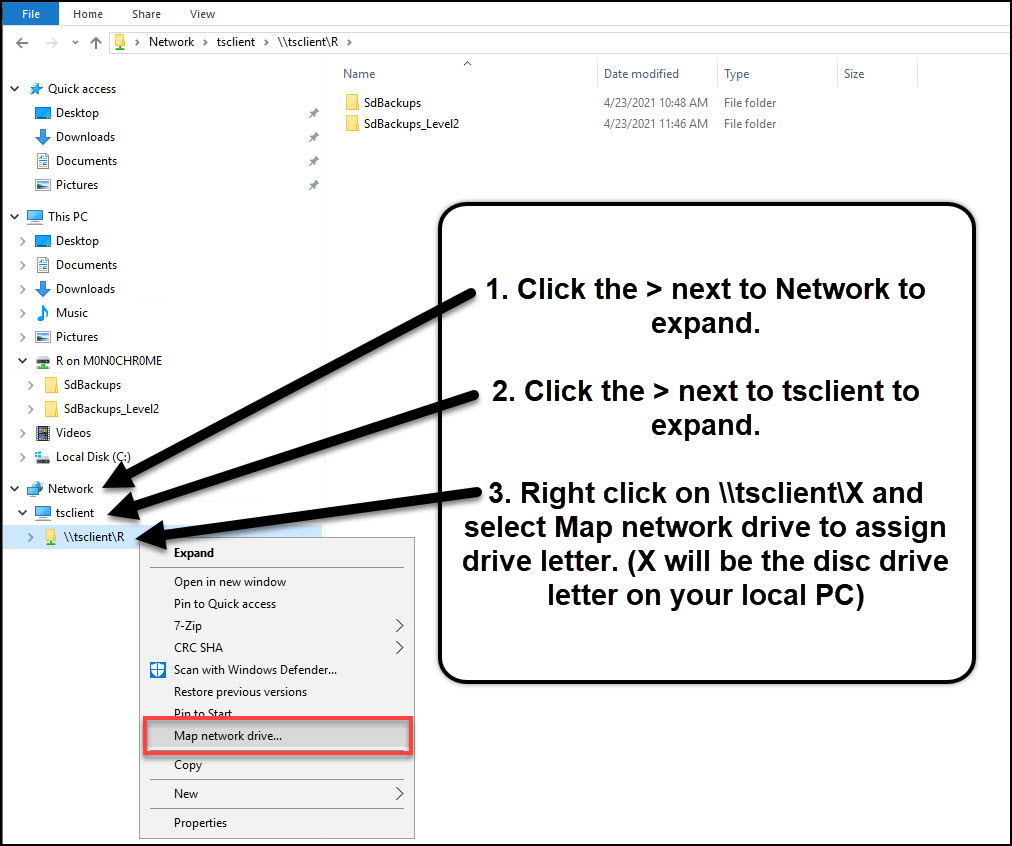
To back up from the RSS server using a flash drive or external hard drive, we first need to give it a local drive letter. Here's how:
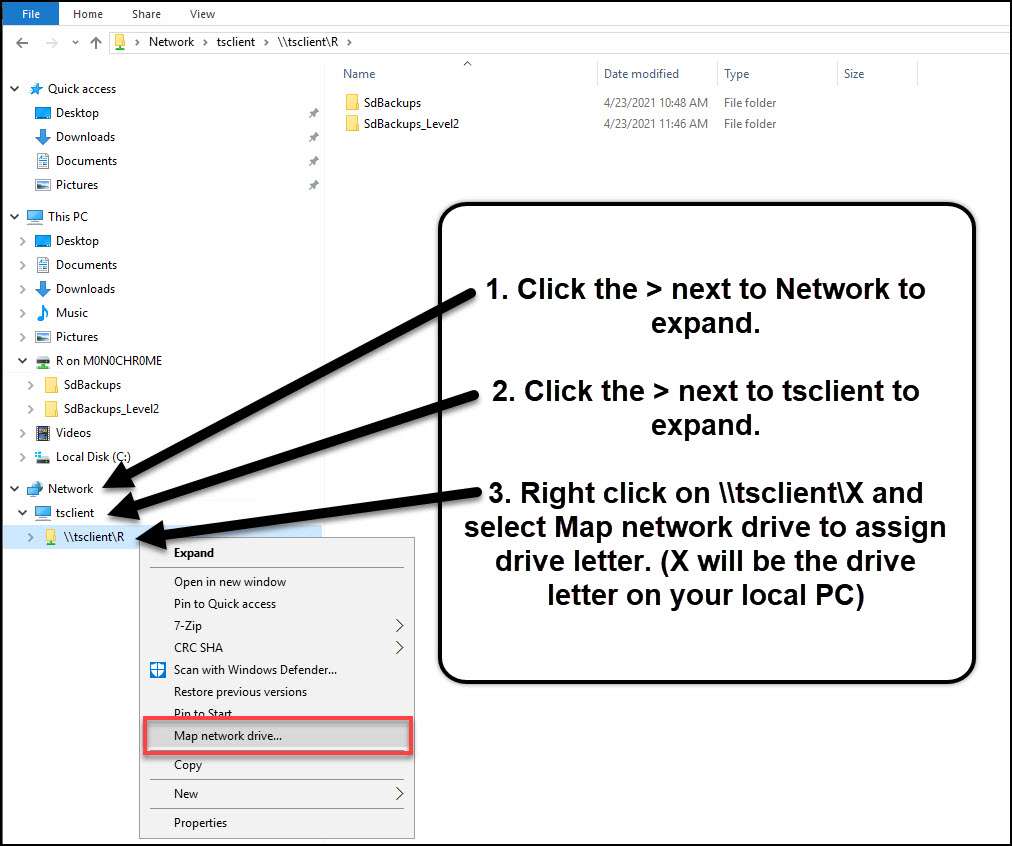
Open File Explorer.
Click on the ">" beside 'Network' to show more.
Look for 'tsclient' and click ">" next to it.
You'll see \\tsclient\\X (X is your local drive letter, not the RSS one).
Right-click on the folder and choose to map a network drive.
Using a CD or DVD:
You can't burn to a CD or DVD directly from the RSS environment because of certain security settings on your computer. But you can still save backup data to a CD or DVD. Here's how:
Insert the disc into your disc drive.
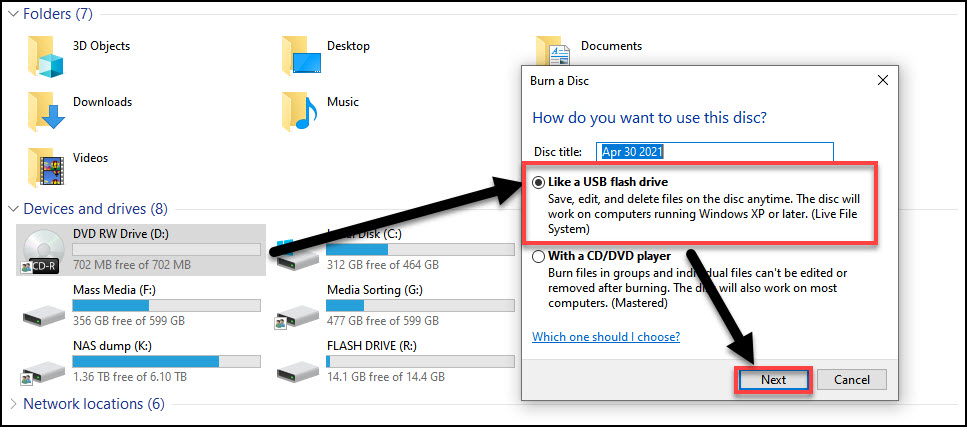
Format the CD or DVD as a flash drive, not a standard writable disc.
Open File Explorer.
Double-click on the disc drive (under Devices and drives).
Make sure "Like a USB flash drive" is selected.
Click Next. The disc drive will format the CD or DVD for you.
After formatting the CD or DVD drive to work like a flash drive, we must make it accessible to the RSS server. Here's how:
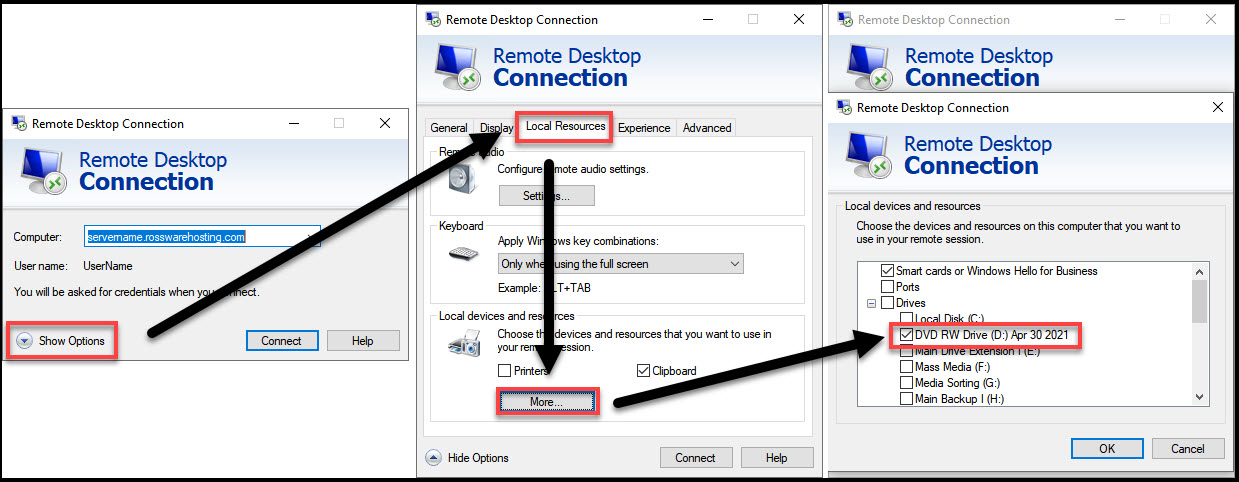
Open the Remote Desktop Connection program, but before connecting, click 'Show Options' (bottom left).
Then click the 'Local Resources' tab and the 'More…' button under 'Local devices and resources'.
In the window that opens, choose the correct disc drive. Usually, this is drive D:).
To back up your data using the Rossware utility, you need to assign a local drive letter to your CD or DVD. Here's how:
Open File Explorer.
Expand the 'Network' section by clicking on the ">" next to it.
Look for 'tsclient' and expand it in the same way.
You will see a folder icon labeled '\tsclient\X'. 'X' is the drive letter your computer assigned to the drive, not the RSS environment.
Right-click on the folder and choose 'Map it as a network drive'.
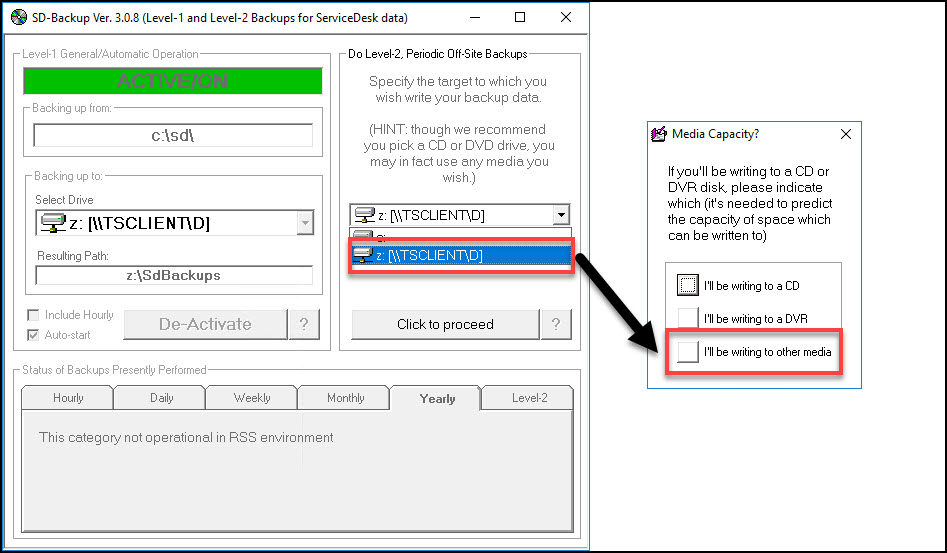
When using the SD backup utility to manually invoke a Level-2 backup, select the proper drive (letter). Once you Click to proceed, select 'I’ll be writing to other media'.
New functionality in SD Backup Ver. 3.0.9
The new SD Backup utility version has new features. It can now do hourly backups in the RSS environment, force Level 1 backups, and exclude specific subfolders to speed up Level 2 backups.
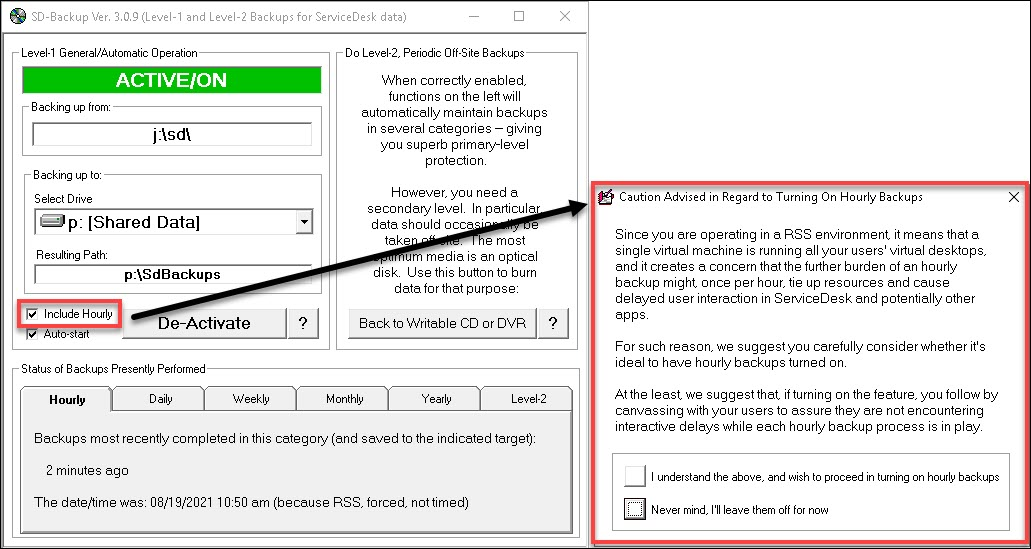
Hourly Backups Within the RSS Environment
Previously, hourly backups for RSS clients were unavailable because we thought it might slow down the server. If you choose this new feature, remember that your server might respond more slowly during the backup.
Forcing Level 1 Backups
You can immediately make Level 1 backups (Hourly, Daily, Weekly, Monthly, and Yearly) happen by right-clicking on the desired tab. This lets you do a weekly backup before its usual time.
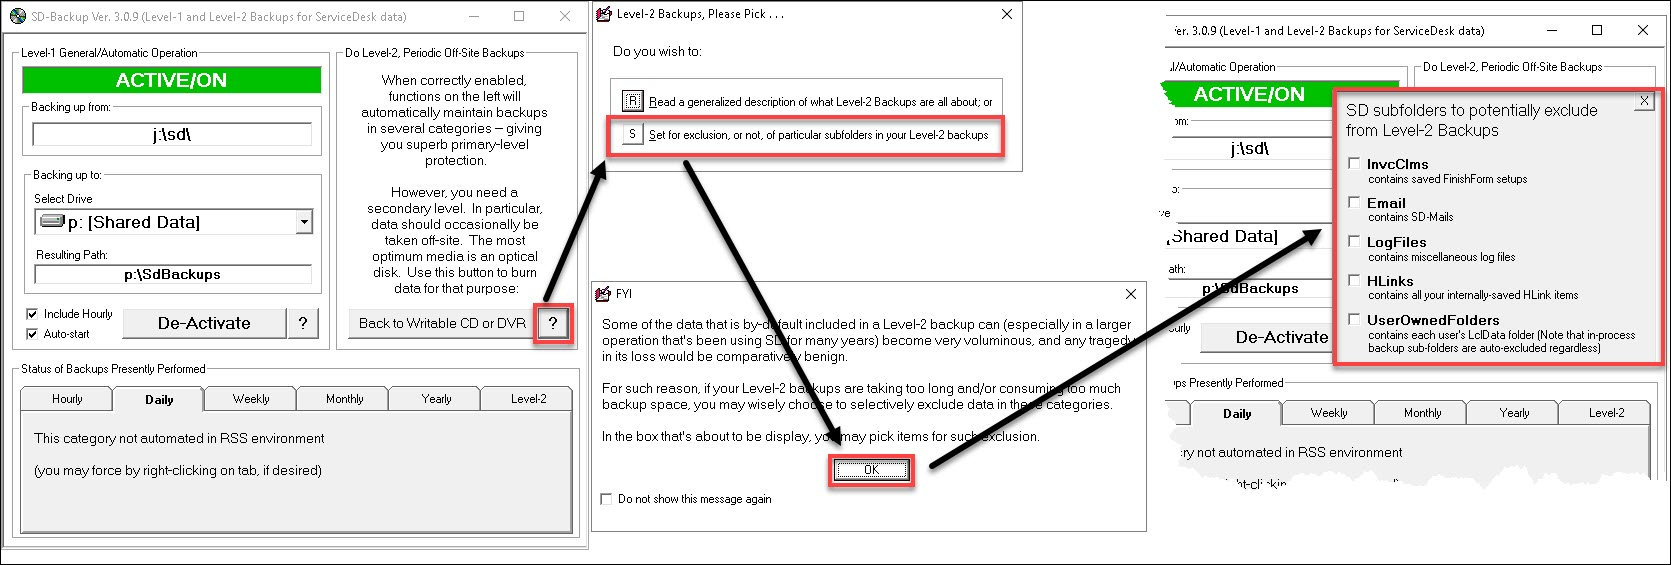
Exclusion of Subfolders During Level 2 Backups
Level 2 backups can be slow, especially with old storage devices. Sometimes, a large backup might even fail. From version 3.0.9, SD Backup lets you exclude certain subfolders, speeding up the process. To do this:
Click on the [?] next to 'Back to Writable CD or DVR'
Select option [S]
Click [OK].
Then, you can choose to exclude the subfolders.
For more information on the SD-Backup utility, please see Work Diary 4-8-215

