
ServiceDesk 4.8.177 Update 08/19/20
Handholding Guidance in Whole-Roster Optimization: New Visibility to Help You Understand Which Specific Faults in Setup Produced Unexpectedly Poor Results
We've had a bunch of users trying the new, Whole-Roster Optimization, and some have seen results that don't look near as optimum as expected.
In several instances, we've spent considerable time with clients, examining particular results. Time and again, we've found that in each instance where a result seemed un-optimum there was an explanation. Perhaps an appointment was "Definite"-assigned to a tech who was not set as qualified to work in the applicable zone, for example. Perhaps one or more jobs were not even submitted for optimization, because they lacked geocoding. The potential reasons are numerous, and have not on-their-face been obvious absent considerable investigation.
Regardless, those explanations were often not easy to find, even for us, much less the client. For such reason, we realized that a major overhaul was needed, in such communication as is available to you, as the user, after an optimization event completes (available to us too, when we're called upon to assist).
That overhaul is in this release.
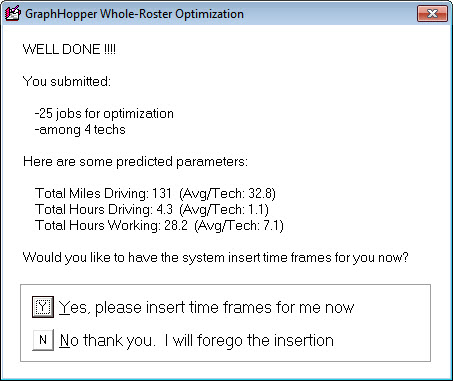
Now, when an optimization request completes, you'll not get the same message regardless of circumstance. Rather, if you were setup in such manner that your entire roster could be properly optimized (and therefore you should positively expect a very pleasing result), the dialog will look something like this:
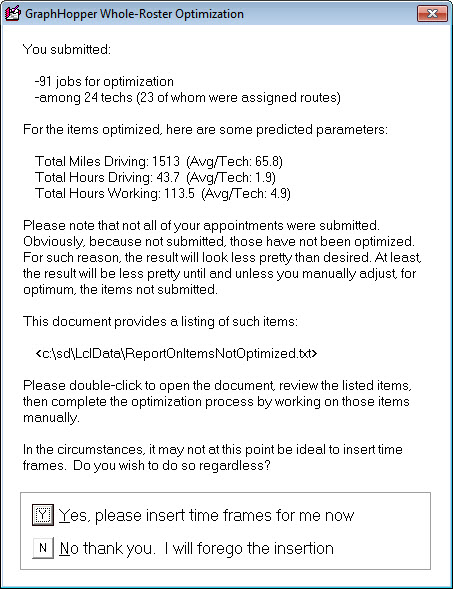
But in contrast to the past, where there's reason to expect less than optimum results, the dialog will much better put you on alert to that fact. Escalating from where problem-reasons are relatively moderate (specifically, if allowing at least 98 percent of the jobs in your roster to be optimized), you'll see something like this:
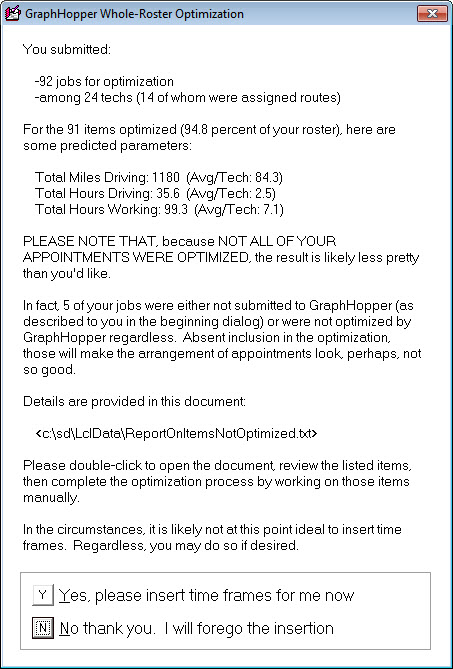
Reaching further, if your setup falls short of 98 percent but still allows at least 94 percent of the jobs in your roster to be optimized, your dialog will look similar to this:
Continuing downward, if your setup proves to be even poorer than the above, but still allows at least 86 percent of jobs in your roster to be optimized, you'll see something like this:
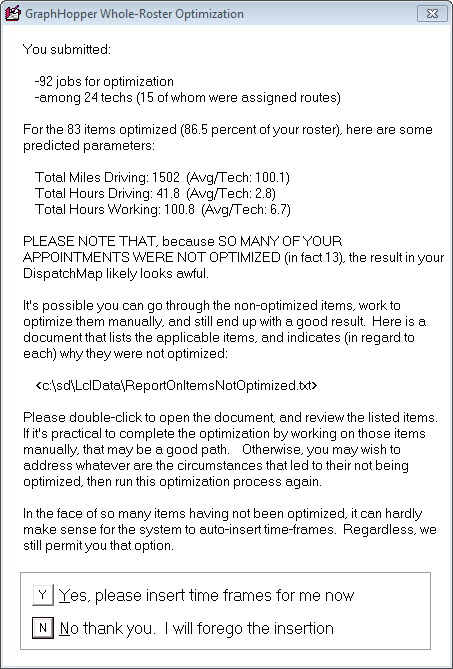
Finally, if your setup does not even allow 86 percent of the jobs in your roster to be optimized, you'll seem something like this:
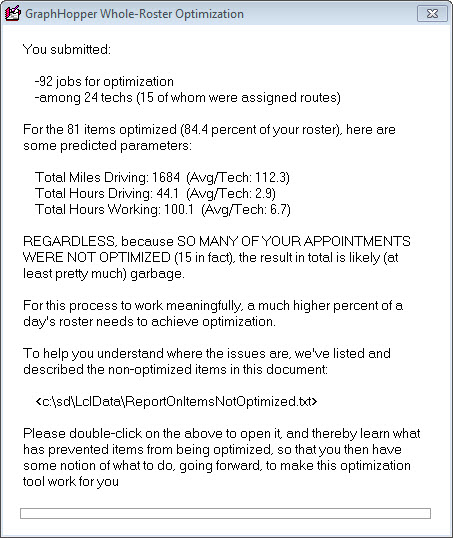
Please notice that in all instances other than perfection, the dialog invites you to double-click so as to open a document that will precisely explain the relevant details. We've worked hard to make this document provide optimum understanding while using minimum effort. It will look different in each instance depending on the underlying facts, but, in general, this is the basic design of it:
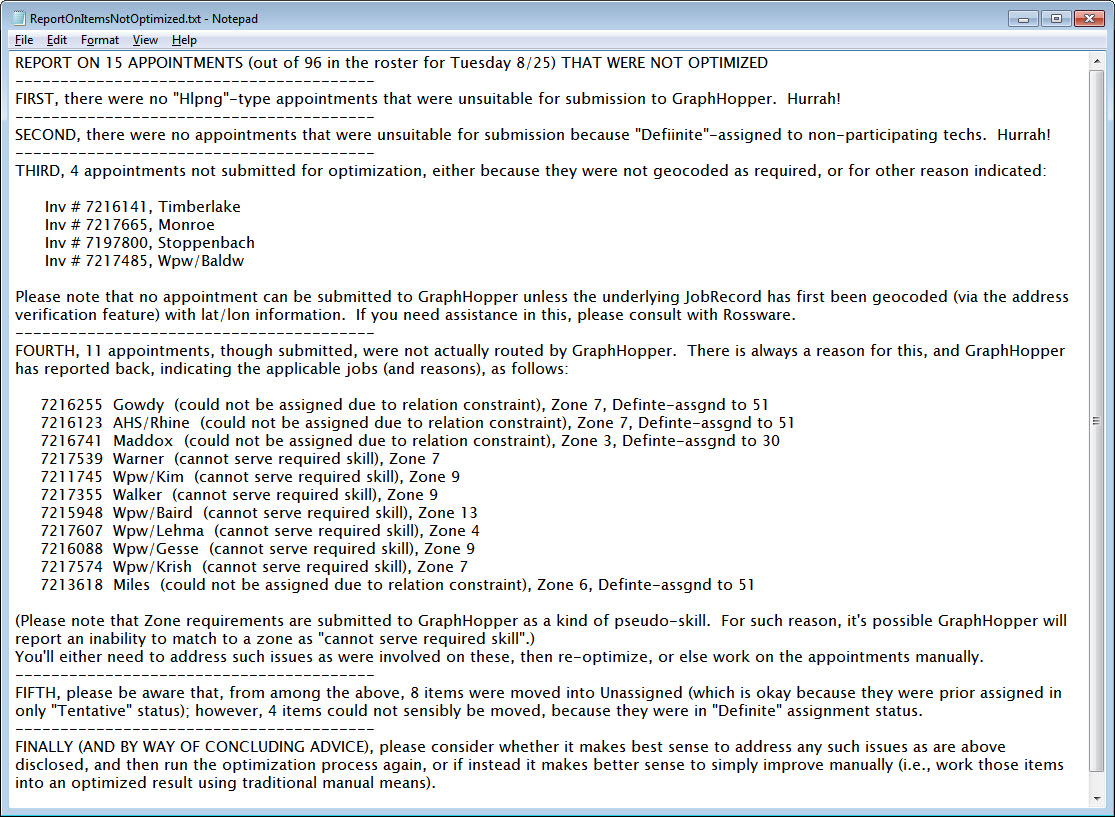
As you are working through items as disclosed on this sheet, please remember you can use that feature just recently introduced (see here) to quickly and easily see what properties are assigned to a tech. Looking at the first item in the "FOURTH" category listed above, for example, you can see that on the Gowdy job GraphHopper could not assign the job to any route, "due to a relation constraint." You can further see that job is in Zone 7, and is Definite-assigned to Tech 51. If you then do that quick property check on Tech 51, you'll discover he is not setup as valid for working in Zone 7. Accordingly, GraphHopper was in a quandary on that job. It knew Tech 51 had to be assigned the job, while simultaneously knowing he could not do it because it's in a Zone he's not permitted in. Once you realize this kind of thing, you may then take steps to address.