Thin Client setup
Many businesses install ServiceDesk on one machine but run it from multiple other machines utilizing a network drive. We call this the "Thin Client setup". This document will guide you through the processing of setting up one machine to be a Thin Client.
Run the SD Component Installer.
Because ServiceDesk will not be installed on the Thin Client, you will need to install some ServiceDesk components on the Thin Client machine. This will allow the Thin Client to run ServiceDesk.
Visit this link.
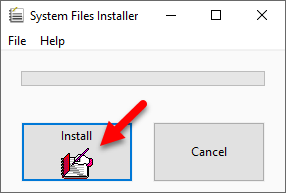
Run the downloaded program (you may be able to use Ctrl + J to open your download list).
Click Install.
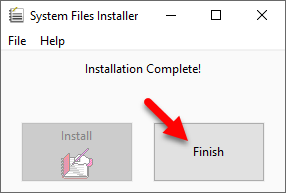
Click Finish.
Map the network drive
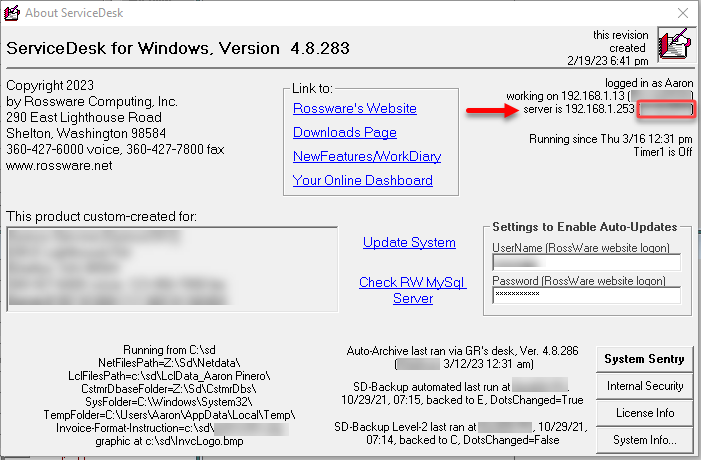
You can identify the name of your server by clicking on File Functions > About ServiceDesk on a station that already has ServiceDesk set up. Locate the field labeled "server is:“ The name server name follows within the parenthesis.
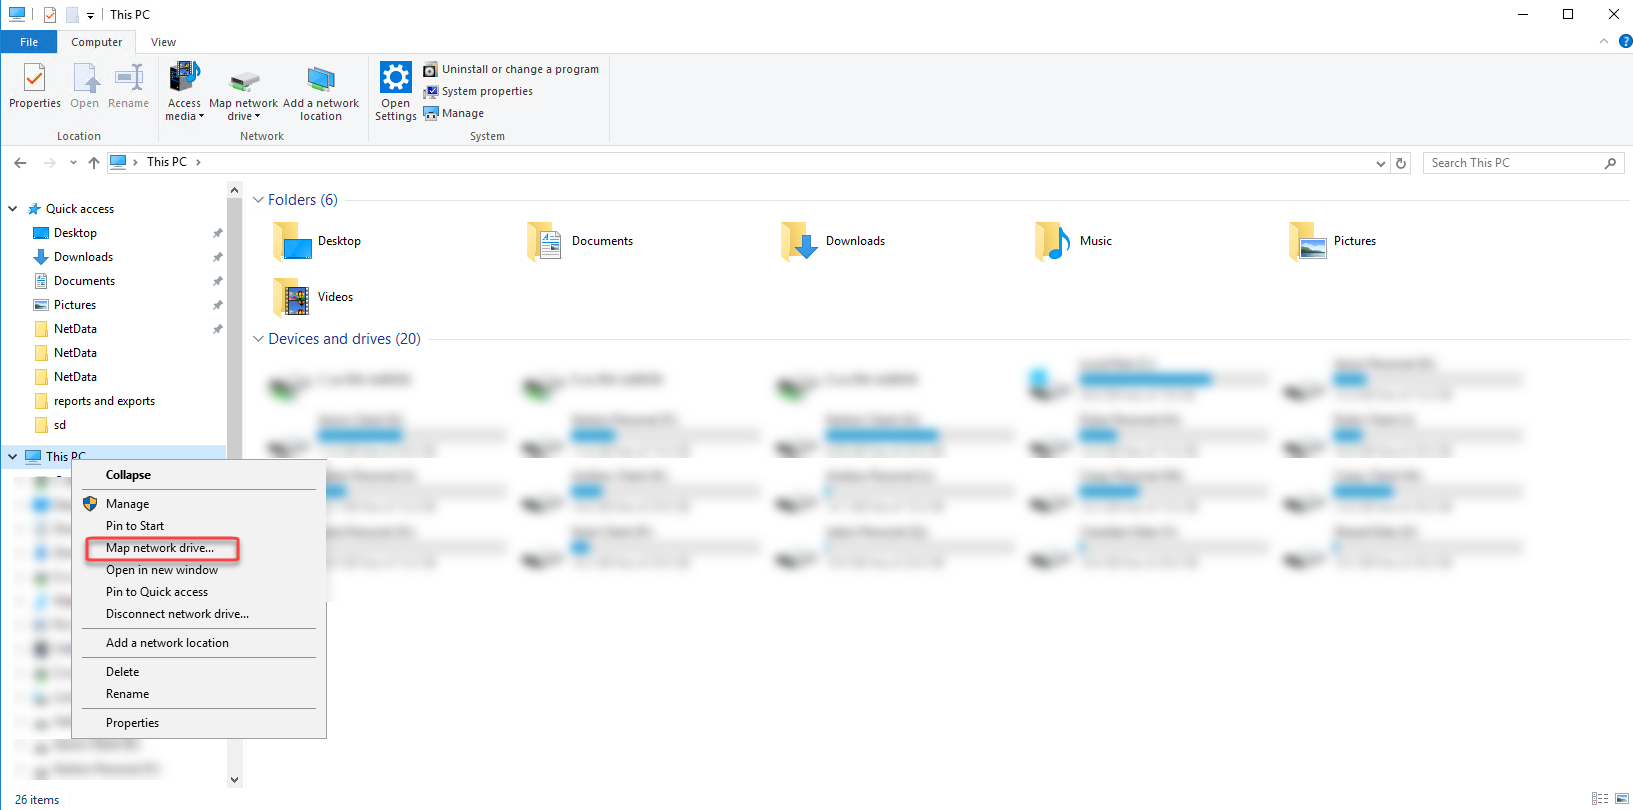
To map a network drive, press Windows + E on your keyboard to open a File Explorer window.
Right-click on "My computer,” "Computer,” or "This PC." It will bring up a context menu.
Click "Map network drive."
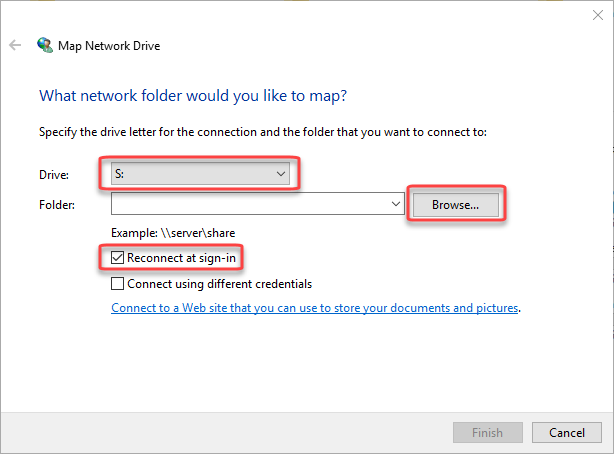
Enter a drive letter consistent with other workstations. If you have chosen "S:" in the past, do so again. If you usually pick "Z:" select that. If you aren't sure, "S:" is a safe bet.
Click Browse. Navigate to the location of your /sd folder. (refer to the tip above if you don't know your server name)
If your server isn't on this list, close the browser window, and in the "folder" field, type
\\YOURSERVERNAME\sd(replace YOURSERVERNAME with your actual server name, found using the tip above)Ensure the box labeled “Reconnect at login” is checked.
Click finish. It may ask for a username and password. This is the Windows username and password to log in to the Windows profile on the Server computer.
Create a desktop shortcut
When the drive is mapped, open it up (you can press Windows + E on your keyboard and click the mapped drive letter you created in the steps above).
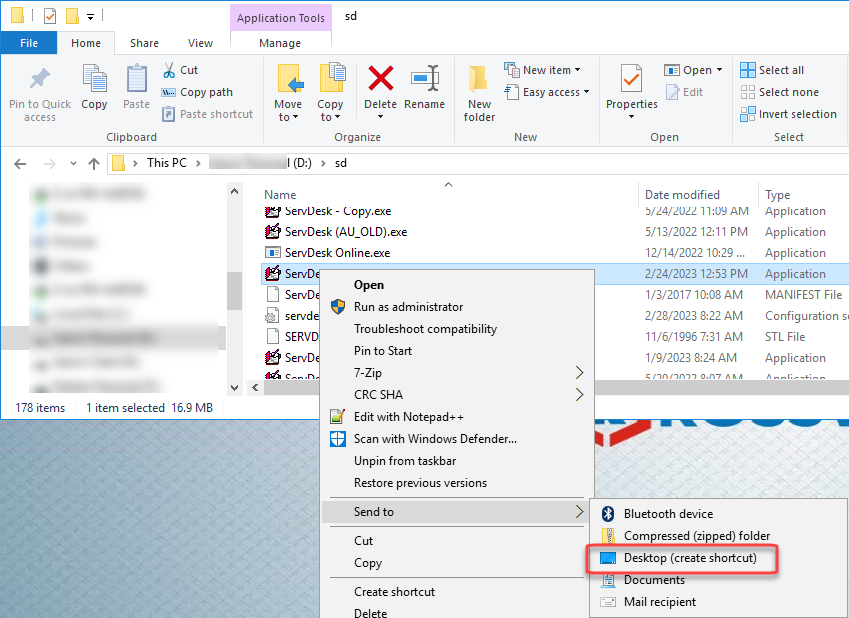
Locate the file named "ServDesk" or "ServDesk.exe." (Ensure there isn't anything after the ServDesk naming convention, being careful to avoid selecting ServDesk(AU_OLD) or similar)
Right-click on that file, hover over "send to," and choose "Desktop." This will create a shortcut on your desktop.

