Print page strategies
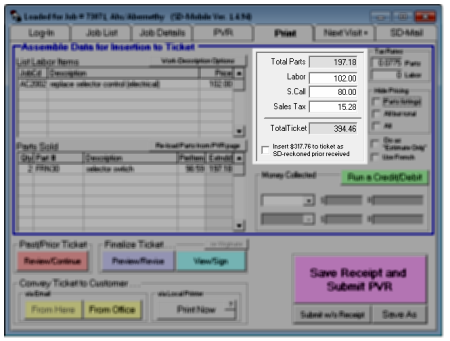
The SD-Mobile "Print" page helps you set up the ticket (also known as "invoice") for your customer. It also assists in collecting the related payments.
General concepts
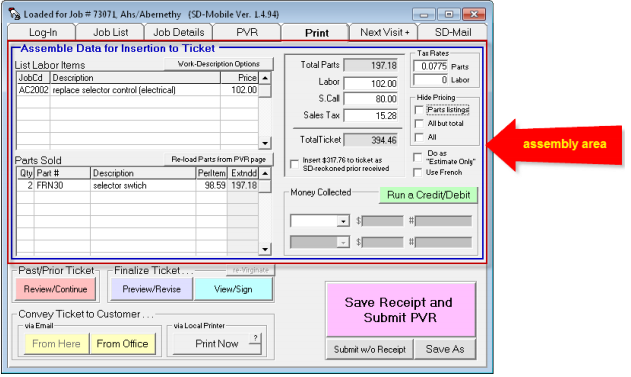
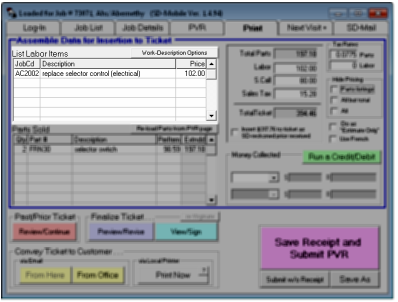
The top part of this page is a section called “Assemble Data for Insertion to Ticket.” Here, you should gather information related to your current visit. This section is not for details about work done, parts used, or anything from previous visits. It's just for information about your current visit.
With such data first assembled here, it can then be used for:
Direct creation of a ticket.
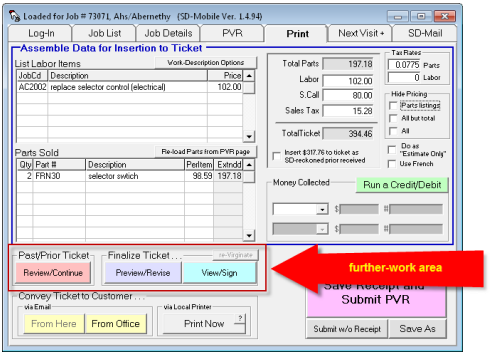
Further work and revision in an actual ticket-form layout.
Insertion/addition to a prior ticket (i.e., as created on a prior visit) to produce a product that includes info from (is a composite of) a succession of visits.
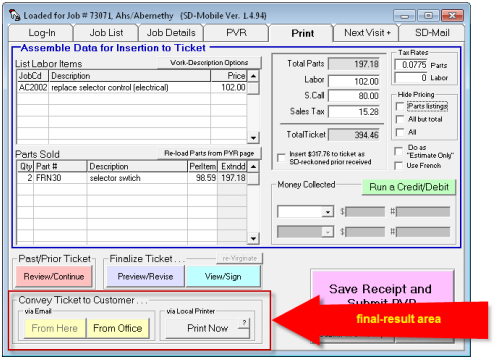
You can show the result to your customer for review and electronic signature in any situation. It can also be emailed or printed.
Think of the first section (shown above), where you gather information about your current visit. After assembling it there, you can move to the next section below to refine the final product, if appropriate.
Lastly, there are buttons you can use to send the final result to your customer:
There are many other details, but the above sketches general concepts.
A slightly closer look
This system is designed for flexibility. You can skip any step in the process, whether it's signing, printing, emailing, or even creating a ticket - it all depends on your company's policies.
Here are a few things to keep in mind:
If you bypass the 'further-work' step and go straight to printing or emailing, your ticket will be created using the information in the 'Assemble' area.
However, if you make changes in the 'further-work' step (modifying the ticket layout), the final product will be based on these changes. This means the 'Assemble' area becomes irrelevant.
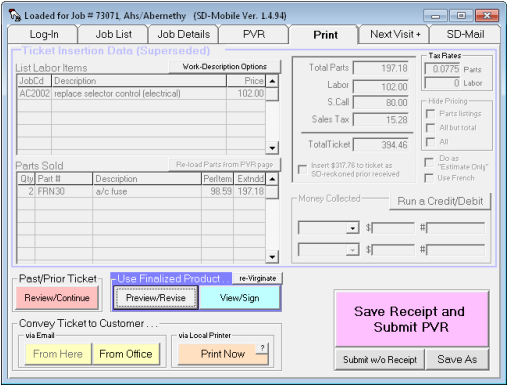
In other words, there's a shift from using data directly from the 'Assemble' area to using the changes made in the 'Further-Work' area. The system will clearly indicate when this transition has taken place.
This transformed state appears when you refine the work in the Assemble area. The Assemble area turns grey to show that you've moved to the next stage.
The View/Sign function is important in this process. Like the email and print functions, it can come from the Assemble or Further-Work areas. If you're still working in the Assembly area, the View/Sign image will show what's in this area. But if you've moved on (for example, because of extra work on a previous ticket or changes in Preview/Revise), the image will show the updated work, just like the Email and Print functions.
Emphasis on three points
Please be certain to absorb the following:
Aside from the task of entering monies received, SD-Mobile’s Print page is almost solely about preparing a document for presentation to your customer;
Text in its Assemble area is for information about the present visit only, and
Work here is one-way only; changes made in the Further-Work area will not affect (upstream) text in the Assemble area (text moves from Assemble-to-Further, not vice versa).
We highlight the above points to avoid any potential frustration.
Moving on to details after discussing the general strategy, we will now focus on the specific elements.
The List Labor Items section
If you flat-rate your labor, the concept is to list individual labor items here:
Although you can add items manually here, creating a FlatRates file is recommended (see FlatRate setup). This file allows you to select each item from a dropdown menu. Most people won't use this section unless they first prepared a file like this.
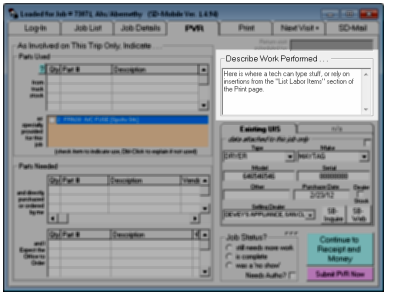
We've mentioned that the text in the Assemble area is mainly for adding to a ticket and showing to the customer. However, this section is an exception to that rule. One of its uses is to describe the work performed, which you'll find in a box labeled "Describe Work Performed" on the PVR page.
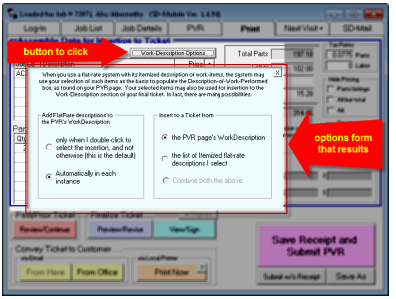
This is one of the few areas where you might need to do a lot of typing. But there's a more straightforward way of using a feature on the Print page. Specifically, you can add text from the List Labor Items section to this PVR page box. Here's how to do it: Click on the "Work-Description Options" button (which is located at the top-right of the List Labor Items section). You'll then see this:
On the left side, you can set the rules for adding the flat-rate description to the Work-Description box on your PVR page.
On the right side, you can choose between two descriptions to be added to your ticket's “Work Description” section or a combination of both. This is because the Work-Description section on your PVR page and the total of flat-rate descriptions (on the Print page) could potentially be added to the final ticket. You can choose which one is added using the options on the right side of the setup sheet.
The Parts Sold section
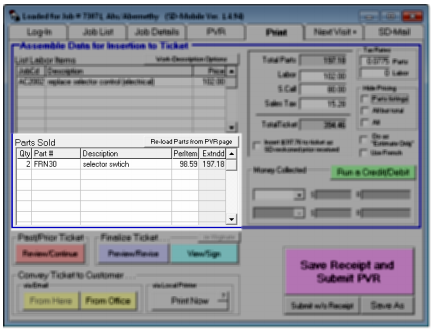
This section automatically fills based on the parts you've used or ordered from the PVR page. Here, you can edit for ticket usage and pricing. Simply put, you can remove items from the ticket by right-clicking to delete them. You can type them in here if you want to include items that didn't auto-insert.* Also, you can change the pricing manually if you want.
TIP
This is just to show the customer! Manually typed items here won't be removed from your ServiceDesk inventory. To maintain inventory control, add the item on the PVR page.
There is a button at the top-right corner of the section called "Re-load Parts from PVR Page." Here's what it does. When you first visit the Print page for a job, the system pulls part items from the PVR page. But, if you go back to the PVR page (maybe to add a part you missed) and return to the Print page, the system doesn't automatically update. That's when you need to use the "Re-load Parts from PVR Page" button.
The totals section
This is where amounts are added up. The "Total Parts" and "Total-Ticket" sections are greyed out because they calculate automatically based on the "PartsSold" section. The "Labor" box also calculates automatically based on the "List-of-Labor-Items" box, or you can enter an amount. The "S.Call" box is only for manual input. The "Sales-Tax" box calculates automatically based on taxable amounts and tax rates relevant to the job.
At the bottom of this section, there's a checkbox for adding amounts collected on the job outside of a previous Mobile ticket (like if the office collected money over the phone). Check this box to add credit to your ticket. If collections were part of a previous Mobile ticket, use that ticket to add credit.
The “Finesse Output” section
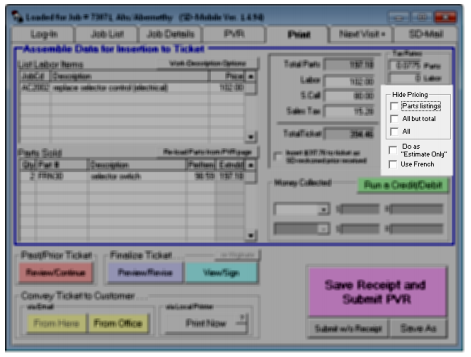
This section has checkboxes that change the ticket's final setup. The first three checkboxes are grouped together. Each one removes some ticket details. The first removes individual parts pricing. The second removes all prices except the total (previously called "Hide Constituent Amounts"). The third removes the total, too (previously named "Work-Completion Document").
After these, there is a checkbox named "Estimate Only." A large "Estimate Only" watermark will show on the ticket if you check this. The last checkbox lets you use a different language (French if you're using English or vice versa).
These "Finesse Output" checkboxes are in the Assemble area. They'll look inactive (or greyed out) when you do a Further-Work action past the Assemble stage. Even if they look inactive, they'll keep working. This might seem confusing, but the interface has to meet different needs. It needs to show you when you're in the "Further-Work" stage by greying out the Assemble area but still lets you use the Finesse features if needed.
The “Money Collected” section
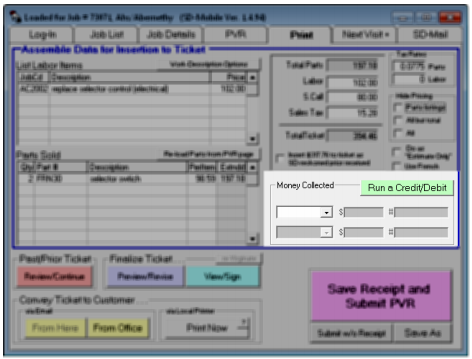
This section is easy to use. However, unlike other parts of the Print page, it's not just for showing information to your customer. This 'Money-Collected' part also feeds into ServiceDesk’s Funds-Control system. So, when you log money as received here, it updates the entire system. It's not just about showing information to the customer; it does that, too.
If you're in the U.S., we suggest setting up a merchant account with RosswarePay. Use the direct/integrated Virtual Terminal (available when you click the “Run a Credit/Debit button”). It saves time, effort, and money. It also increases accuracy and impresses customers.
We've now covered five major sections in the “Assemble” area of the Print page. Next, we'll talk about the “Further-Work” area.
The “Massage Result Further” area
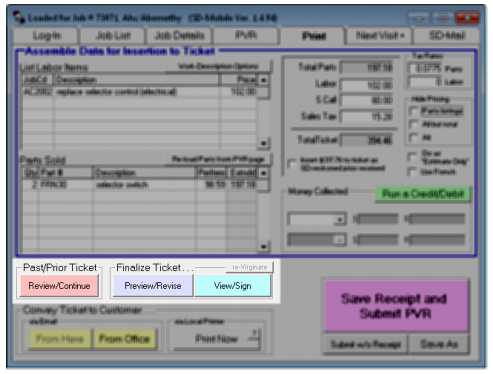
If this is the first visit on the job and there's no pre-made ticket, ignore the left-most button above. It's not usable and doesn't matter to us. So, let's talk about the middle button.
This "Preview/Revise" button lets you view and edit the ticket. Try it out, and then click the button next to it called "View/Sign." You'll see they both display the same ticket details differently.
"Preview/Revise" shows an editable version of the ticket. You can change any part of it. This is useful when you need to add something to the final ticket that you couldn't add in the Assemble area.
On the other hand, "View/Sign" shows the ticket as a picture. Your customer can see it and sign it electronically.
So, if the ticket from the Assemble area doesn't need any changes before the customer signs it, you don't need to use "Preview/Revise." Go directly to "View/Sign."
Now, let's talk about the left-most button. It's inside a frame labeled "Past/Prior Ticket," and it's labeled "Review/Continue."
What's its purpose?
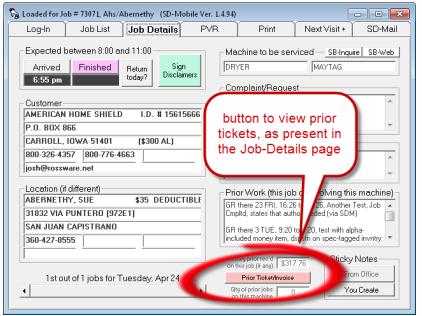
You might think this button lets you view previous tickets related to the job. That's true, but there's a better way. The Job Details page in SD-Mobile has a button that lets you view old tickets.
The button on the other page is useful for viewing purposes. It's handy when starting or planning a visit rather than after finishing it.
Now, let's focus on the button on the Print page. To understand its purpose, think of an old-school paper ticket system. The technician fills in details about the visit on a multi-part form and gives the customer a copy. On follow-up visits, they add more information to the remaining part of the form. They give the customer a copy each time, usually after getting a signature.
Our Print page's Past/Prior-Ticket, Review/Continue button serves a similar function. If a technician has visited before and saved a ticket, they can pull up that ticket and add information about the current visit. This way, the ticket includes details from all visits.
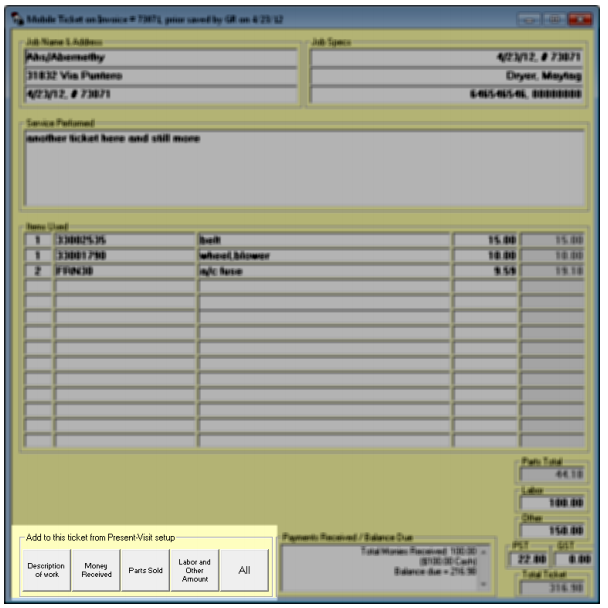
Try opening a Print page linked to an appointment with one or more saved tickets. When you select a past ticket, it appears in the same Preview/Revise form as the Preview/Revise button. But it initially has a yellow background to show it's a past ticket. There are also buttons on the bottom-left to add data about the current visit to this past ticket.
The buttons work as their labels indicate. You can choose what to add from your current Assemble area or click the "All" button to add everything.
Why might you want to select less than "All?"
Let's say on your first visit, you listed all the parts expected to be used. Some of these parts were ordered, and the current visit involves delivering and installing these parts. Usually, your Assemble area is ready to list the parts used in the current visit, even if they were already listed on the previous ticket. You can choose to add the current "Description of Work" and "Money Received" (if you received more money on this visit), but avoid adding parts sold.
What if, on this visit, you used a part that was not previously expected and, therefore, not listed on the previous ticket? You can add the PartsSold, then delete any parts that appear twice because they were listed initially and added again.
This might seem odd, but we haven't yet found a way to remove the human element altogether.
The key idea is that these methods let you combine current work with previous work on the same job. You can then collect the customer's signature, provide the document to your customer, and so on, using standard methods.
Lastly, your office can pre-prepare a ticket for you in ServiceDesk, which you can open, use, and add here using the same past/prior ticket methods.
Managing “Balance-Due” and added collection of monies
Let's consider a situation where you've returned for a second visit, and everything goes as planned, just as outlined in the initial ticket. When you open that ticket, all the necessary line-items and fees are already listed. You might need to update the description to say the work is complete and add any collected payments.
We're assuming that during the first visit, you collected a deposit that was less than the final amount. On your second visit, you'll collect the remaining balance.
In this straightforward situation, it's simple. Open the previous ticket, see the balance due, collect that amount from your customer, and enter the payment in the "Money-Collected" section. Then, click a button to update the ticket with the collected money. The "Payments Received" section will instantly update to show the added collection and a zero balance due.
If your second visit involves additional fees for parts or labor not included in the initial ticket, it's slightly more complex but still easy. You'll need to add the items that involve these additional fees to the ticket to create a new total and balance due.
After doing this, the exact balance due will be clearly displayed in your updated ticket's "Payments Received" section. Collect the amount, enter it as usual, and don't be put off by the "Money Collected" section being greyed out on the print page. It's greyed out for consistency but still works when you need it.
After you've collected and entered the revised balance, return to the updated ticket, and click the button to insert the collected money. The "Payments Received" section will update perfectly.
Doing multiple saves
(Especially for an "Estimate-Only" ticket)
Sometimes, you may need more than one ticket for a single visit, like when you're giving a quote but the customer hasn't agreed, yet. You'll want to keep the quote details but also create a separate ticket for the work you've done so far (usually the diagnostic fee).
Here's how to do it:
Email or print the ticket with all the expected work as an "Estimate-Only" (select the option that adds this watermark).
Click the "Save-As" button on the Print page (bottom-right corner). This opens a box where you can save the ticket under a different name like "Estimate" or "Quote" (you can choose any name).
Once you've saved the separate ticket, click on the Preview/Revise button. Remove all the line items that haven't been applied to your work. Make sure everything else matches the work you're currently billing for.
Get the customer's signature, then email or print it. The system will now have both tickets (the estimate and the actual one).
What happened to the “Sign-Disclaimers” button?
In previous versions of SD-Mobile, the Sign-Disclaimers button was located on the Print page. This button is used to show special disclaimers to the customer for electronic signing. We soon understood that we need to collect these signatures before work starts, not after. So, we moved the button to the Job-Details page.

