
ServiceDesk - DispatchMap
The DispatchMap displays your service territory with an overlay of scheduled jobs and their routing.
Enabling the web-based DispatchMap
Update to ServiceDesk version 4.8.302 or newer. You may update to the new version using SD-Helper. Optionally, manually download the update here.
Open the Settings Form (CTRL+F1).
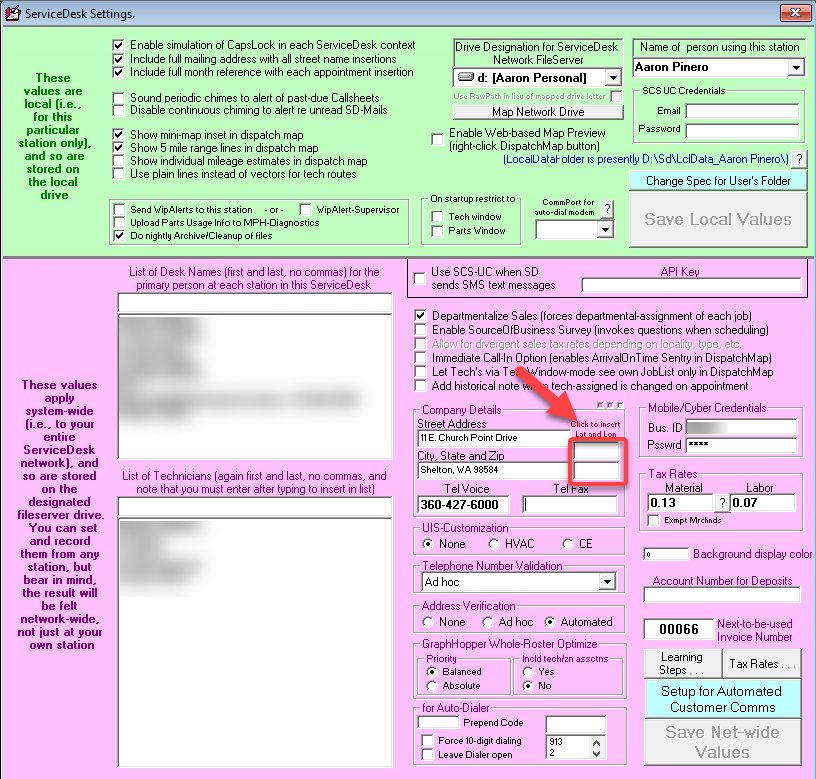
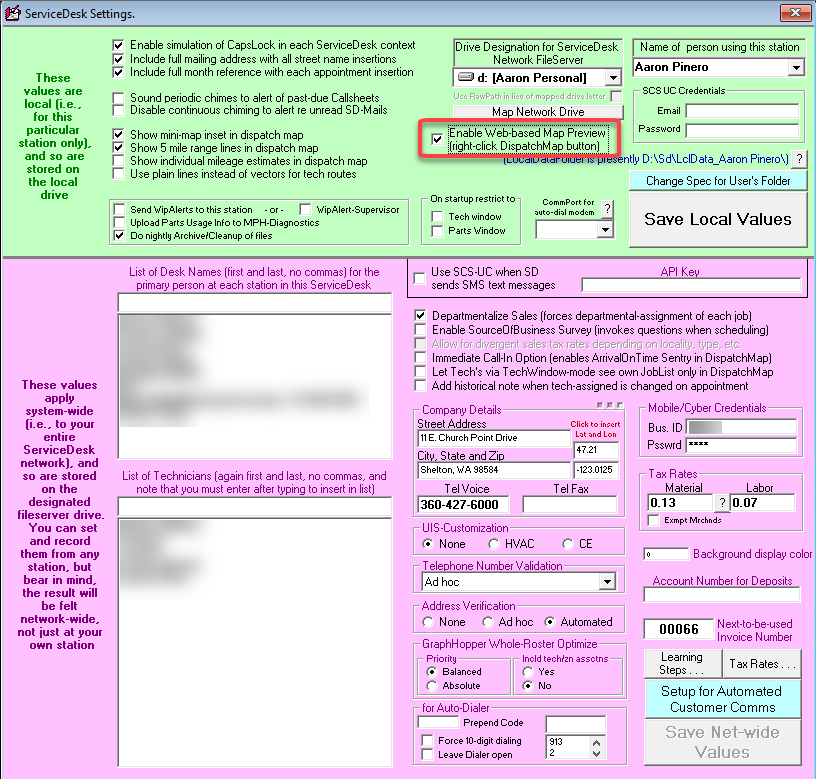
Review the Lat/Long box.
If there are values present, you don't need to do anything.
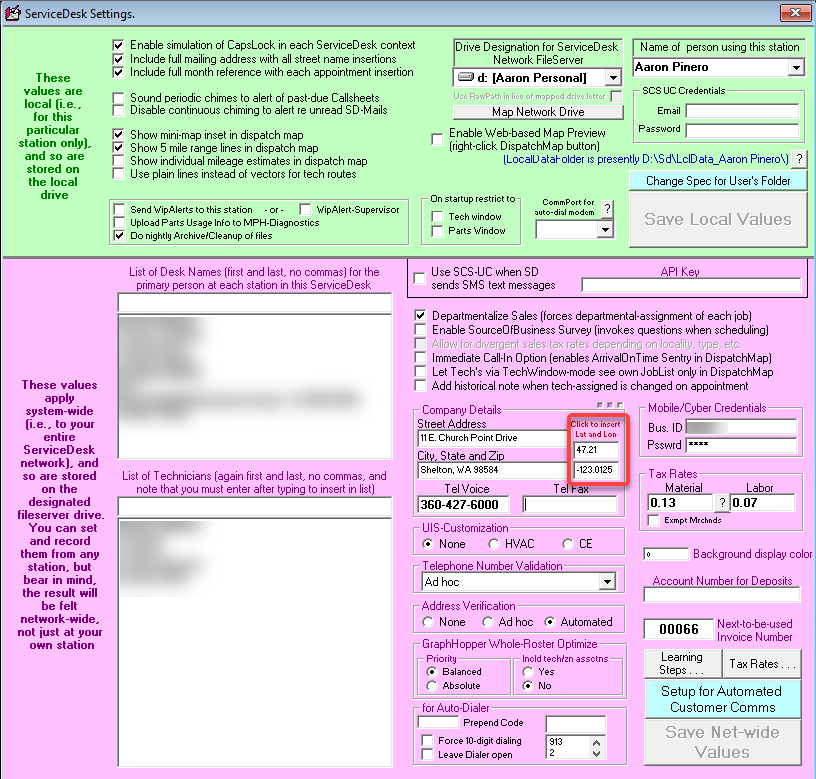
If no values are present, verify that the company address is present, then click on the red text 'Click to insert Lat and Lon' to insert those values.
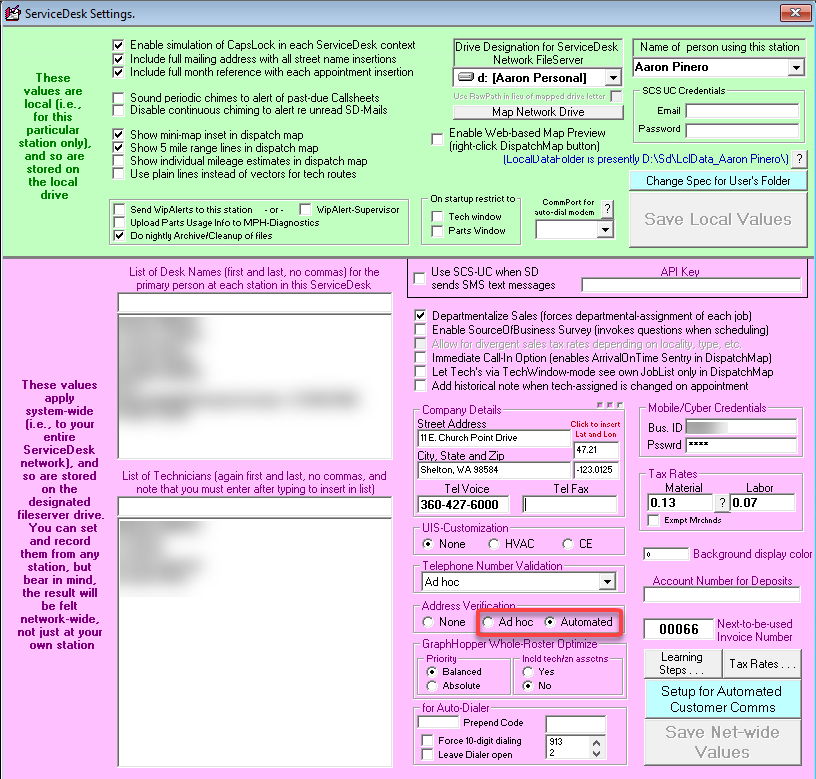
Verify Address Verification is set to either Ad Hoc or Automated.
TIP! This function must be set to Ad Hoc or Automated in order for the web-based map preview to function properly.
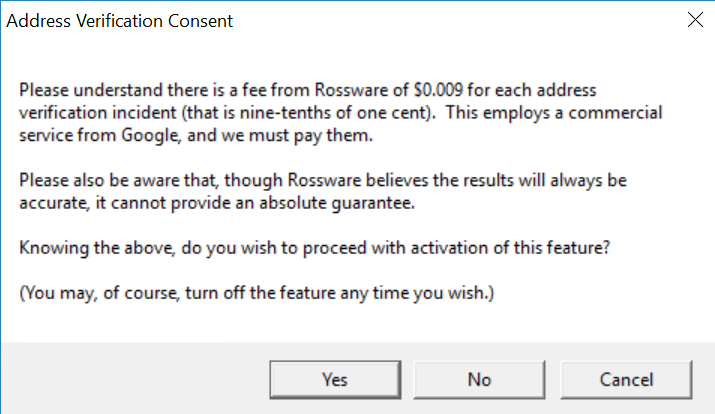
If enabling Address verification, respond to the 'Address Verification Consent' message.
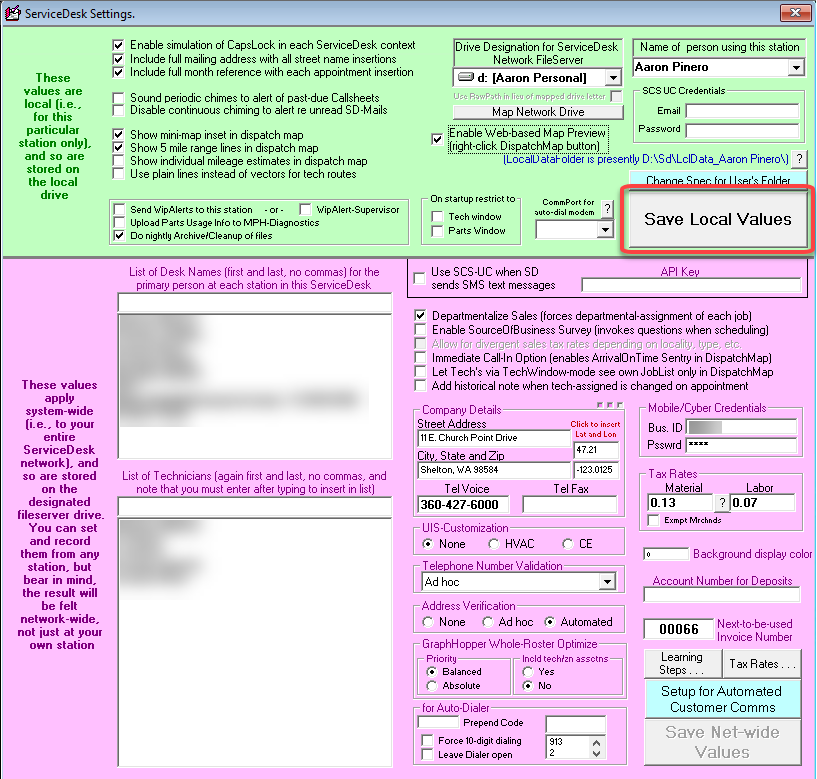
Check the box labeled, "Enable Web-based Map Preview"
Click, "Save Local Values."
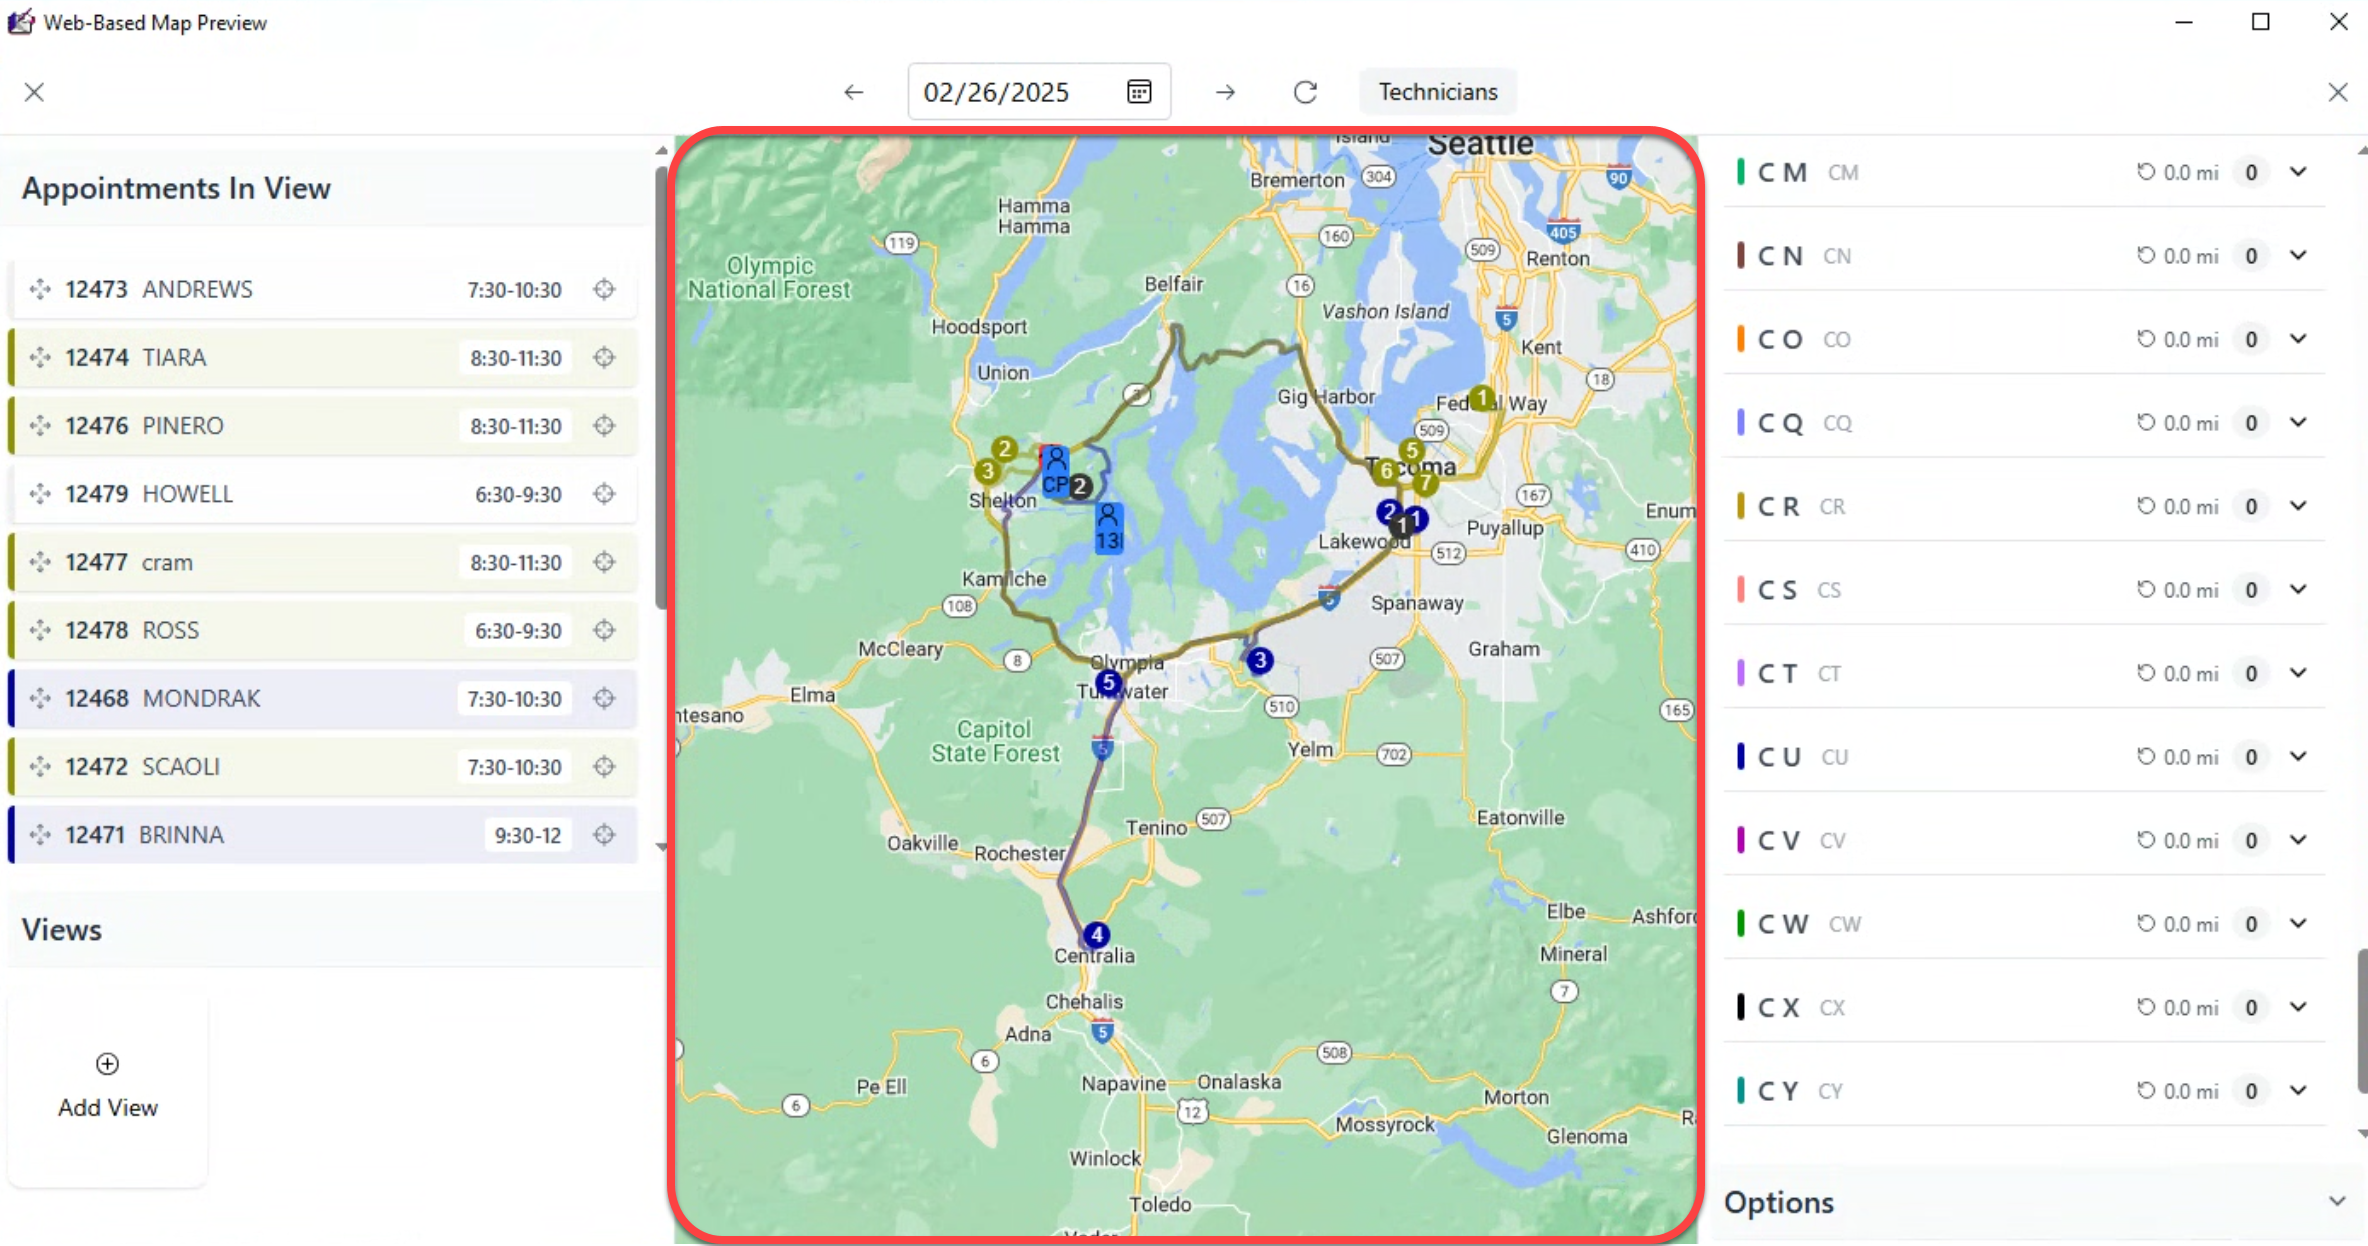
Navigating the web-based DispatchMap
Open the web-based DispatchMap by right-clicking the button labeled, "DsptchMap."
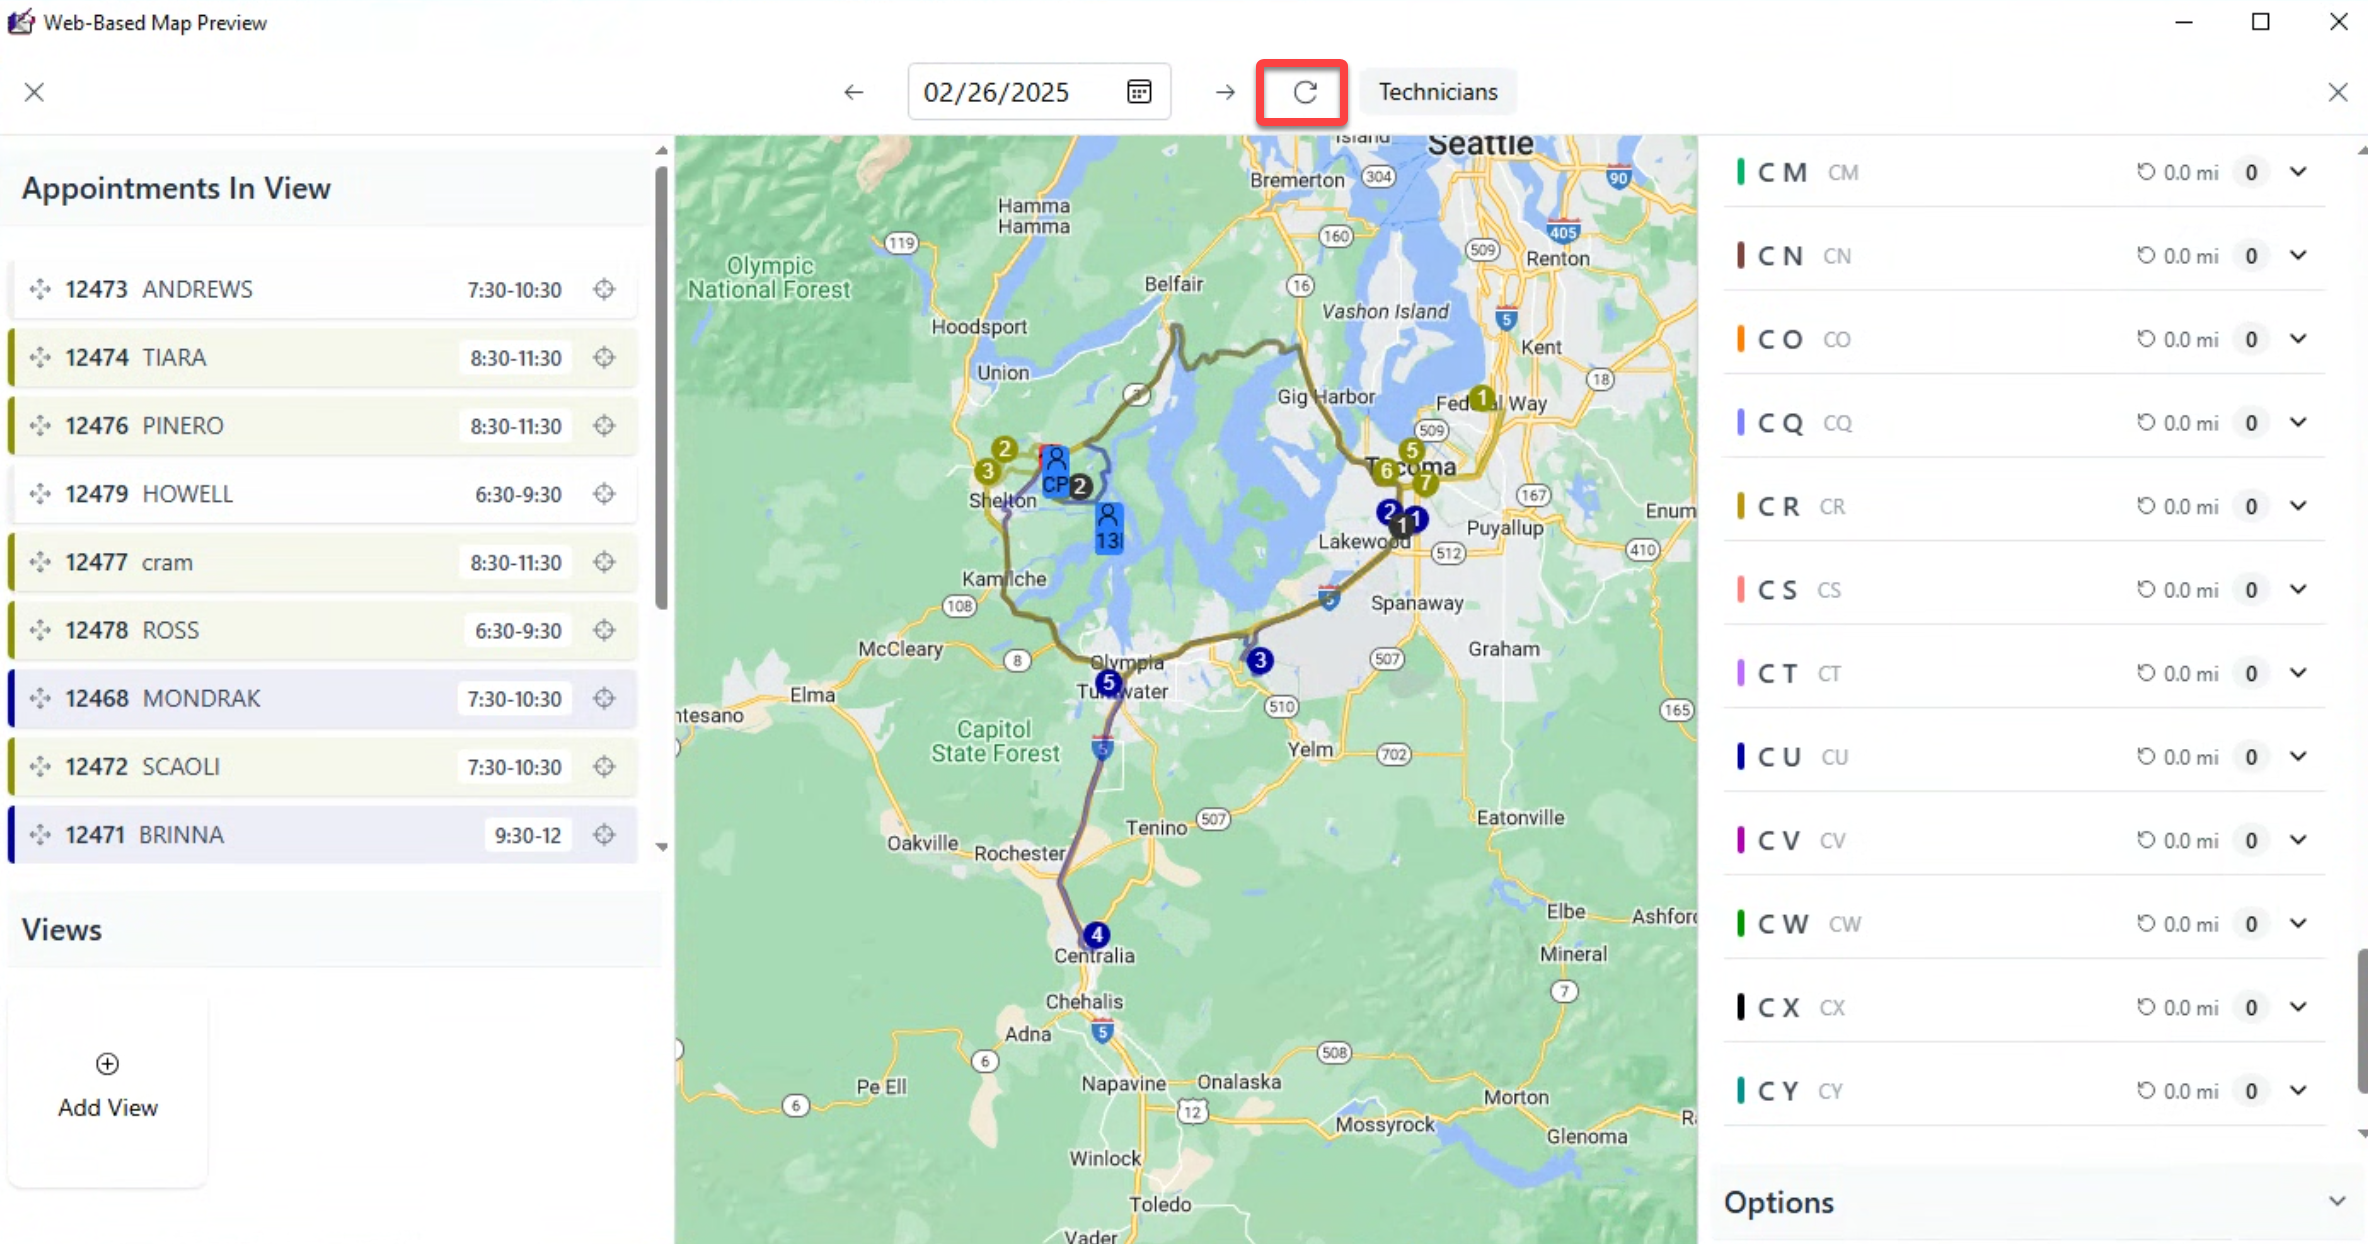
Calendar days
Clicking on the left arrow will go to a previous date.

Clicking on the right arrow will advance to a future date.
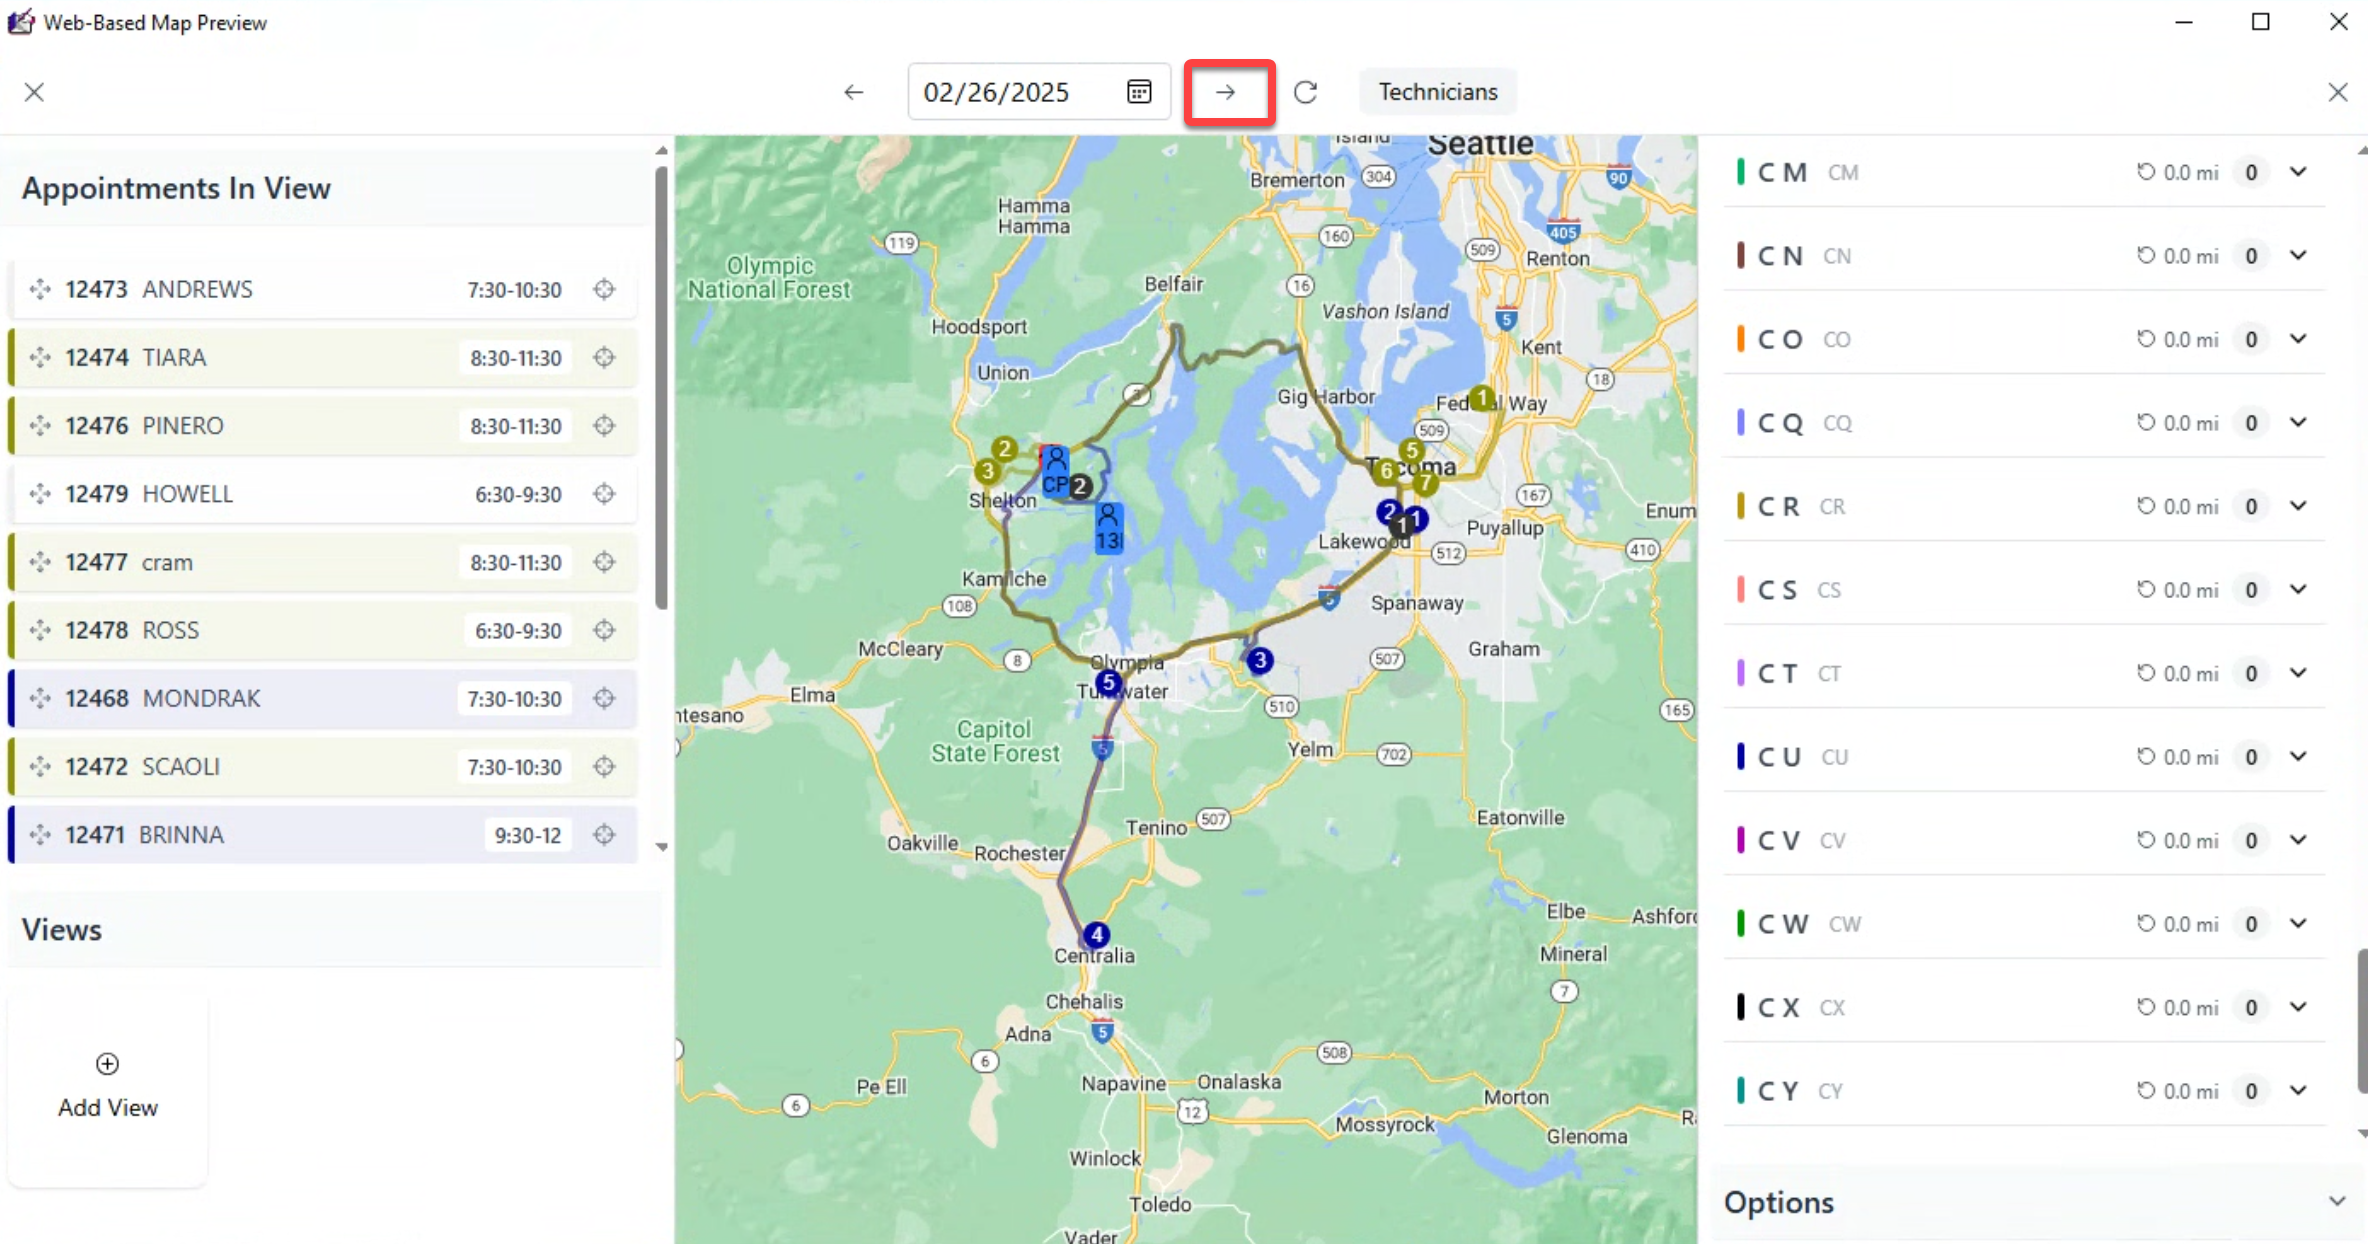
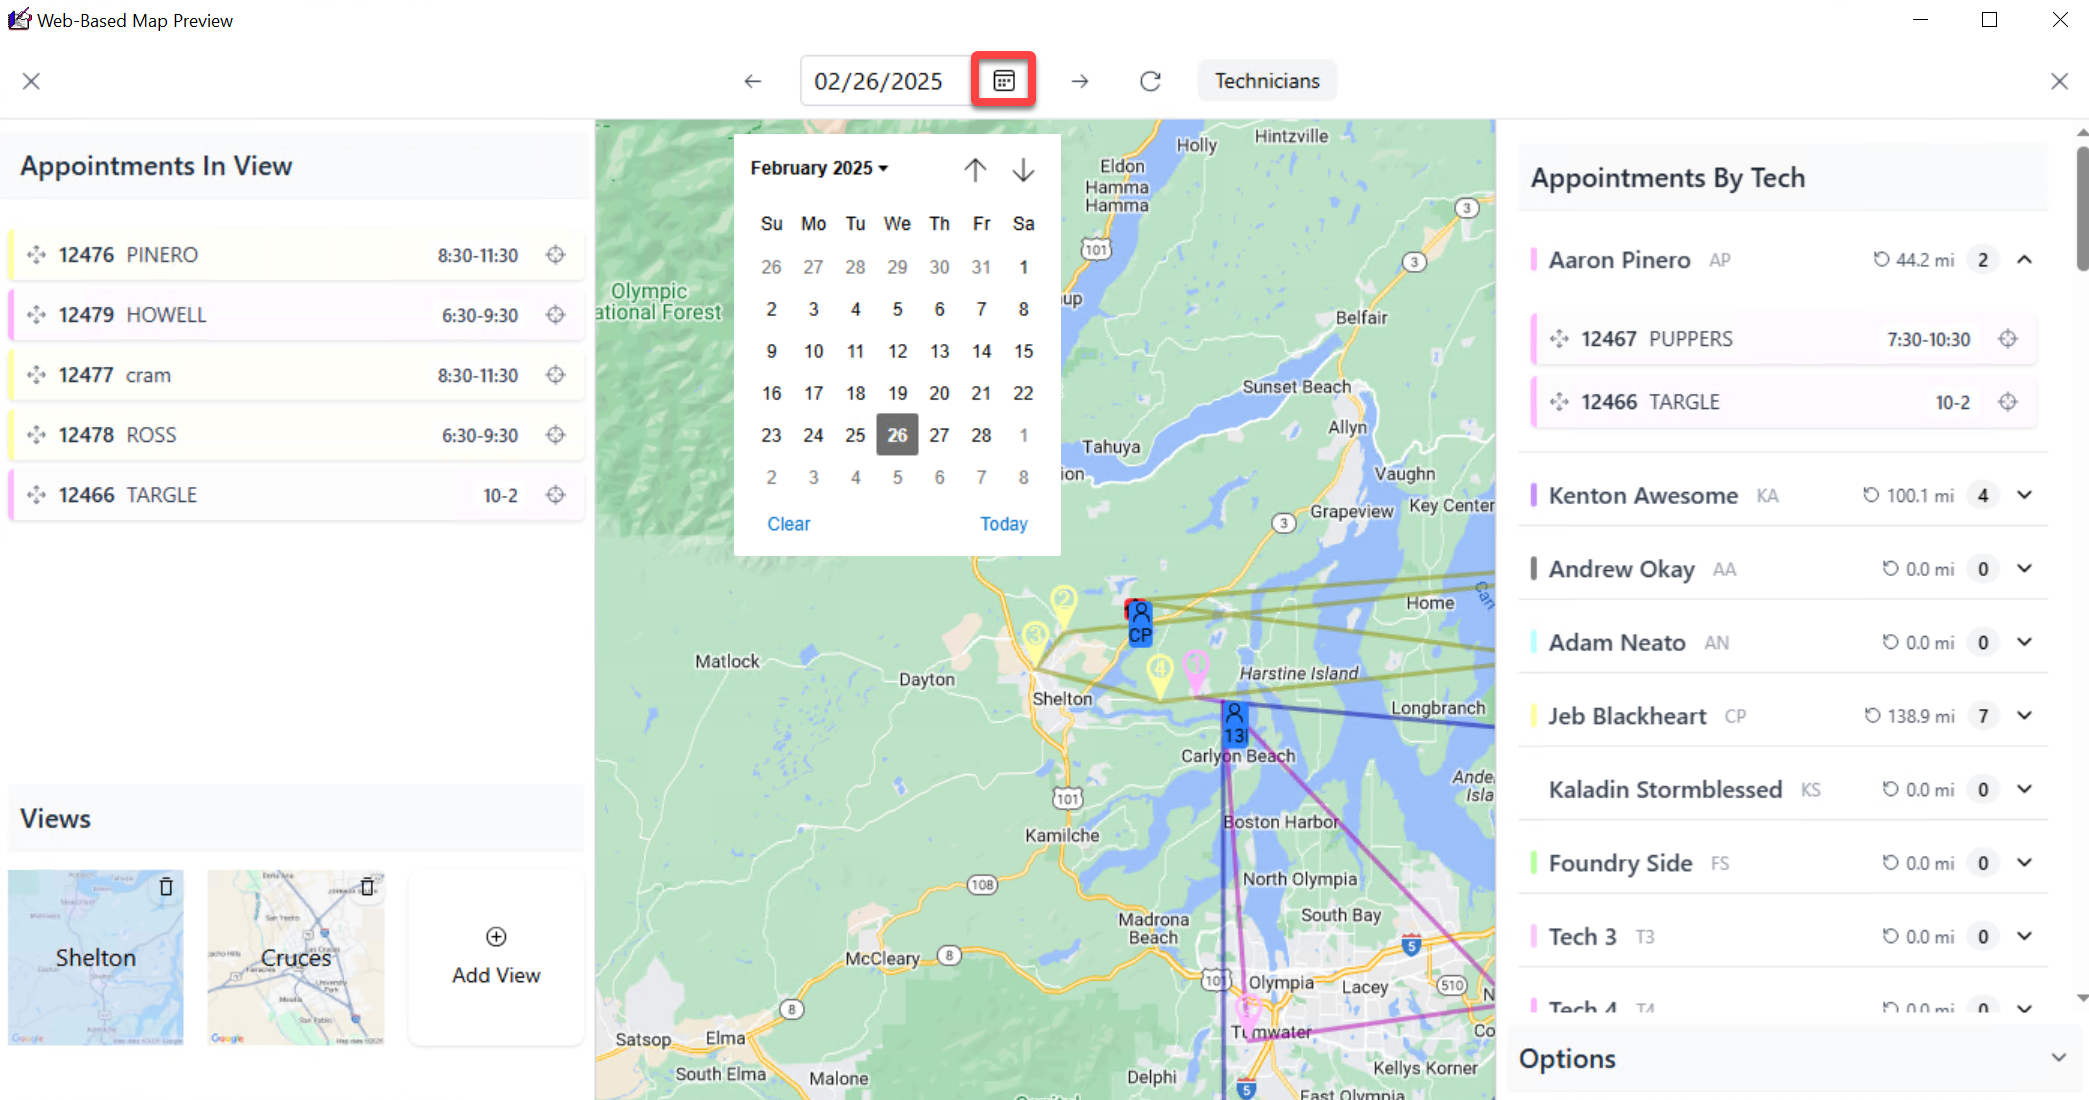
Clicking on the calendar icon will allow you to pick a date to view.
Clicking on the refresh icon will refresh the view of the currently selected date. This can help you view a recently added appointment.
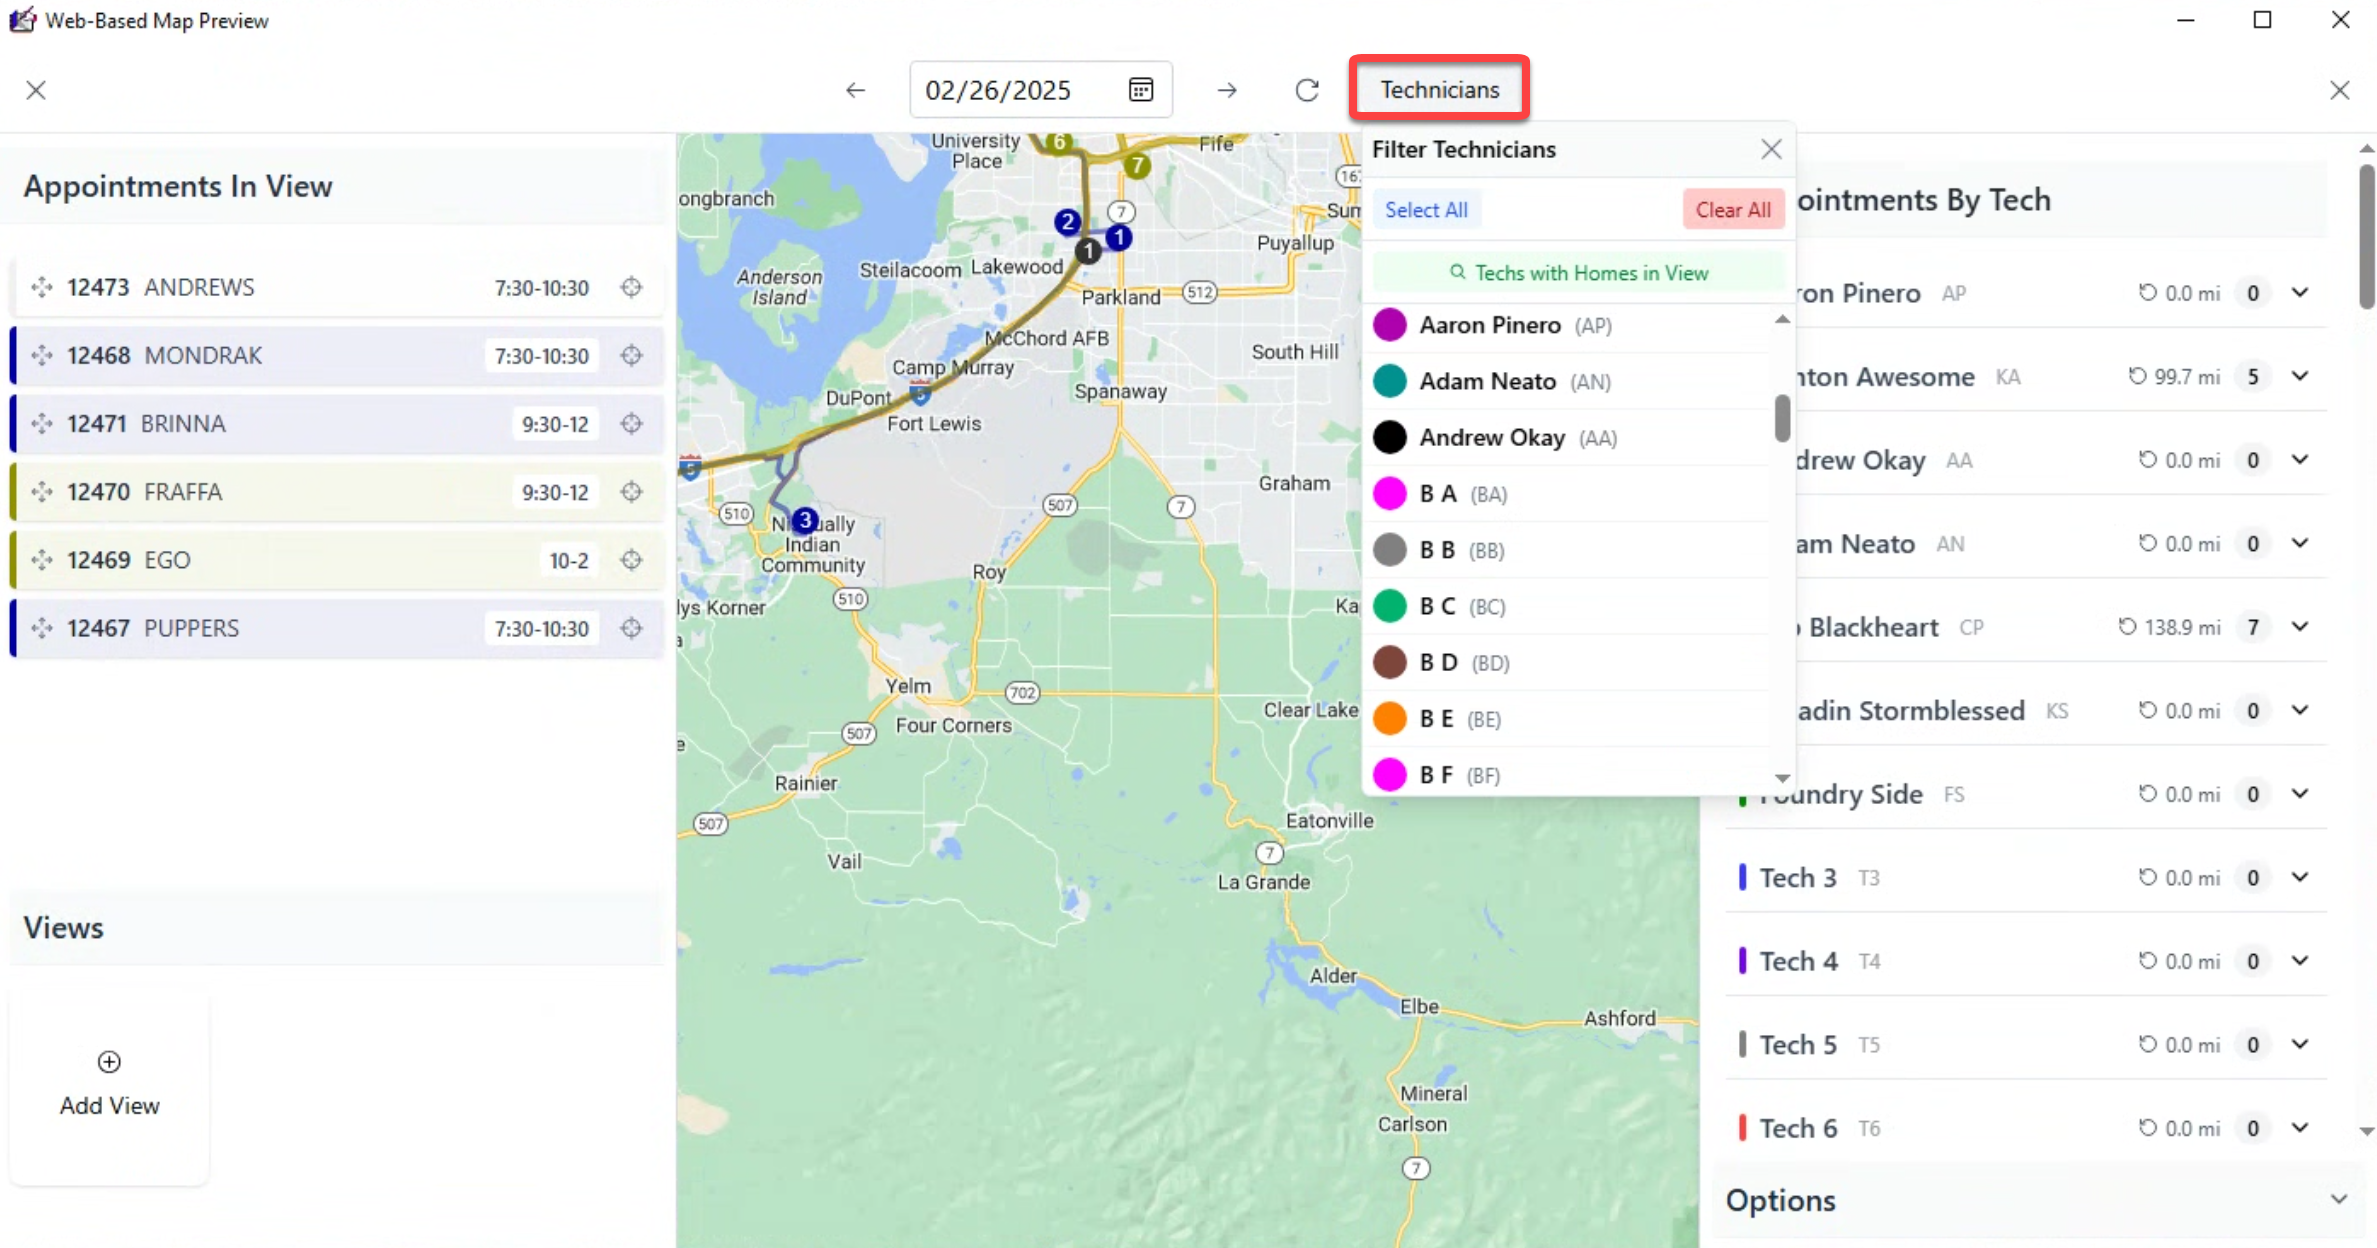
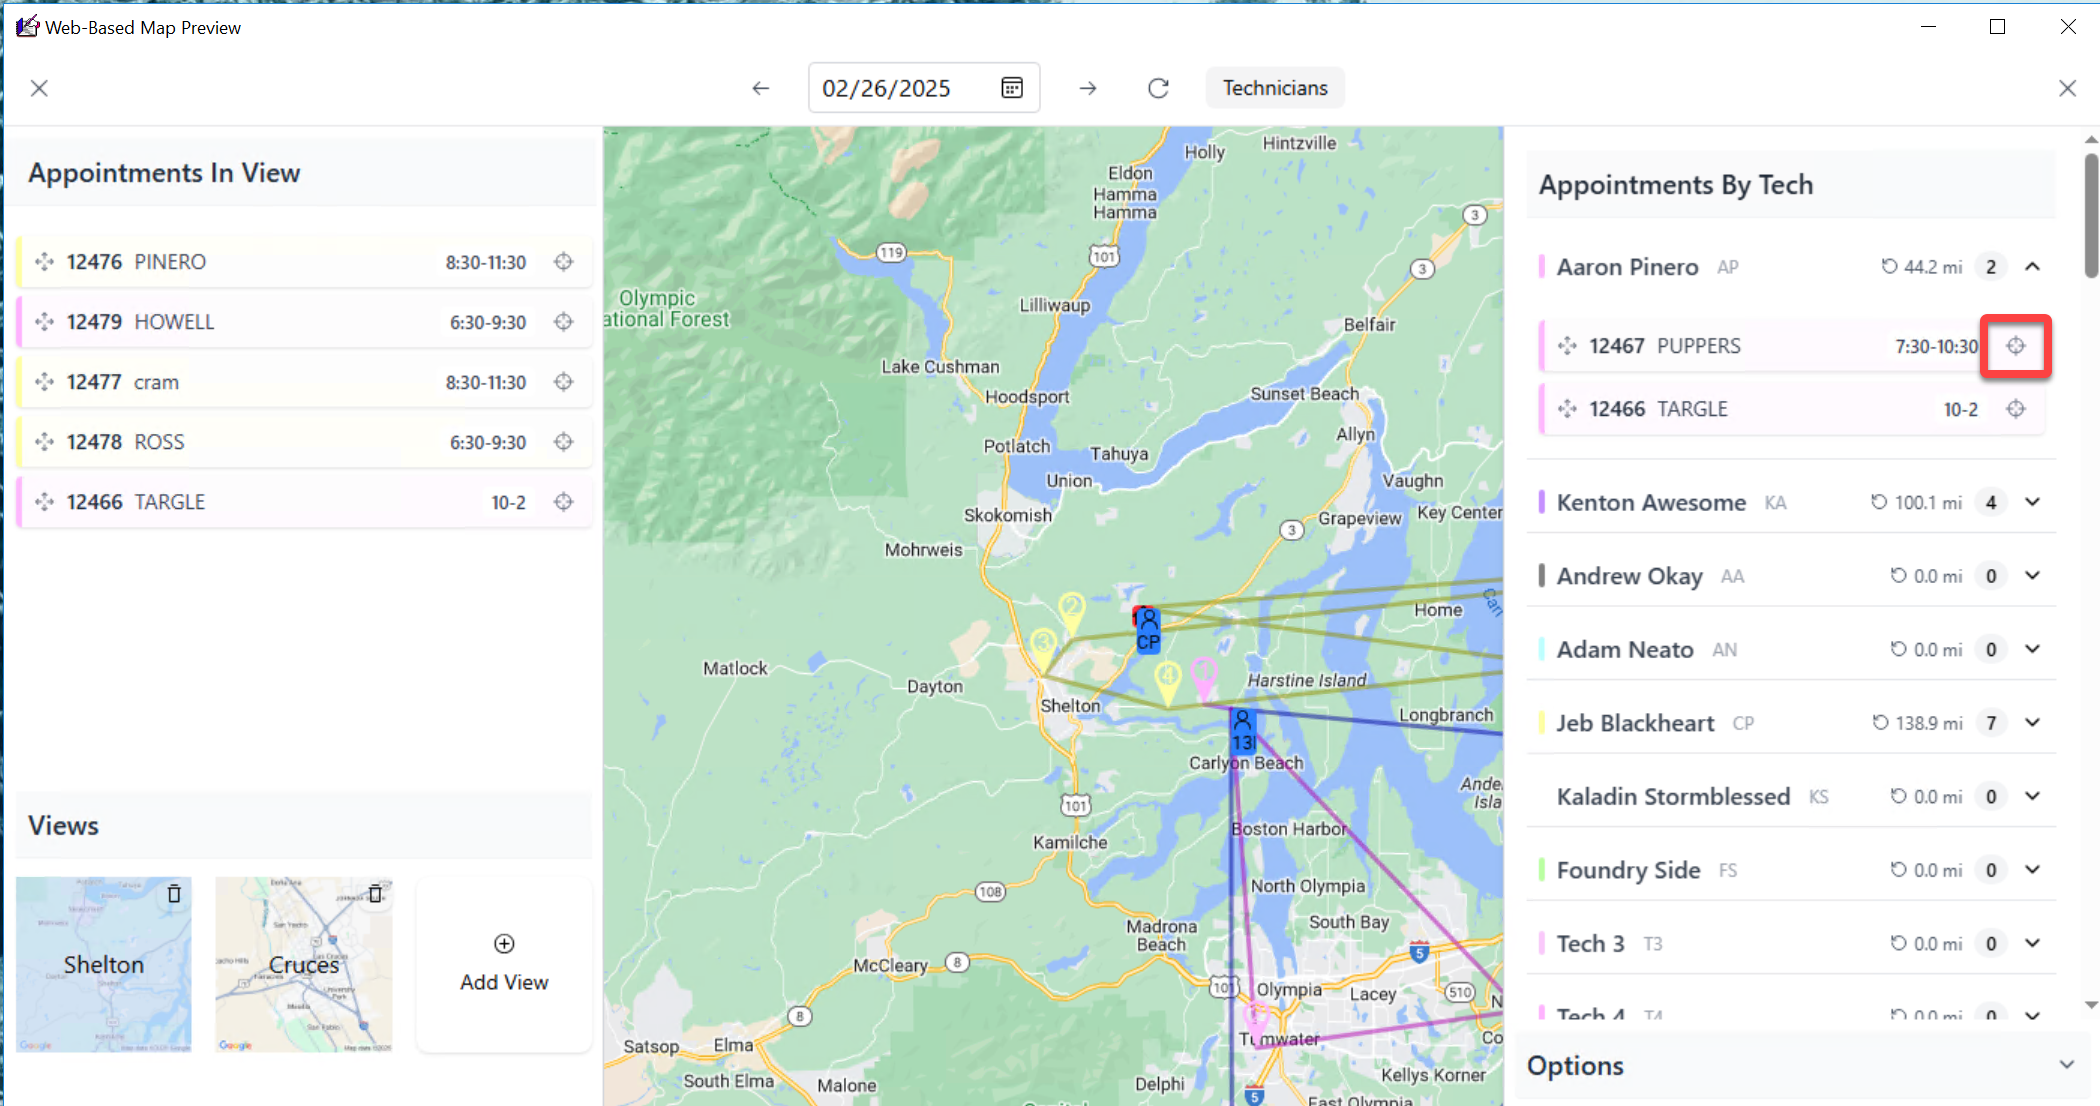
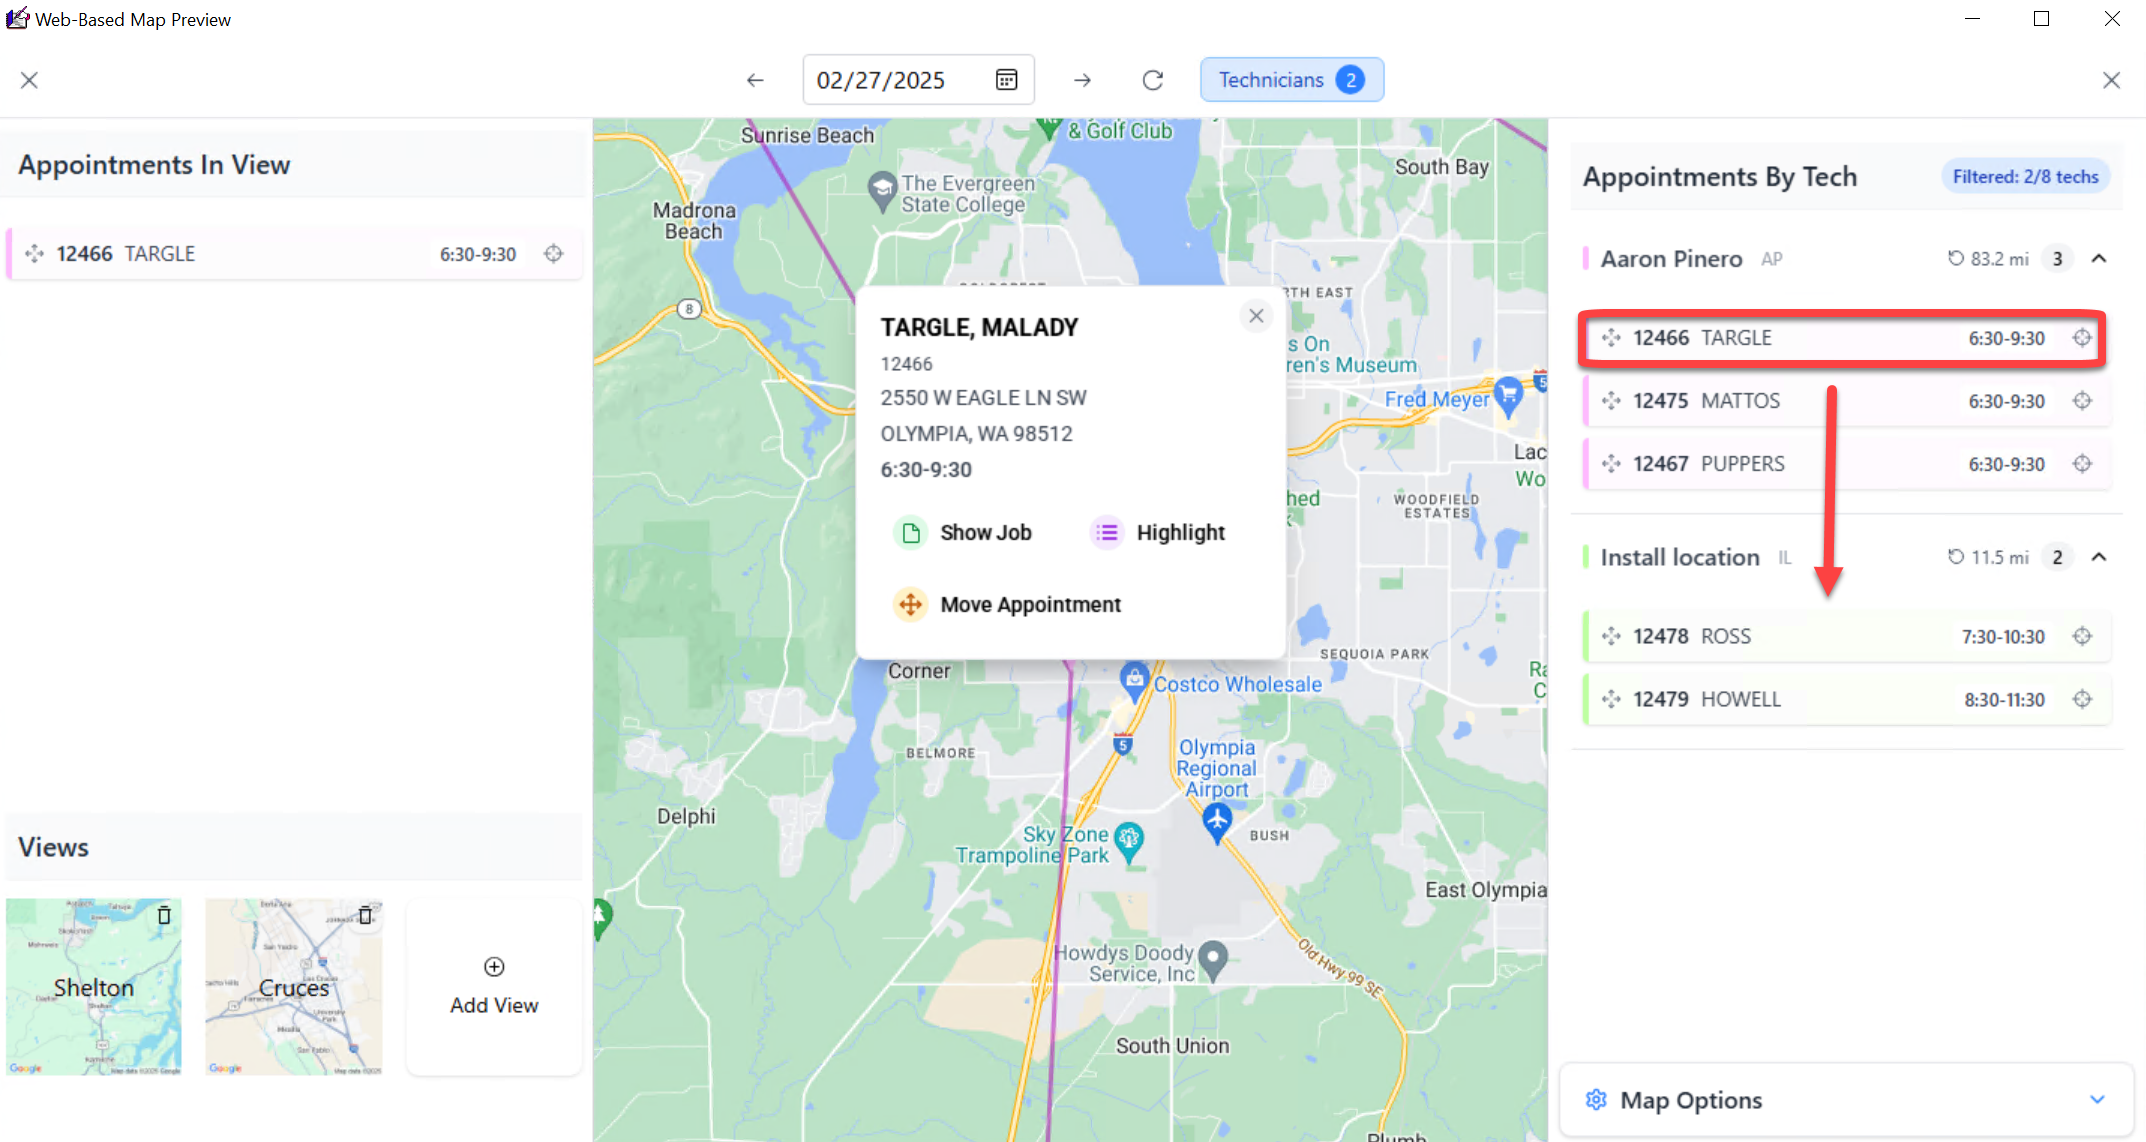
Technician roster
To filter by specific technicians, click on 'Technicians' and then select technicians in the list to view those technicians.

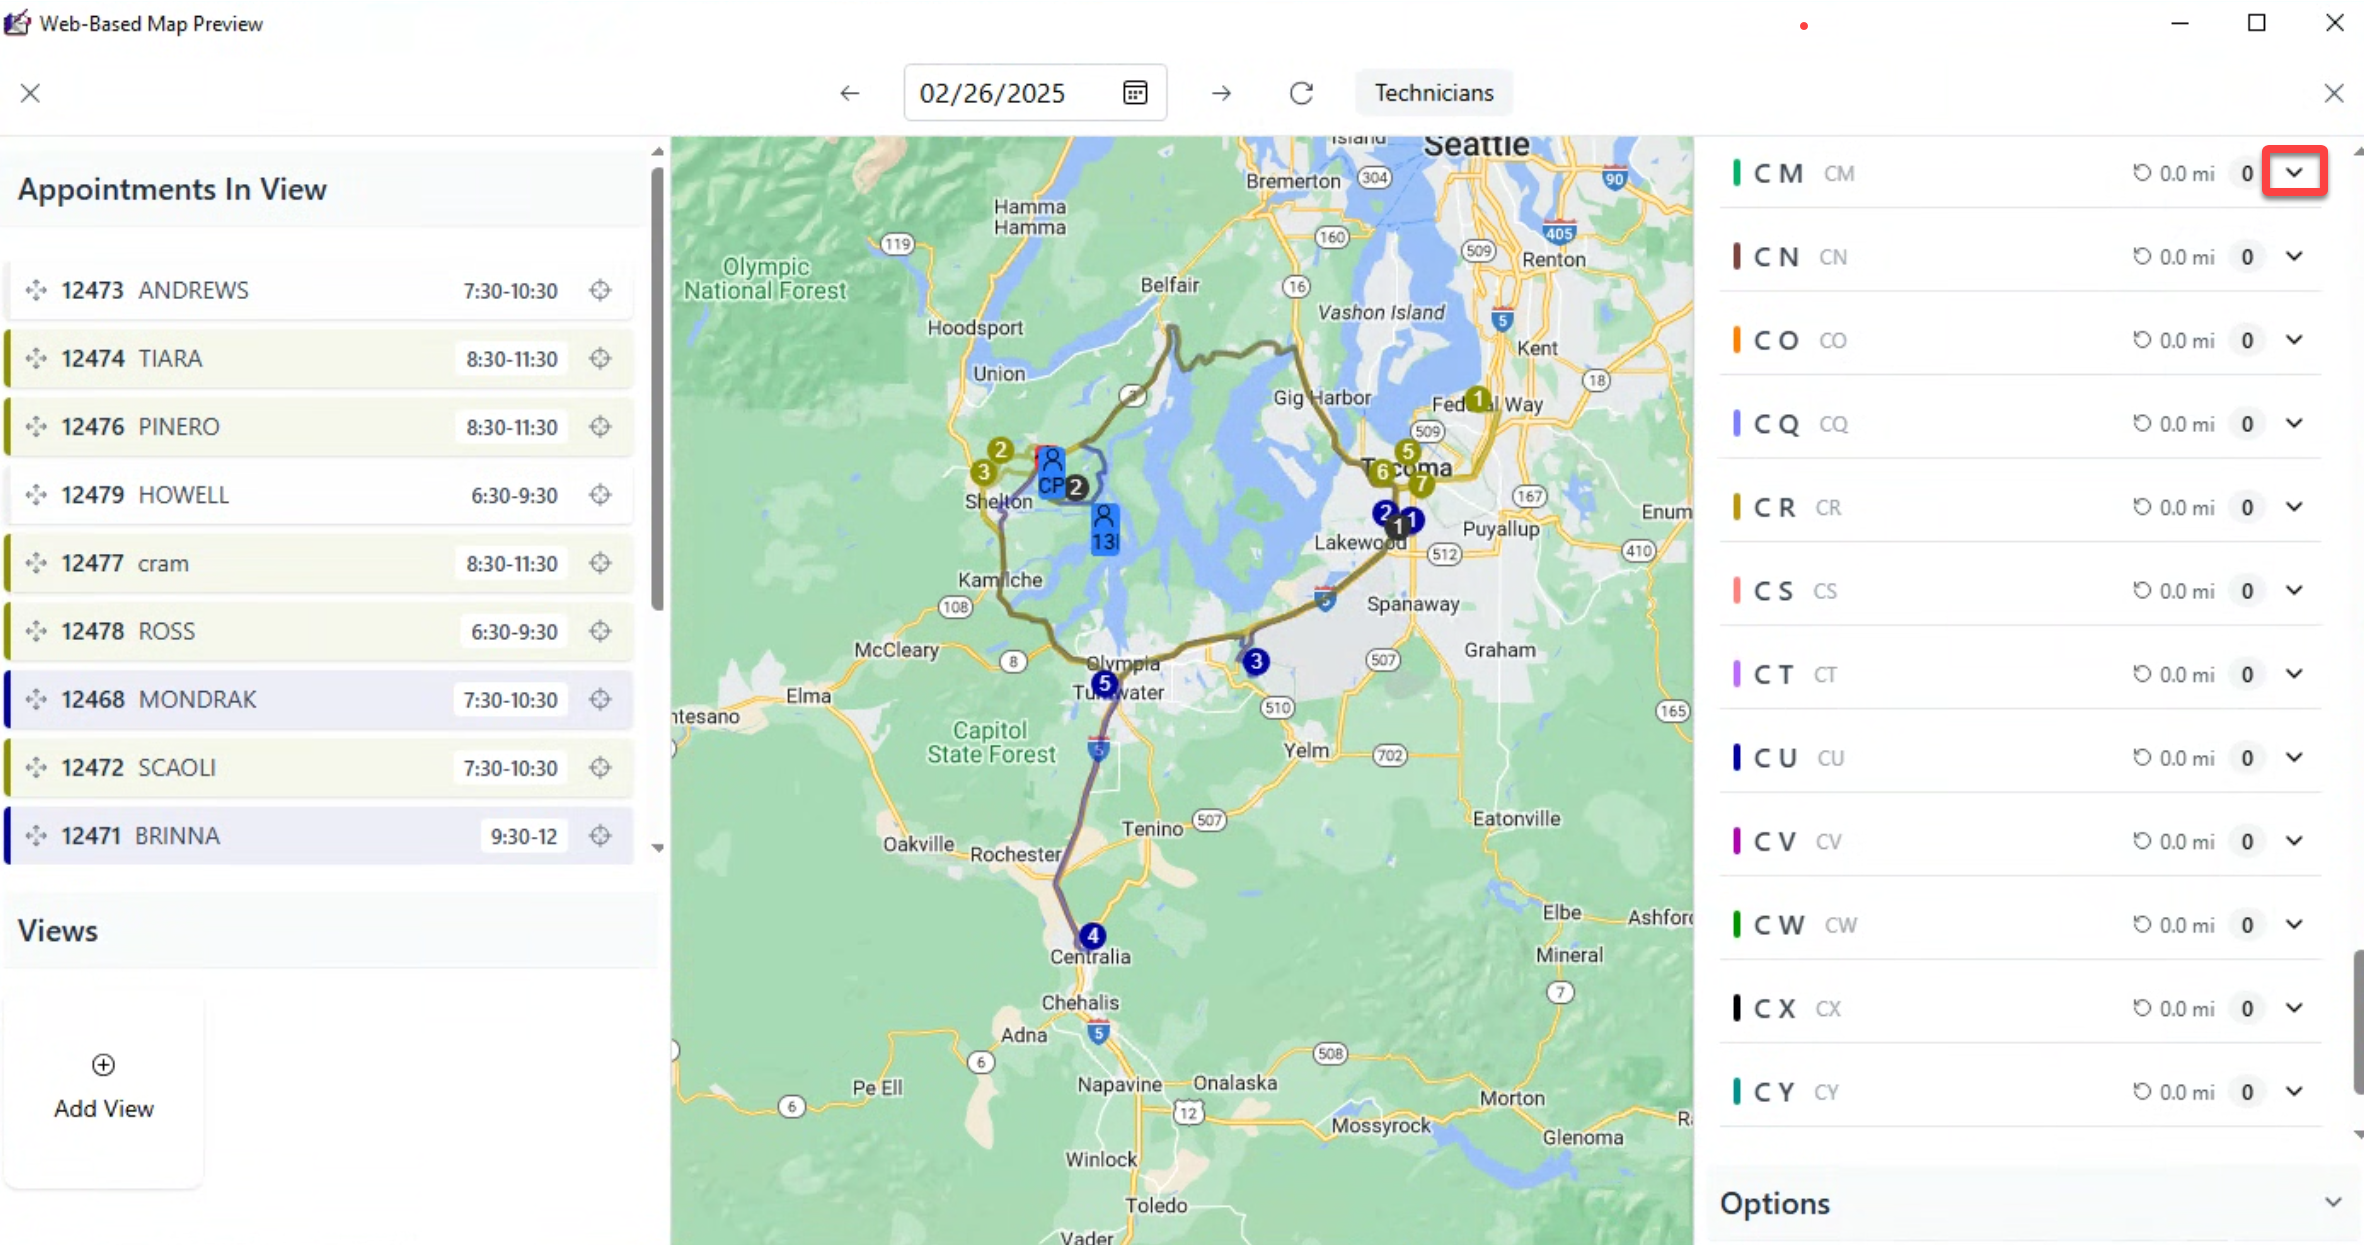
Click on the arrow to expand a technician's roster.
Click on the "Arrows" to view the JobRecord in ServiceDesk.
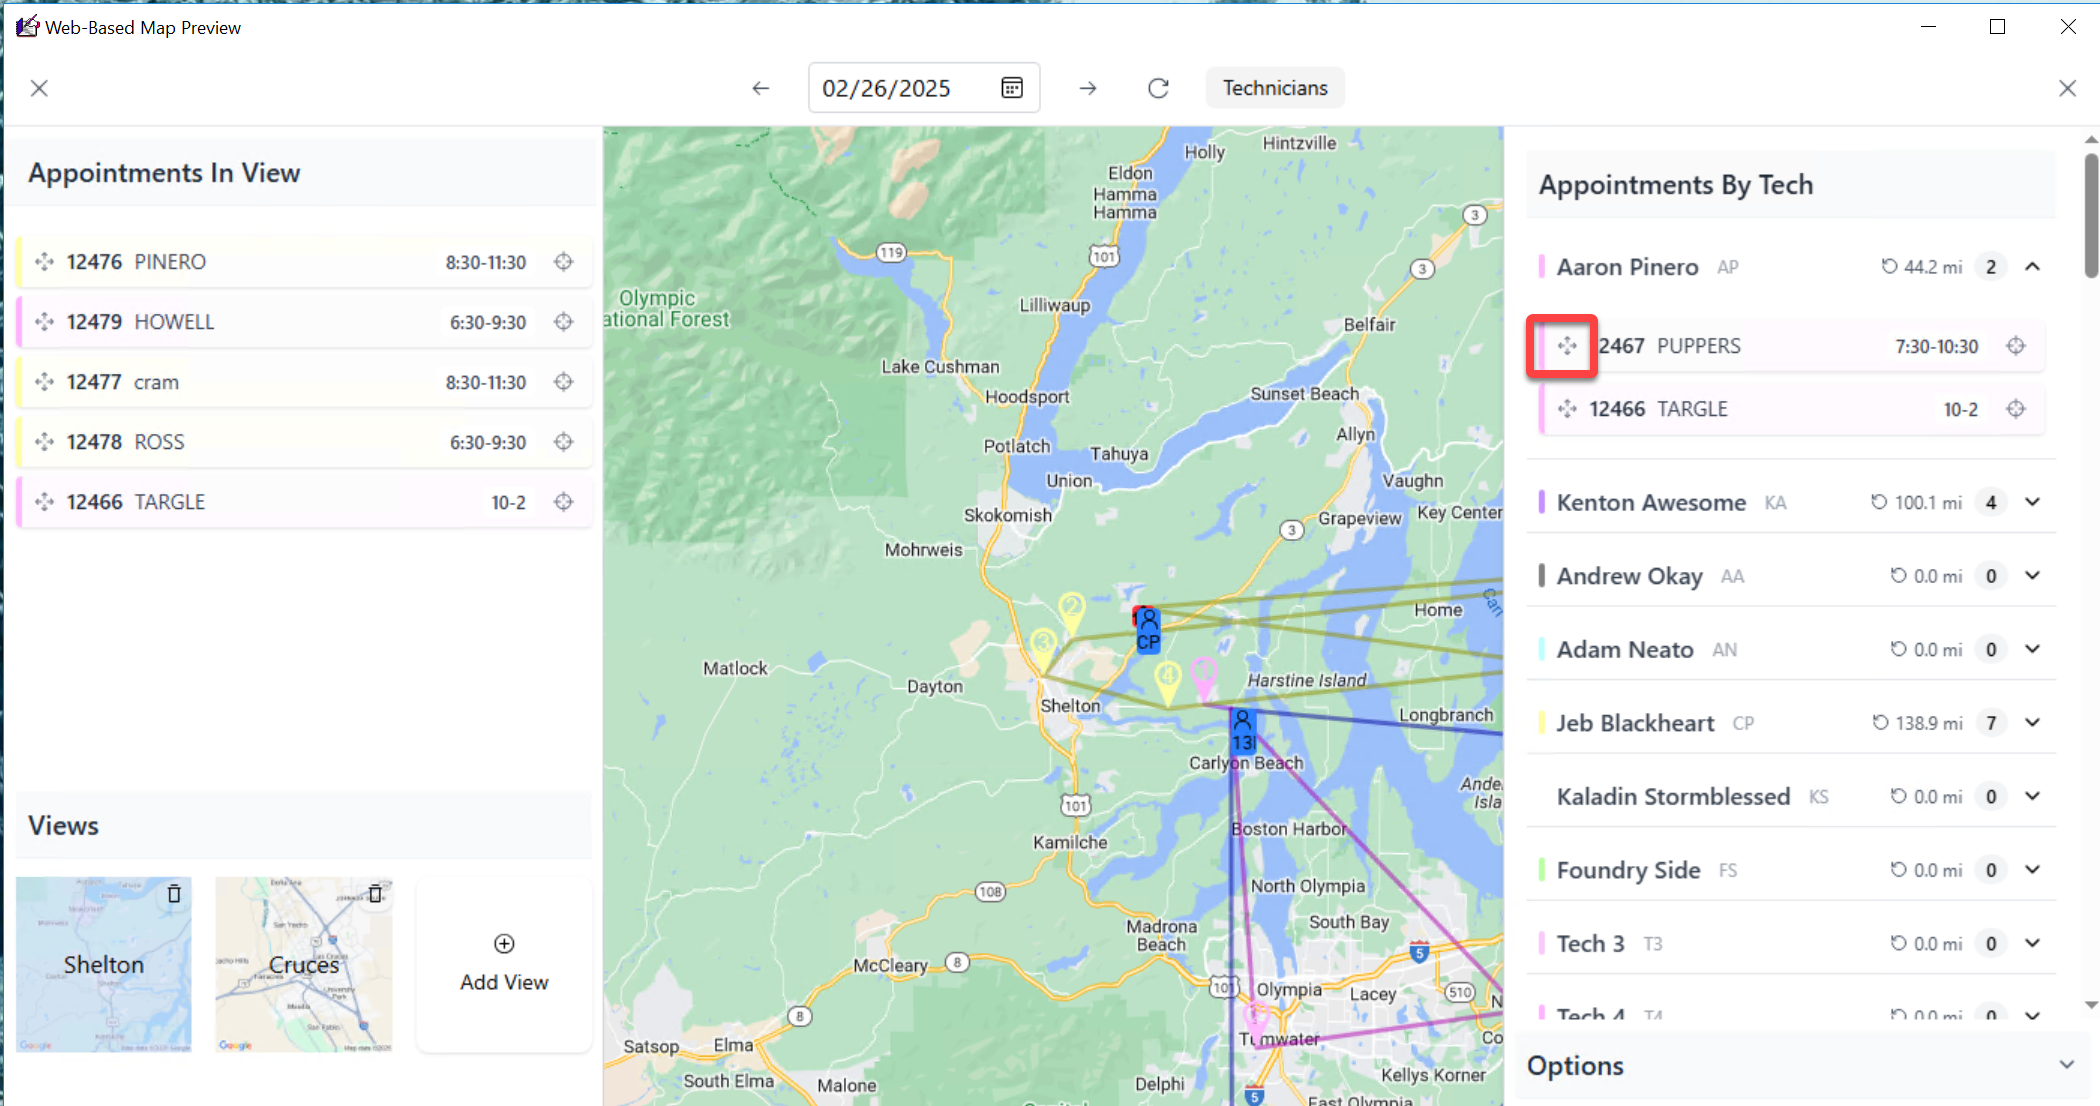
Click on the "Crosshairs" to place the focus on the appointment within the map.
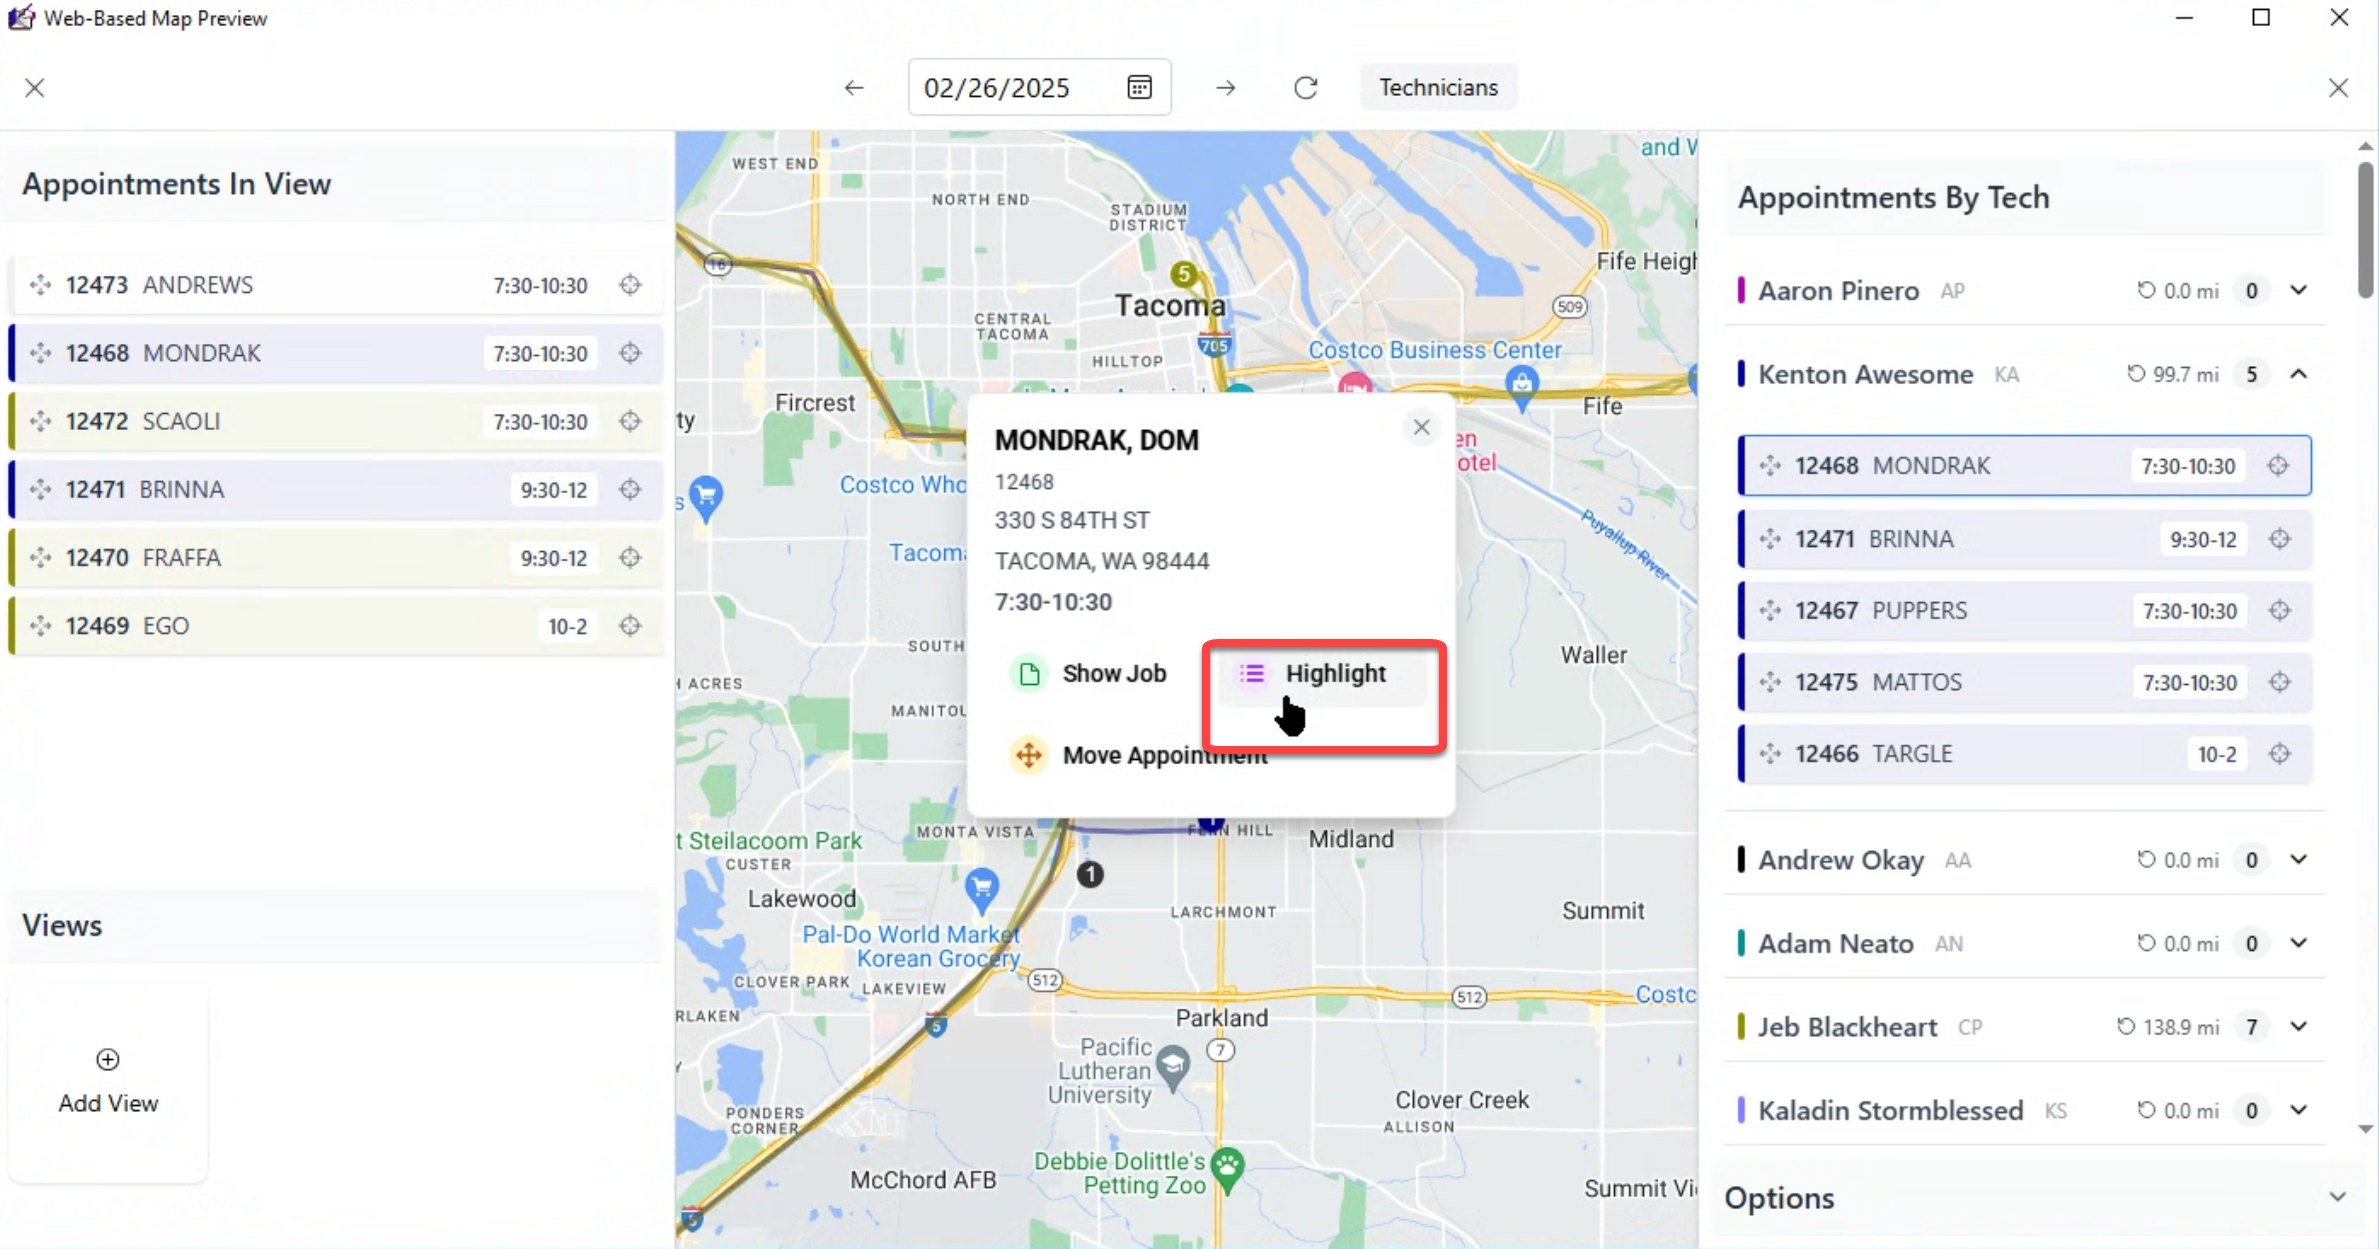
Click on the appointment node to open the JobRecord in ServiceDesk.

Drag and drop an appointment to move it.
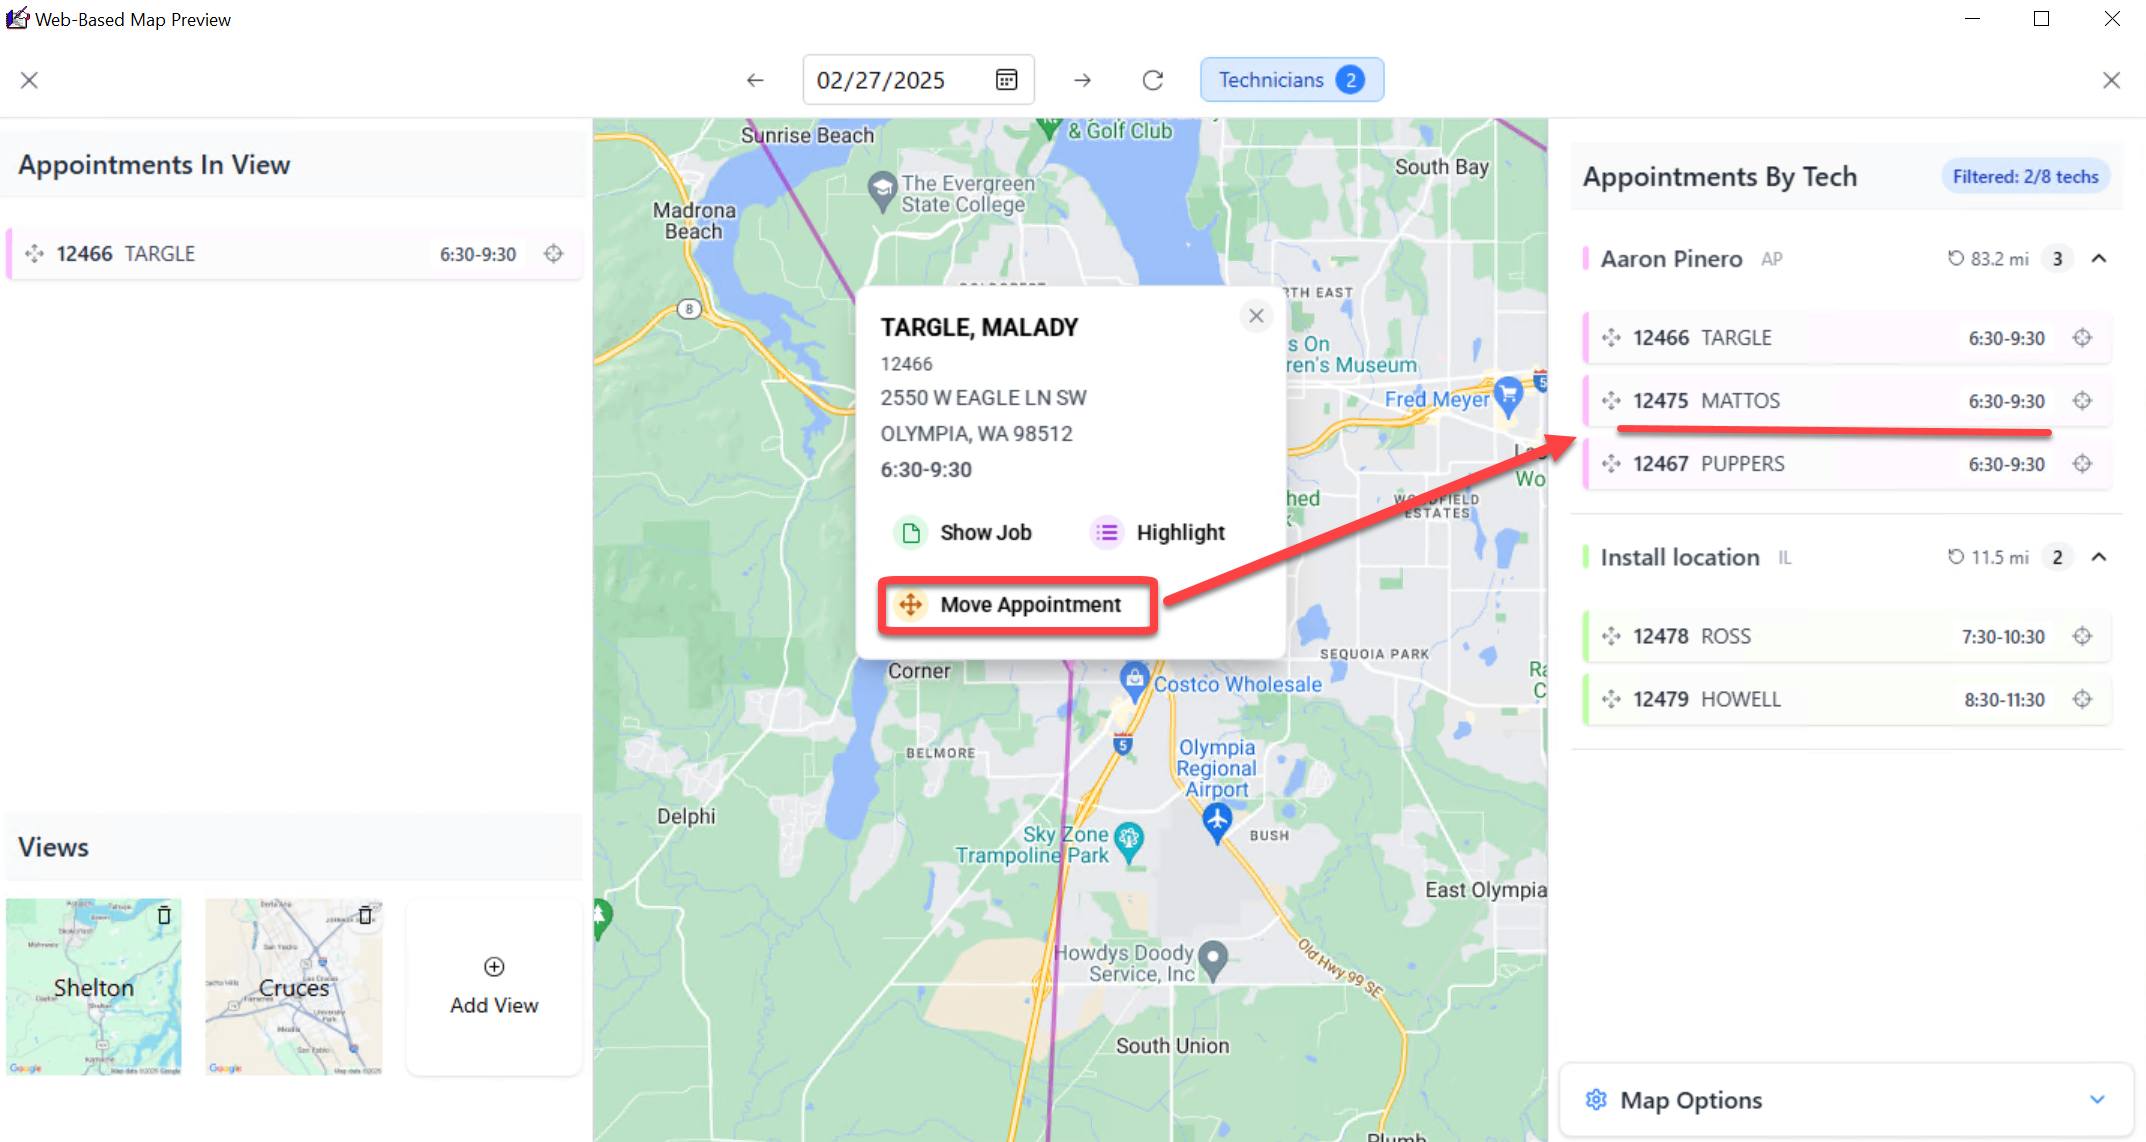
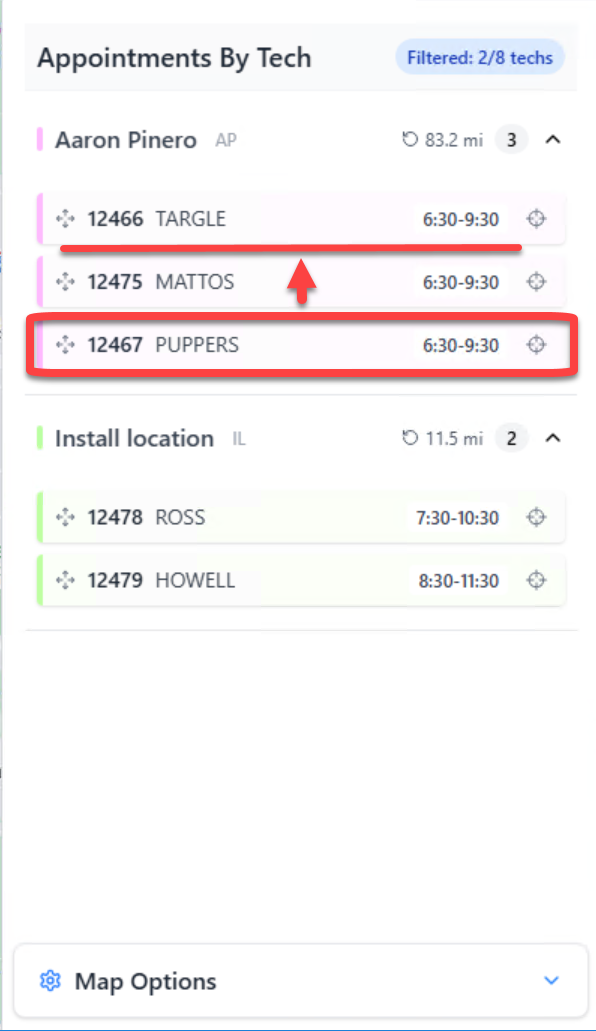
Drag and drop an appointment to reassign an appointment to another technician.

Moving around the map
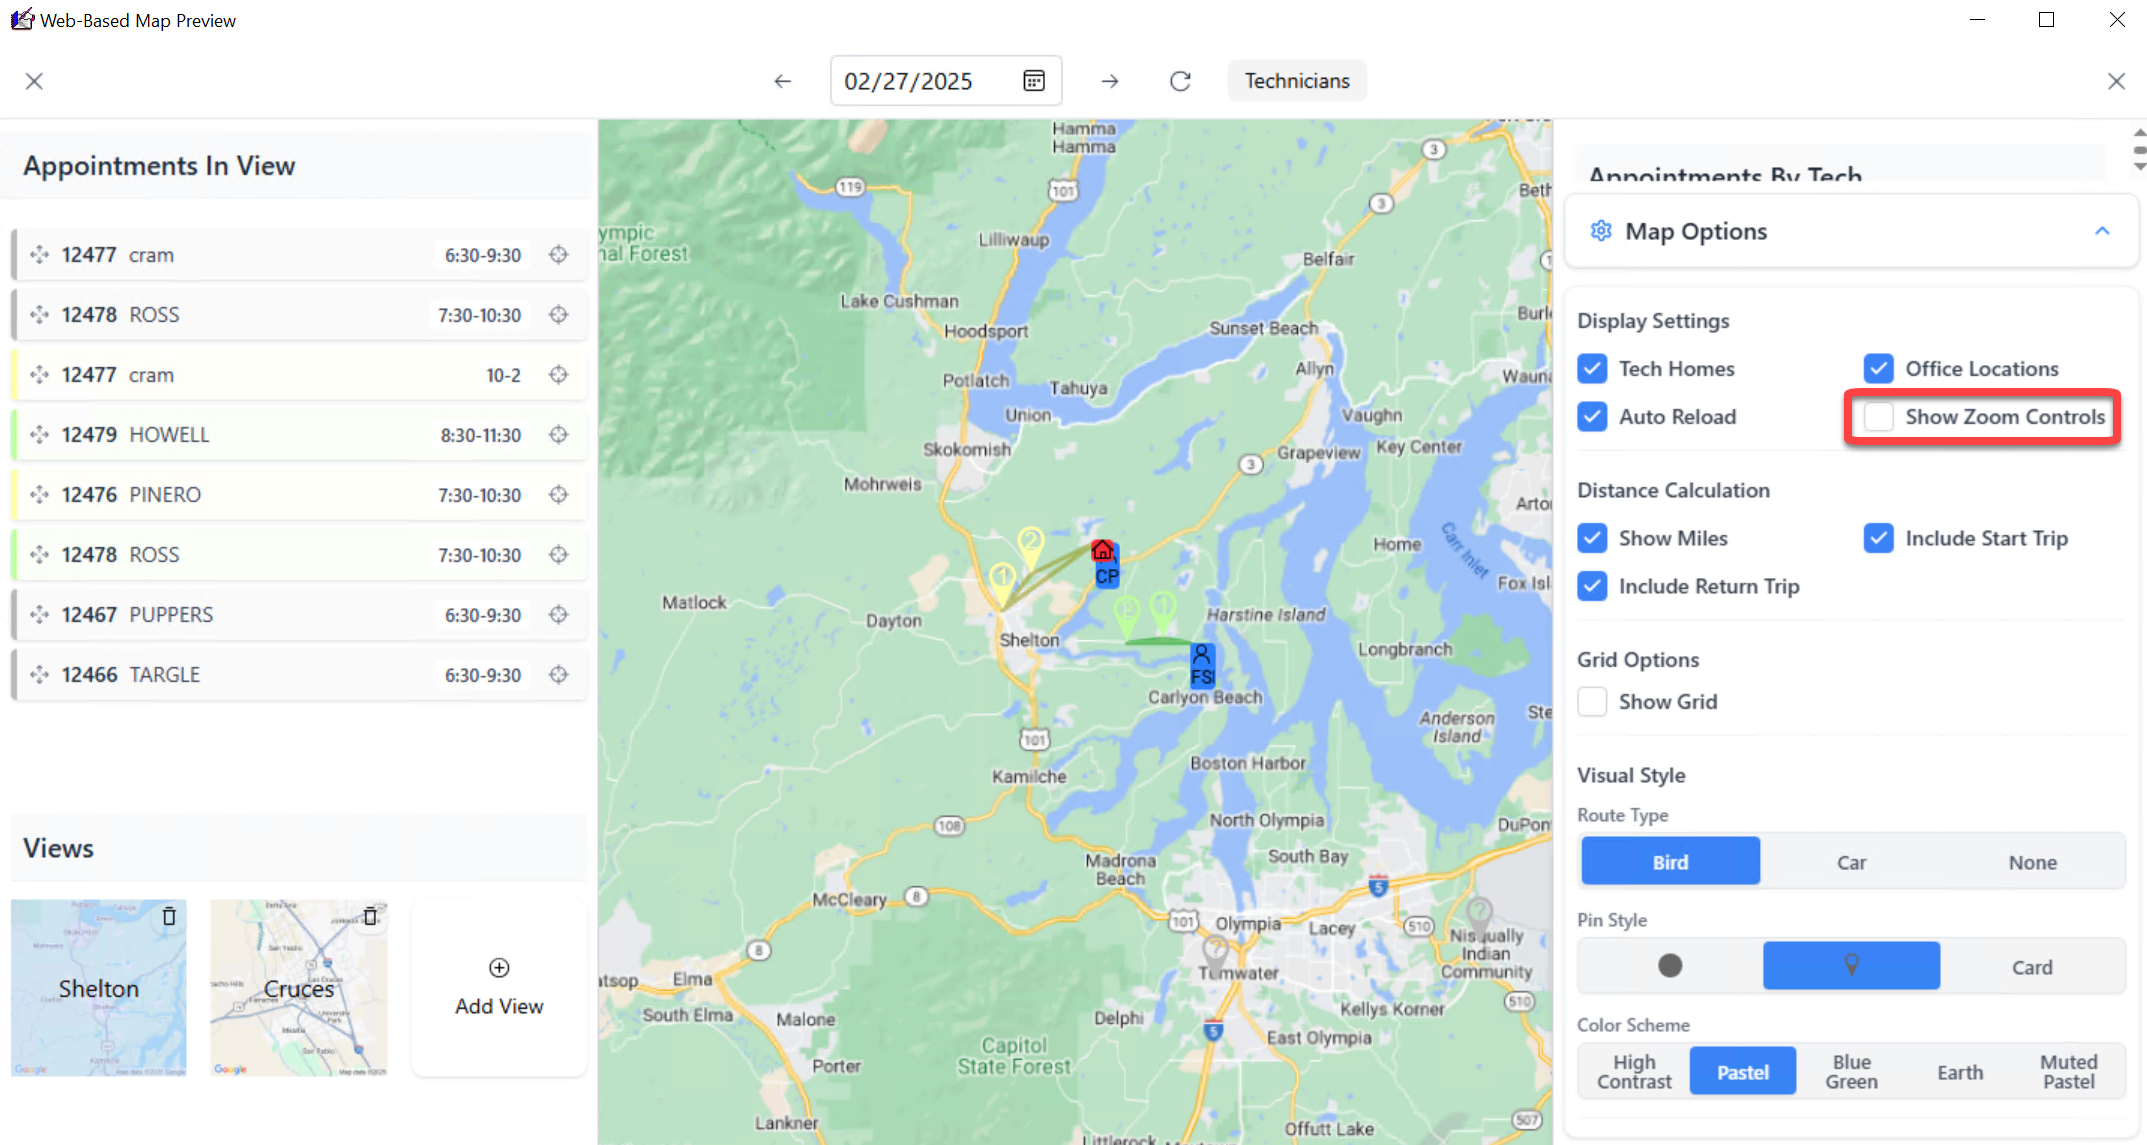
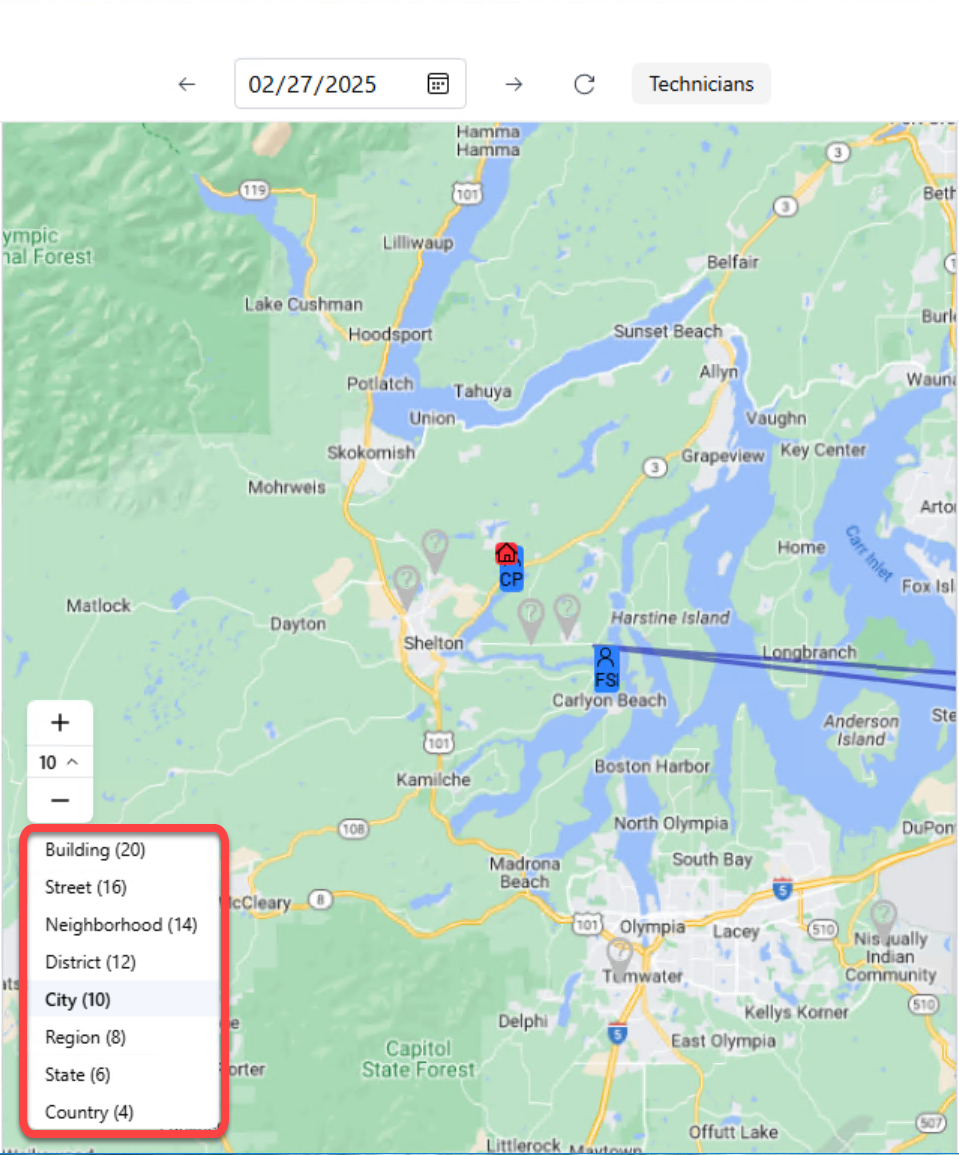
Zoom controls on the interface
Click the option to display zoom controls.
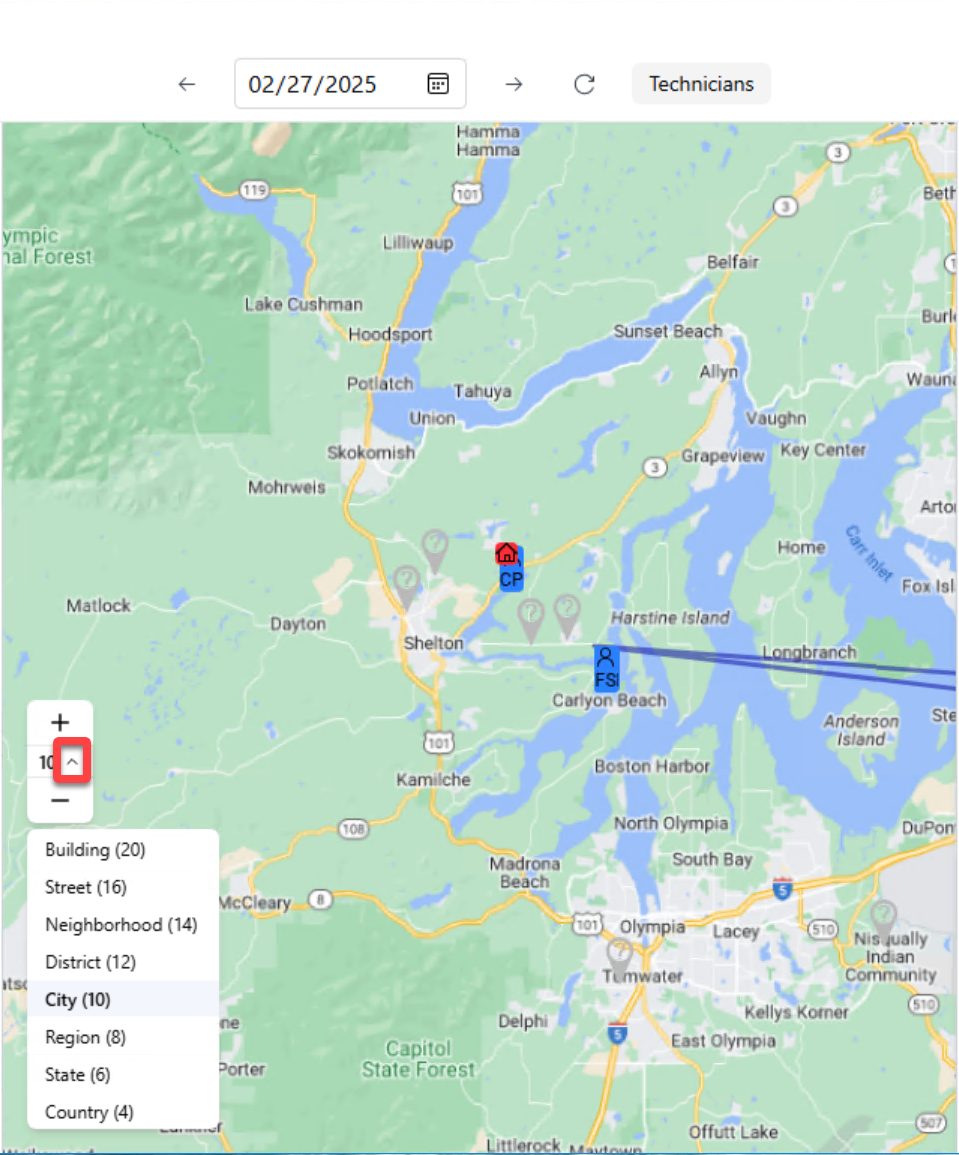
Use the + or - to zoom. Click on the down arrow to expand the zoom menu.

Select a zoom level.
Click the up arrow to collapse the zoom menu.
Zoom controls for mouse and keyboard
Changing the zoom level:
Use the scroll wheel on the mouse or;
Double left-click to zoom in, double right-click to zoom out, or;
Use the + or - keys on your keyboard.

Panning
To pan around the map:
Left-click and drag, or;
use the Left Arrow, Right Arrow, Up Arrow, and Down Arrow keys on your keyboard, or;
PgUp, PgDn, Up, and Dn keys on your keyboard.
Managing Views
TIP! The views and their respective settings are individual to the ServiceDesk user. These are not system-wide settings.
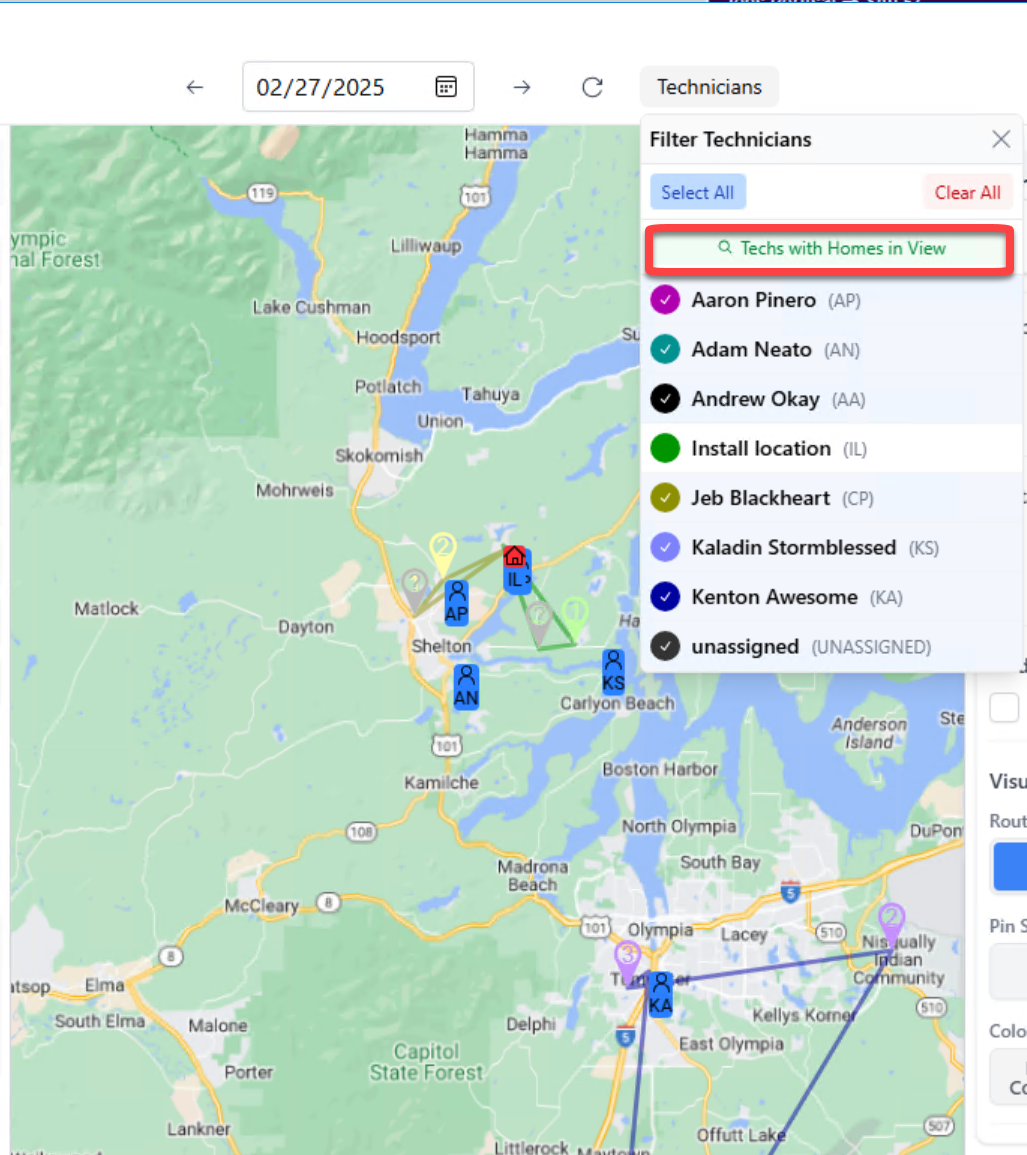
Filtering Techs with Homes in View
To filter the list of technicians on the right pane window to show only the technicians whose home grids are currently displayed on the map image (using the current zoom level), click on 'Technicians' above the map image, then select 'Techs with Homes in View.'
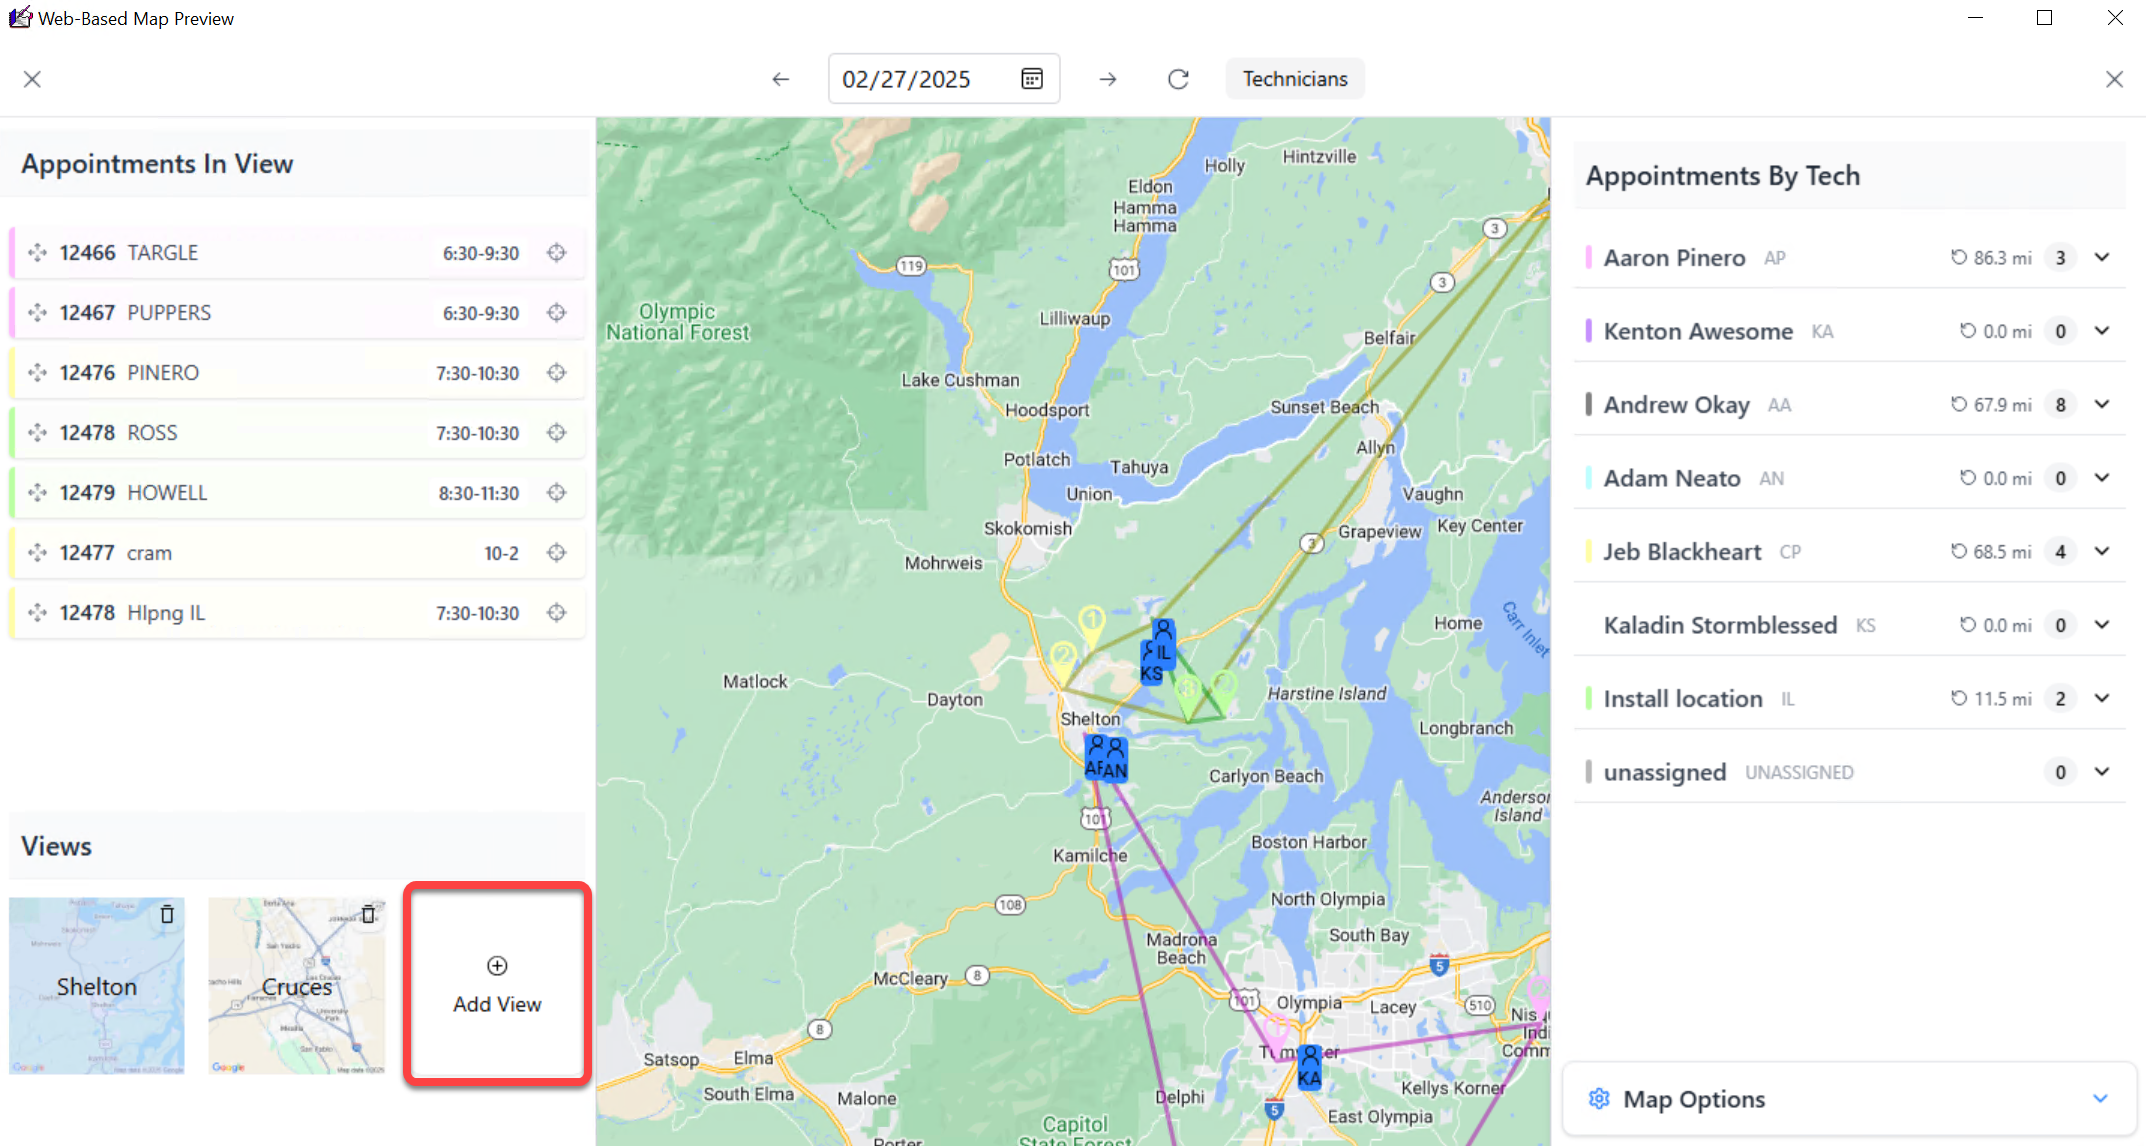
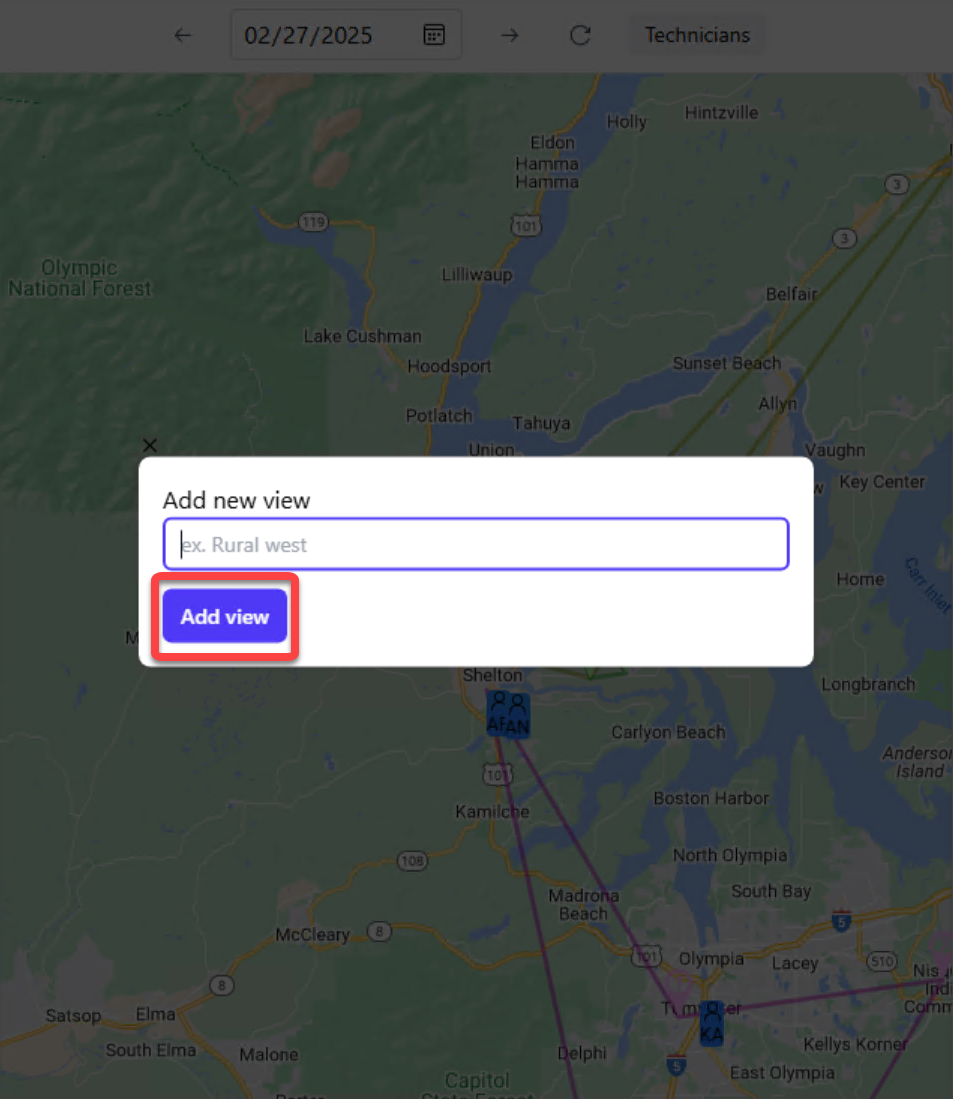
Adding a view
To add a view pan over to display the area of the map you want to add as a view.
Then click, 'Add View.'
Type in a description for your new view.
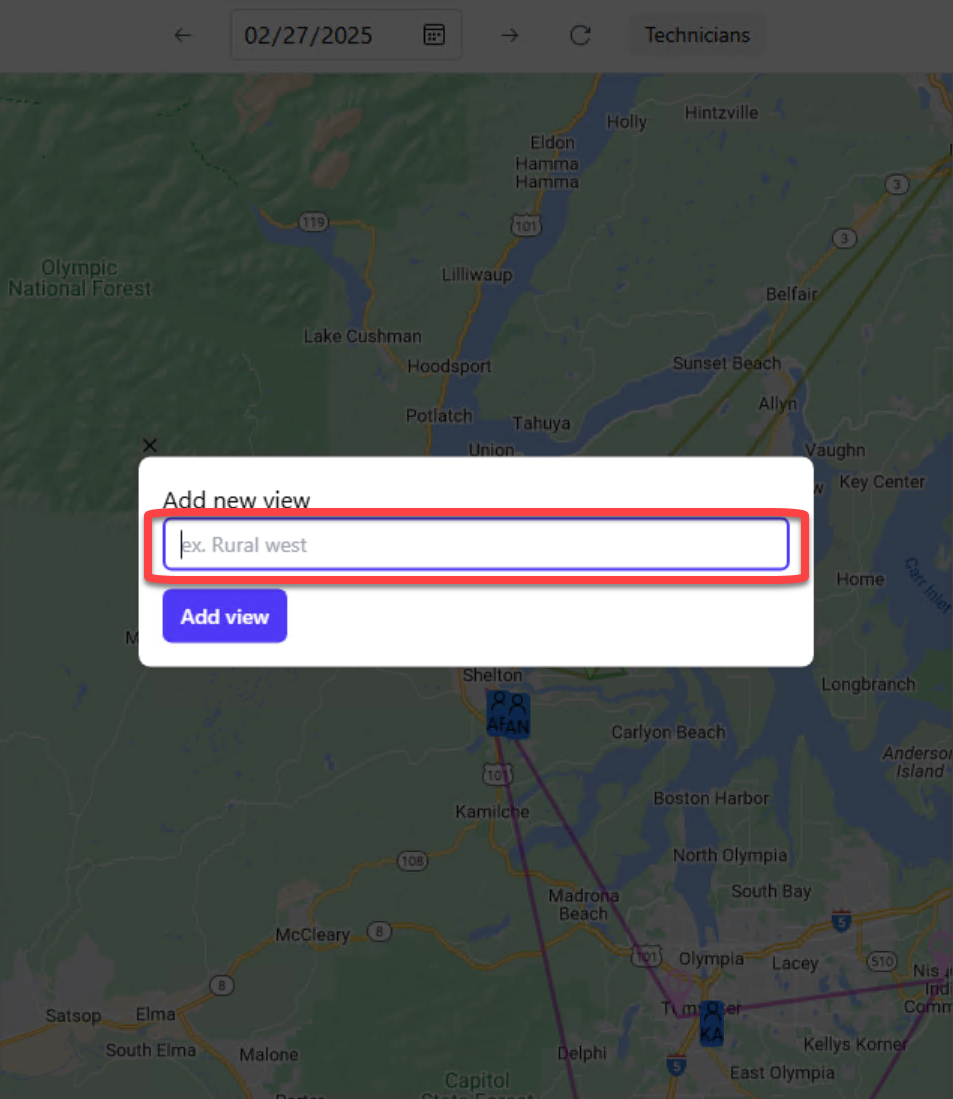
Click 'Add view.' or press 'Enter.'
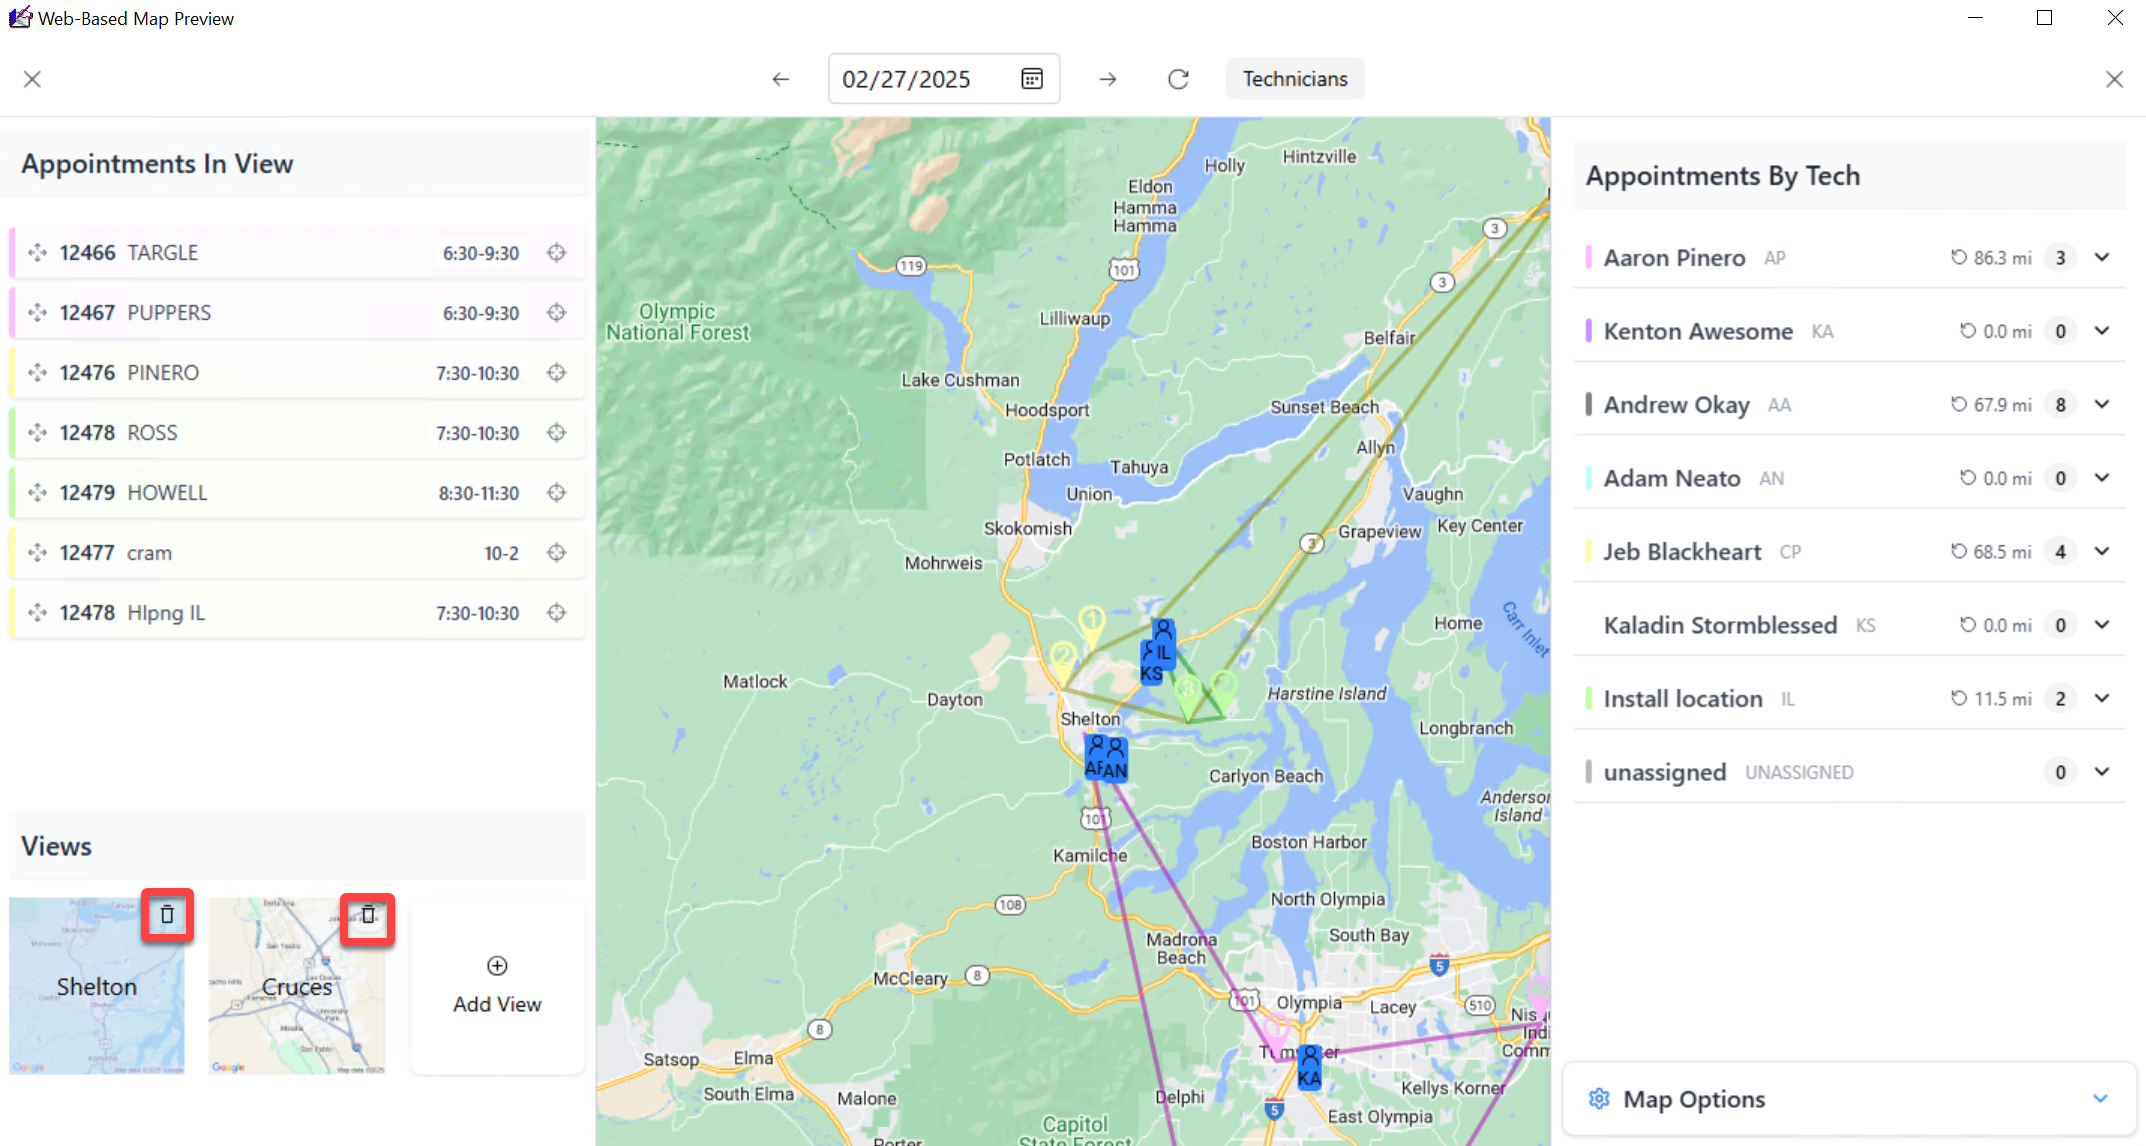
Deleting a view
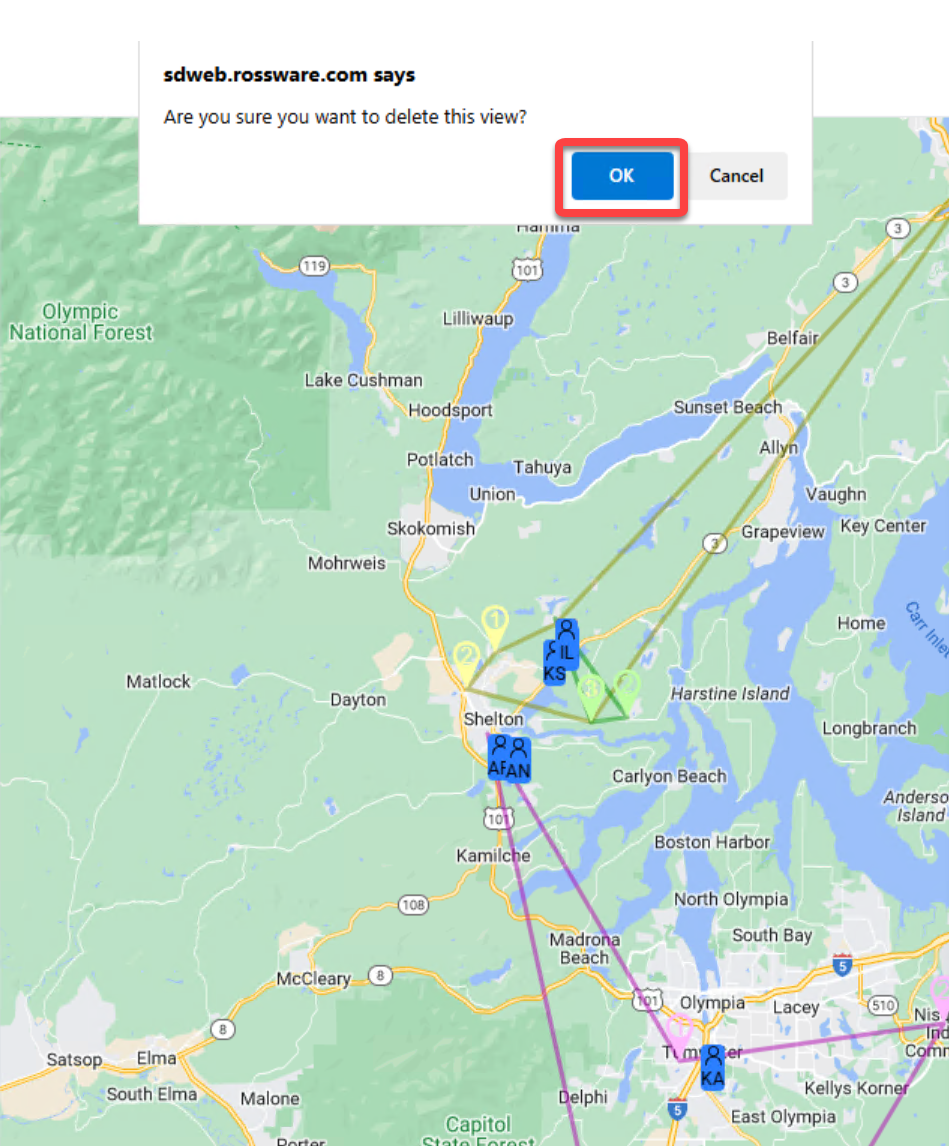
To delete a view click on the "Trash can" icon.
Click 'OK' to delete the view.
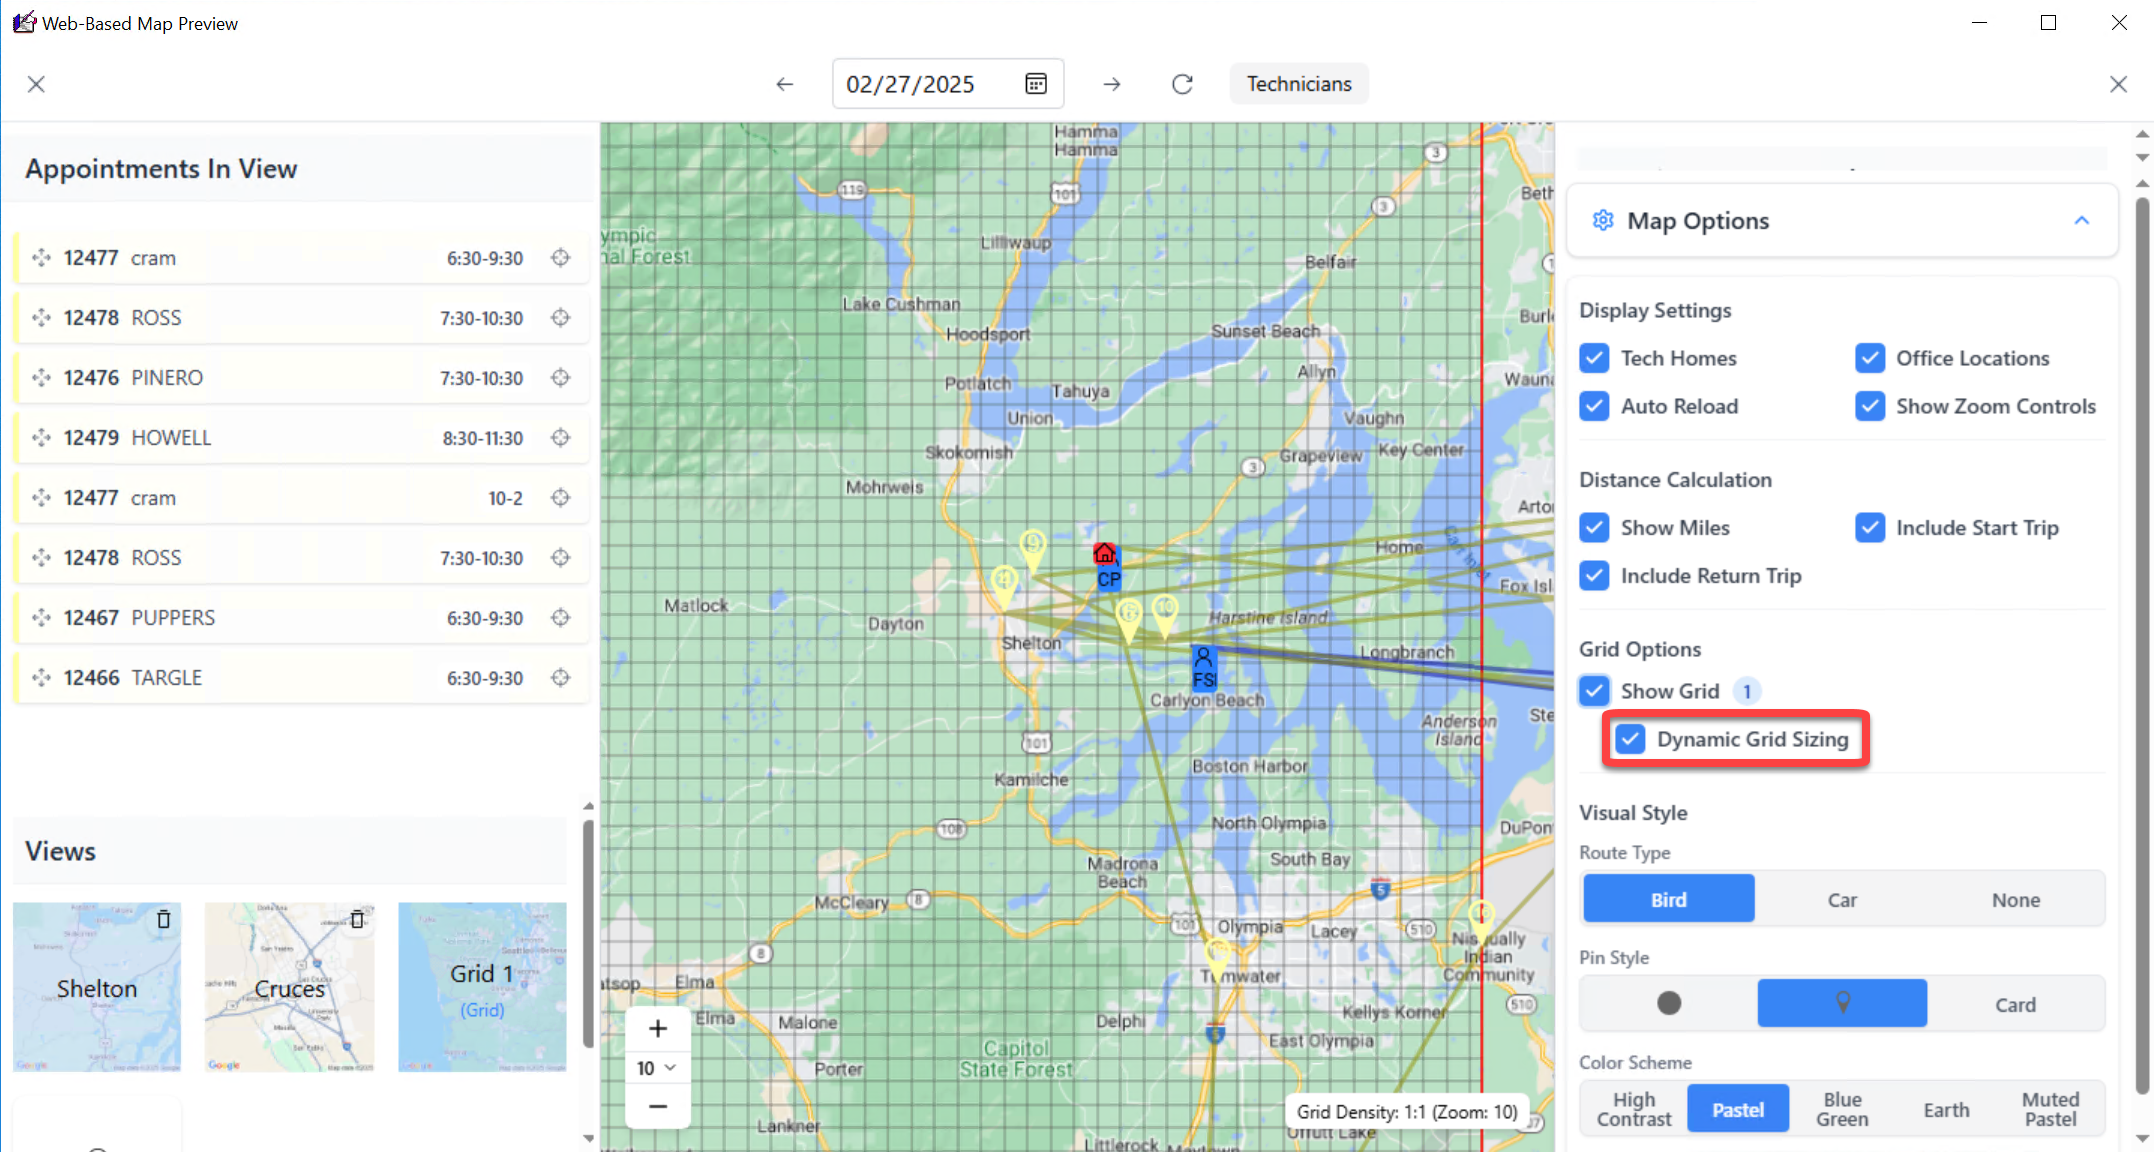
Additional display options
Display grid lines overlaying the map image. Optionally, select dynamic grid sizing. (grids resize when the zoom level is changed)
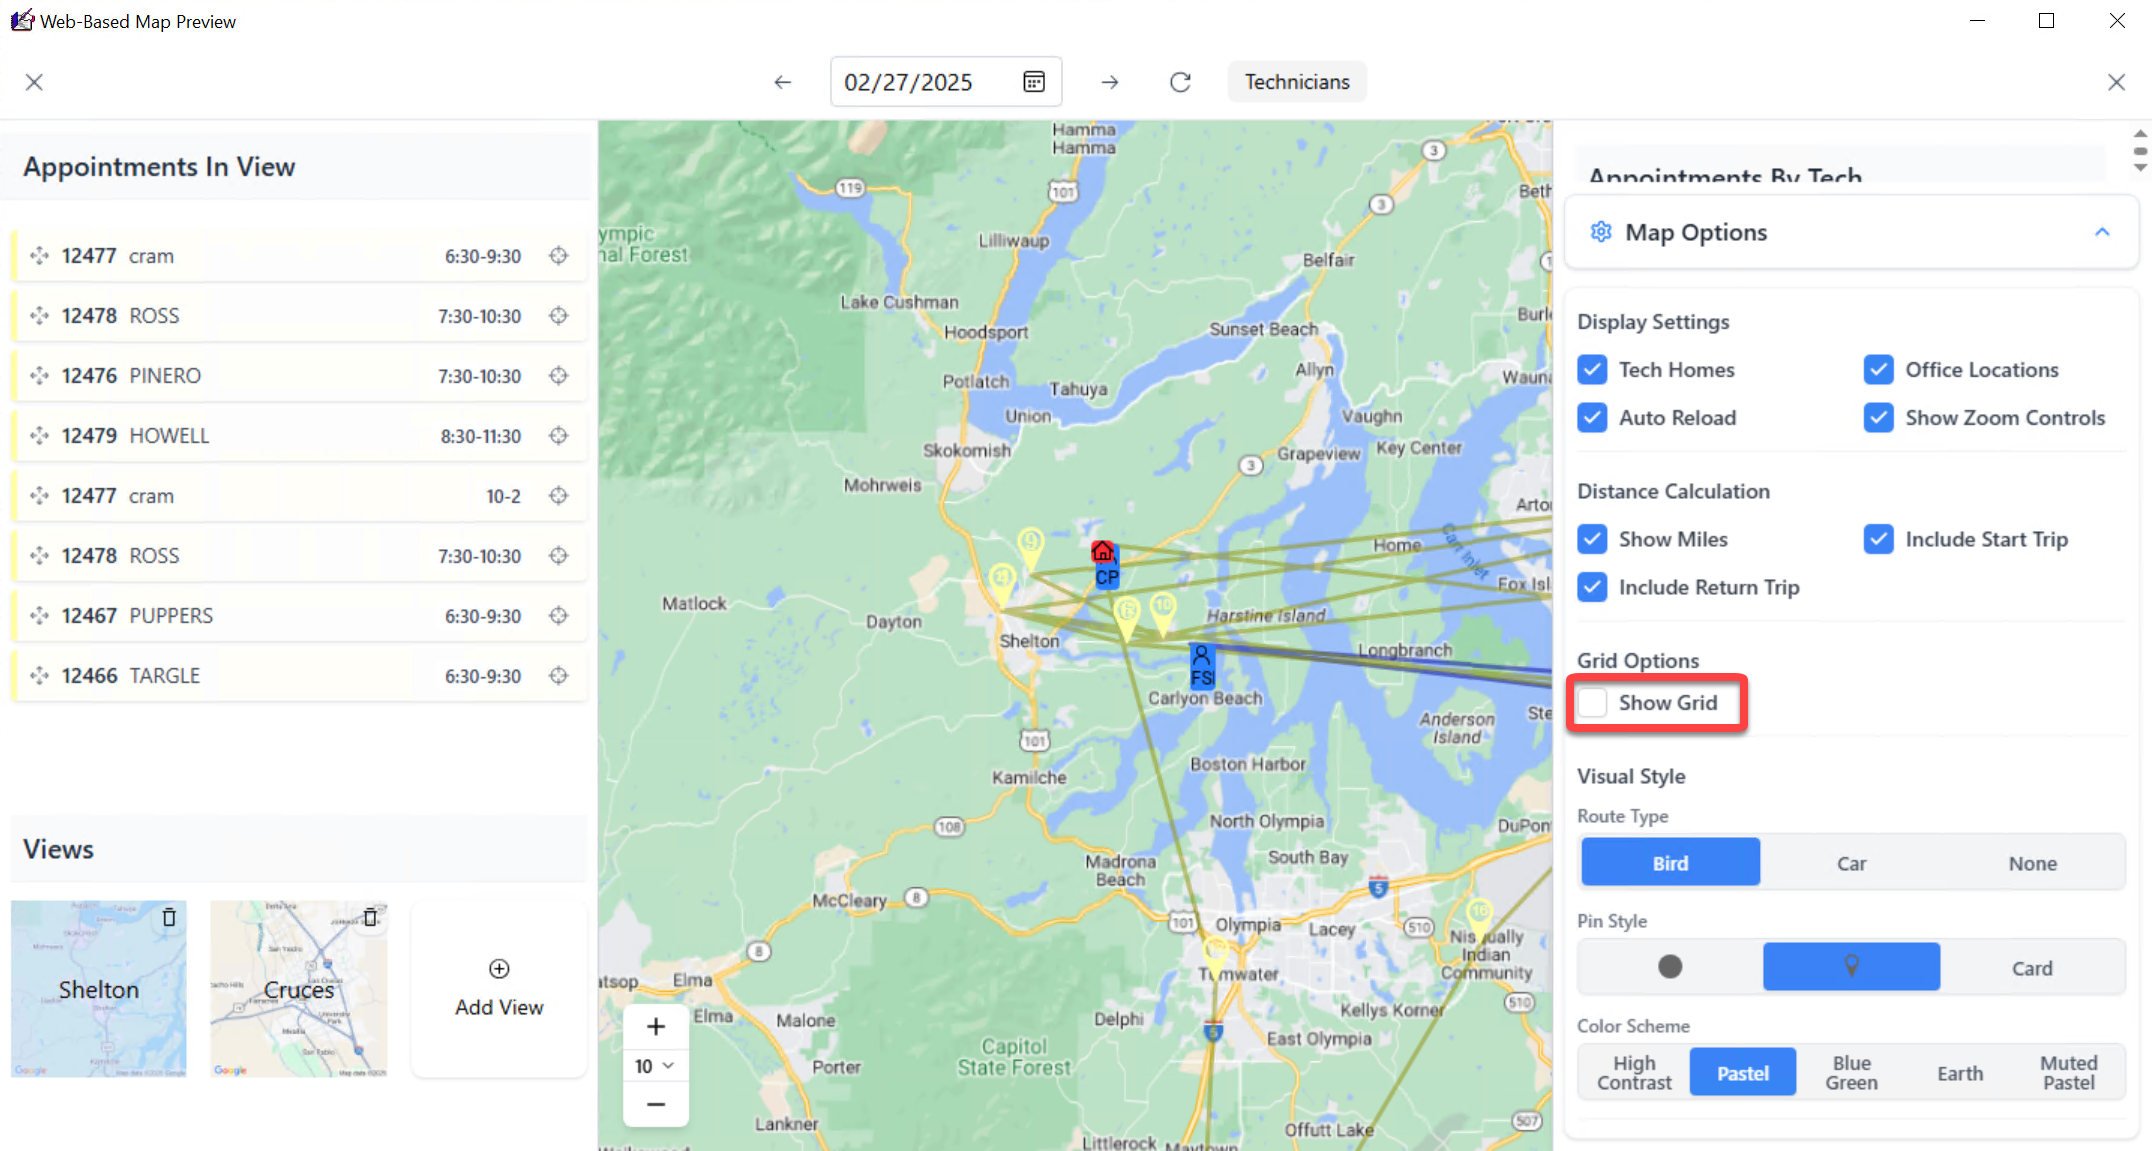
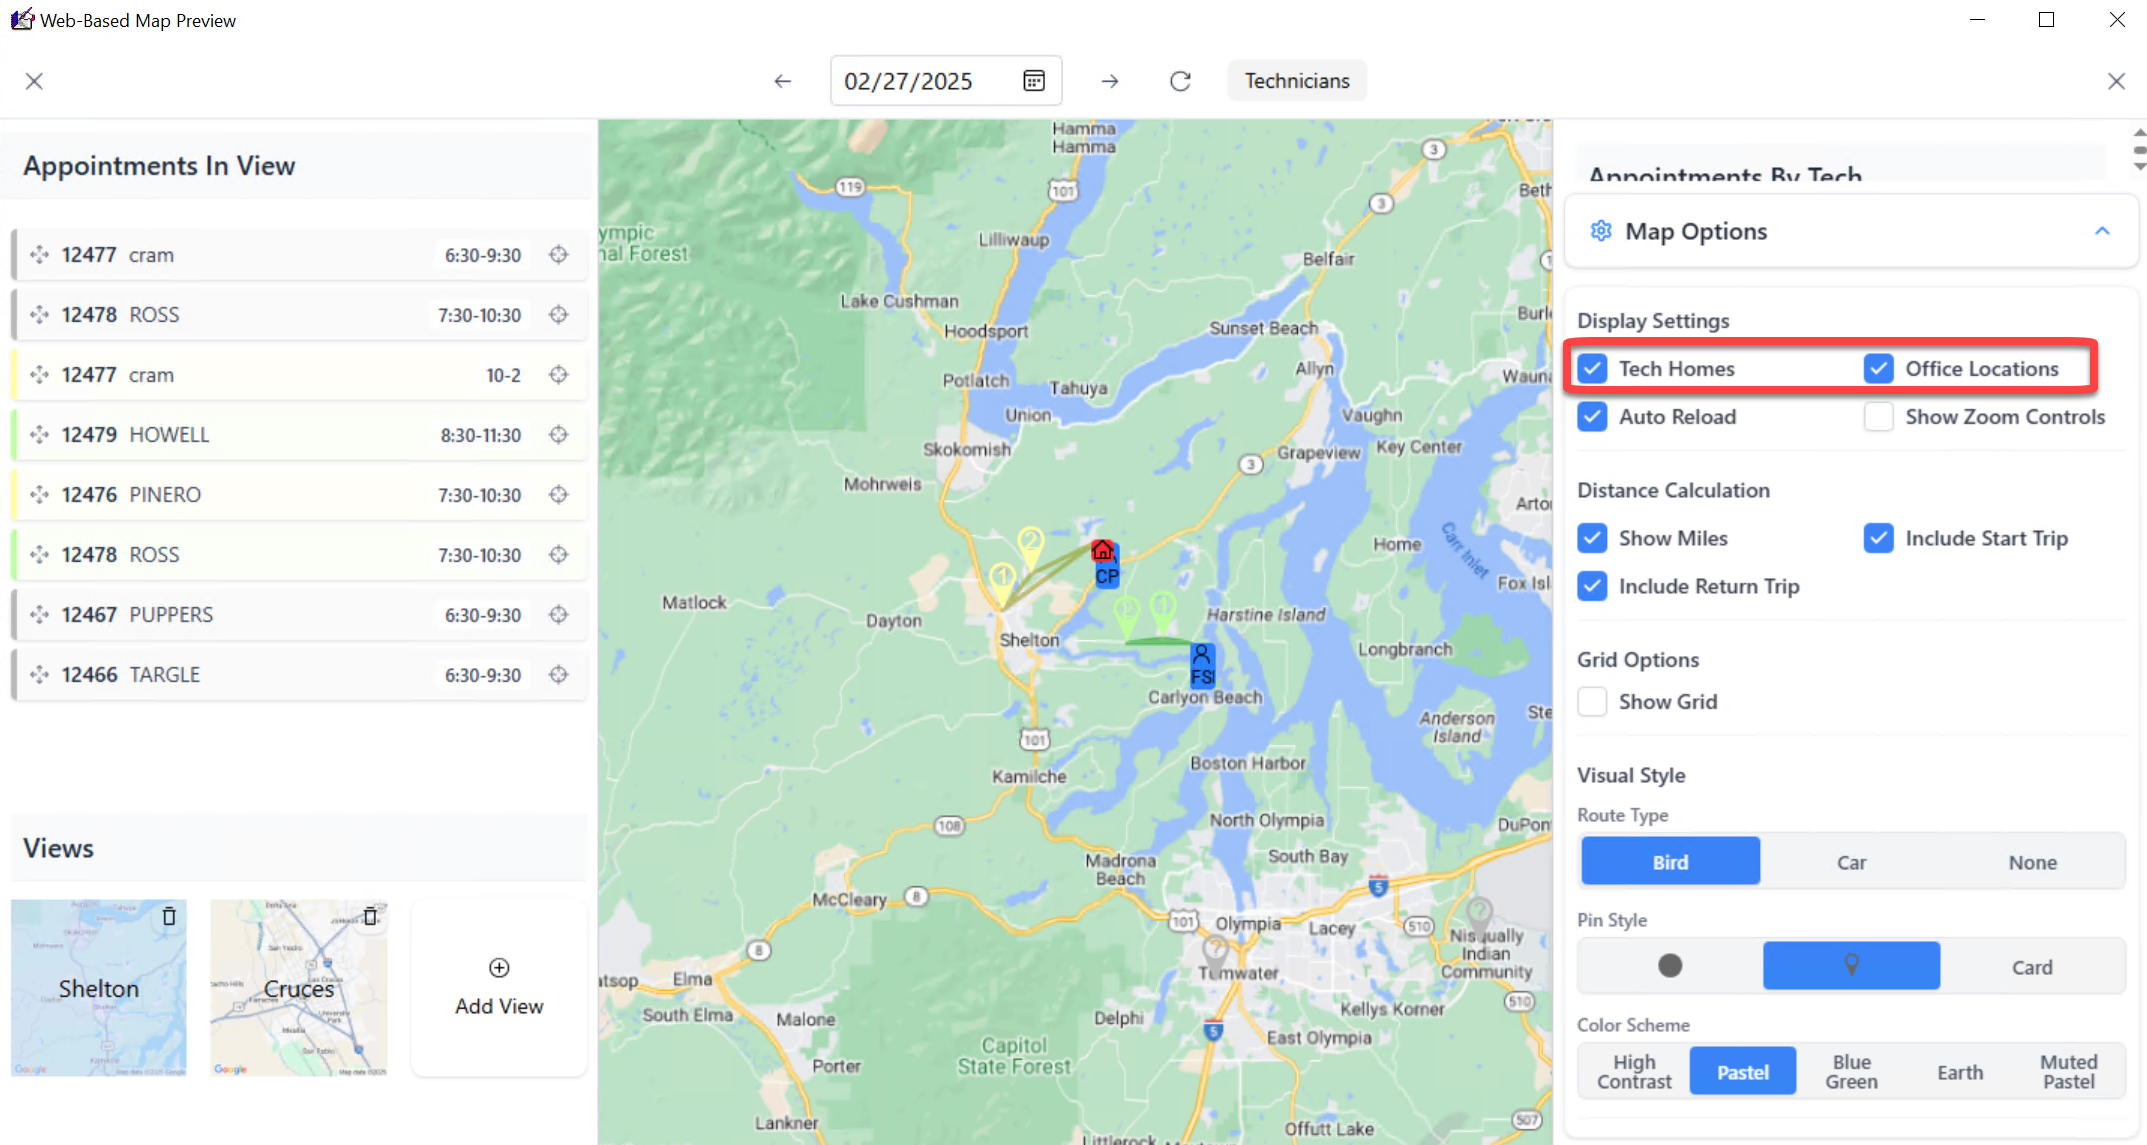
Configure whether or not to display Tech Home and Office Locations.
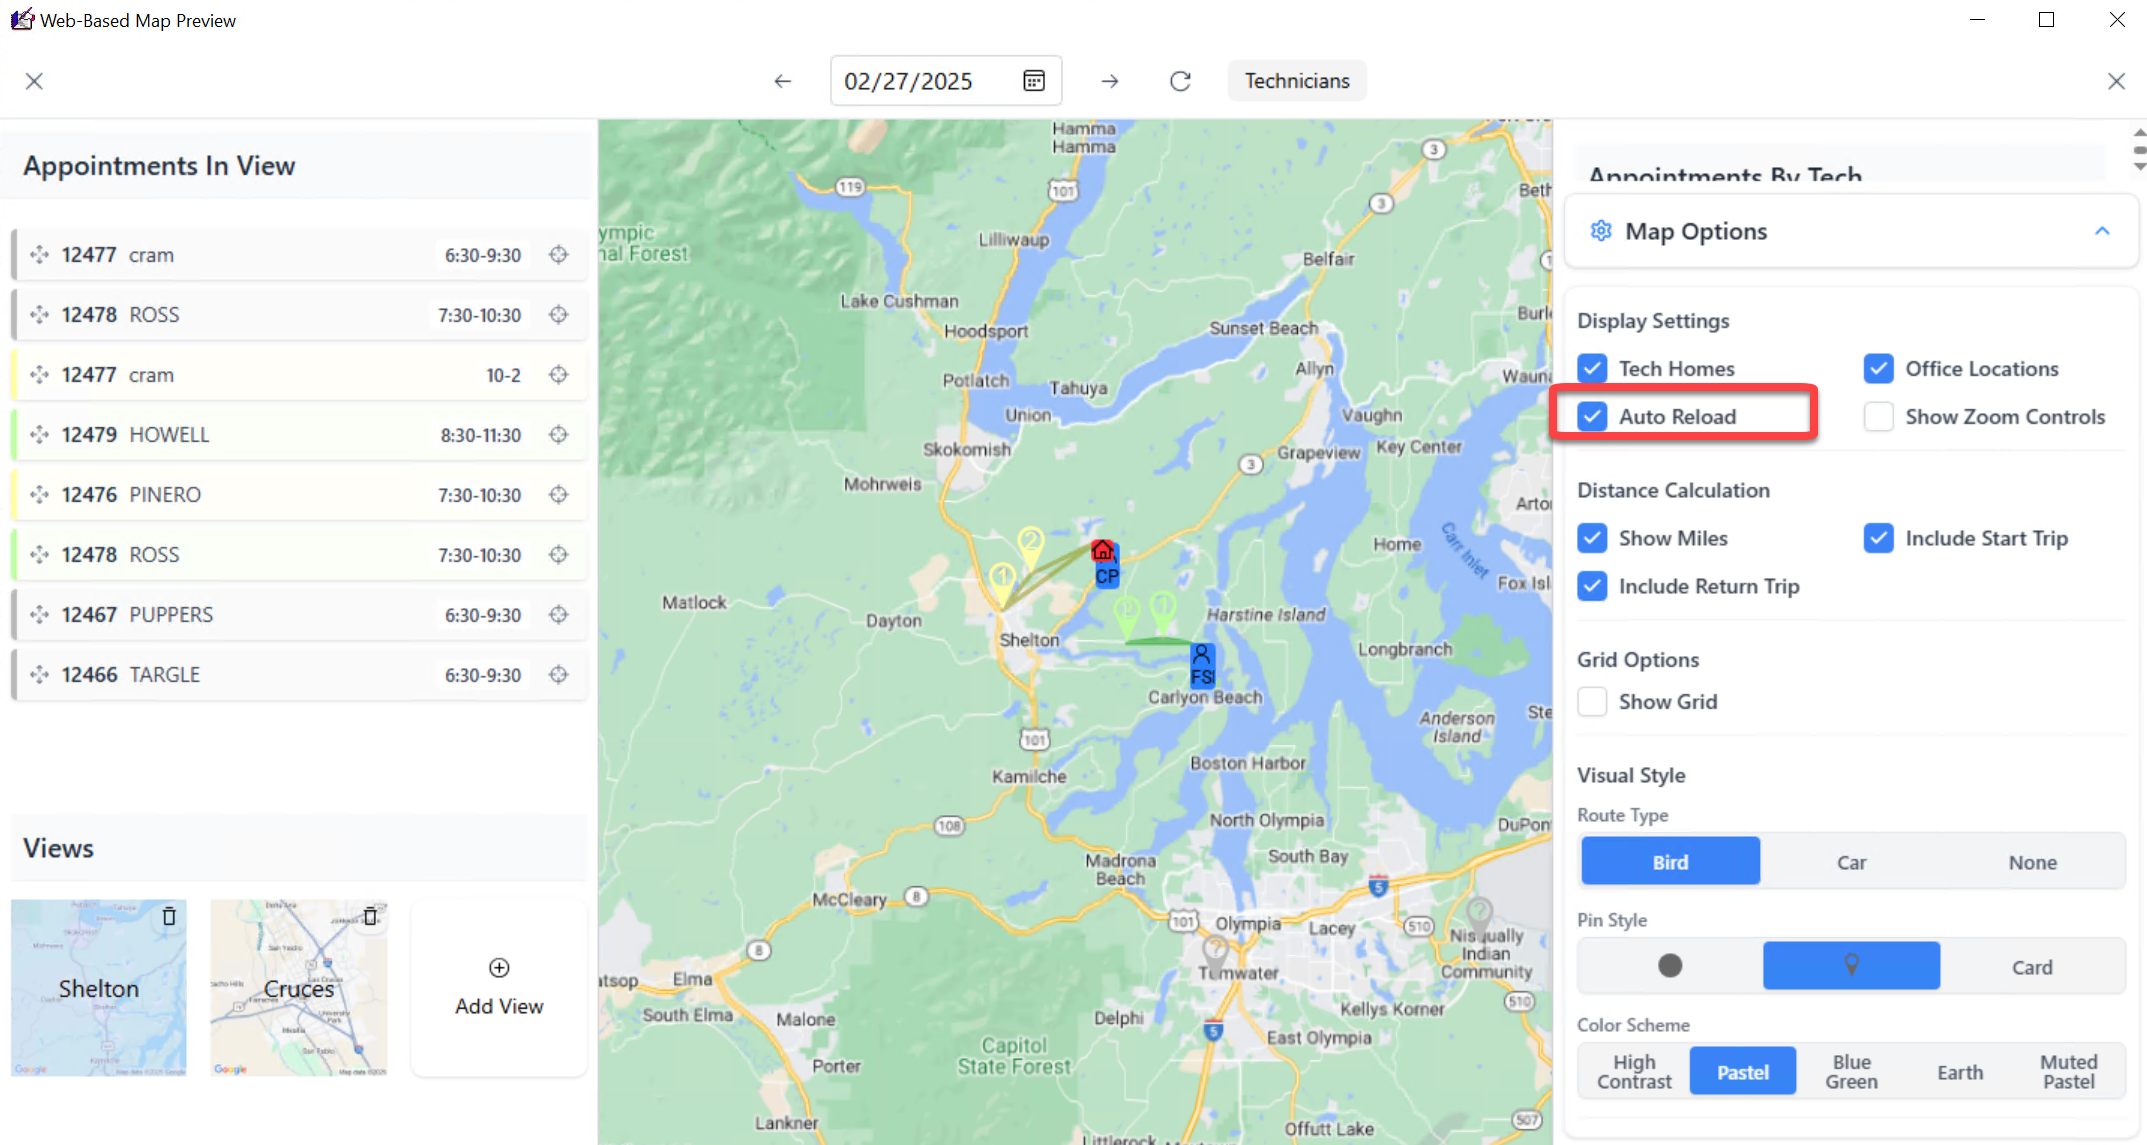
Enable Auto Reload (this automatically refreshes displayed appointments).
Show miles and optionally include start and return trips. (Technician home location needs to be inserted in the technician details window accessed from CTRL+F1 and clicking on the technician's name)

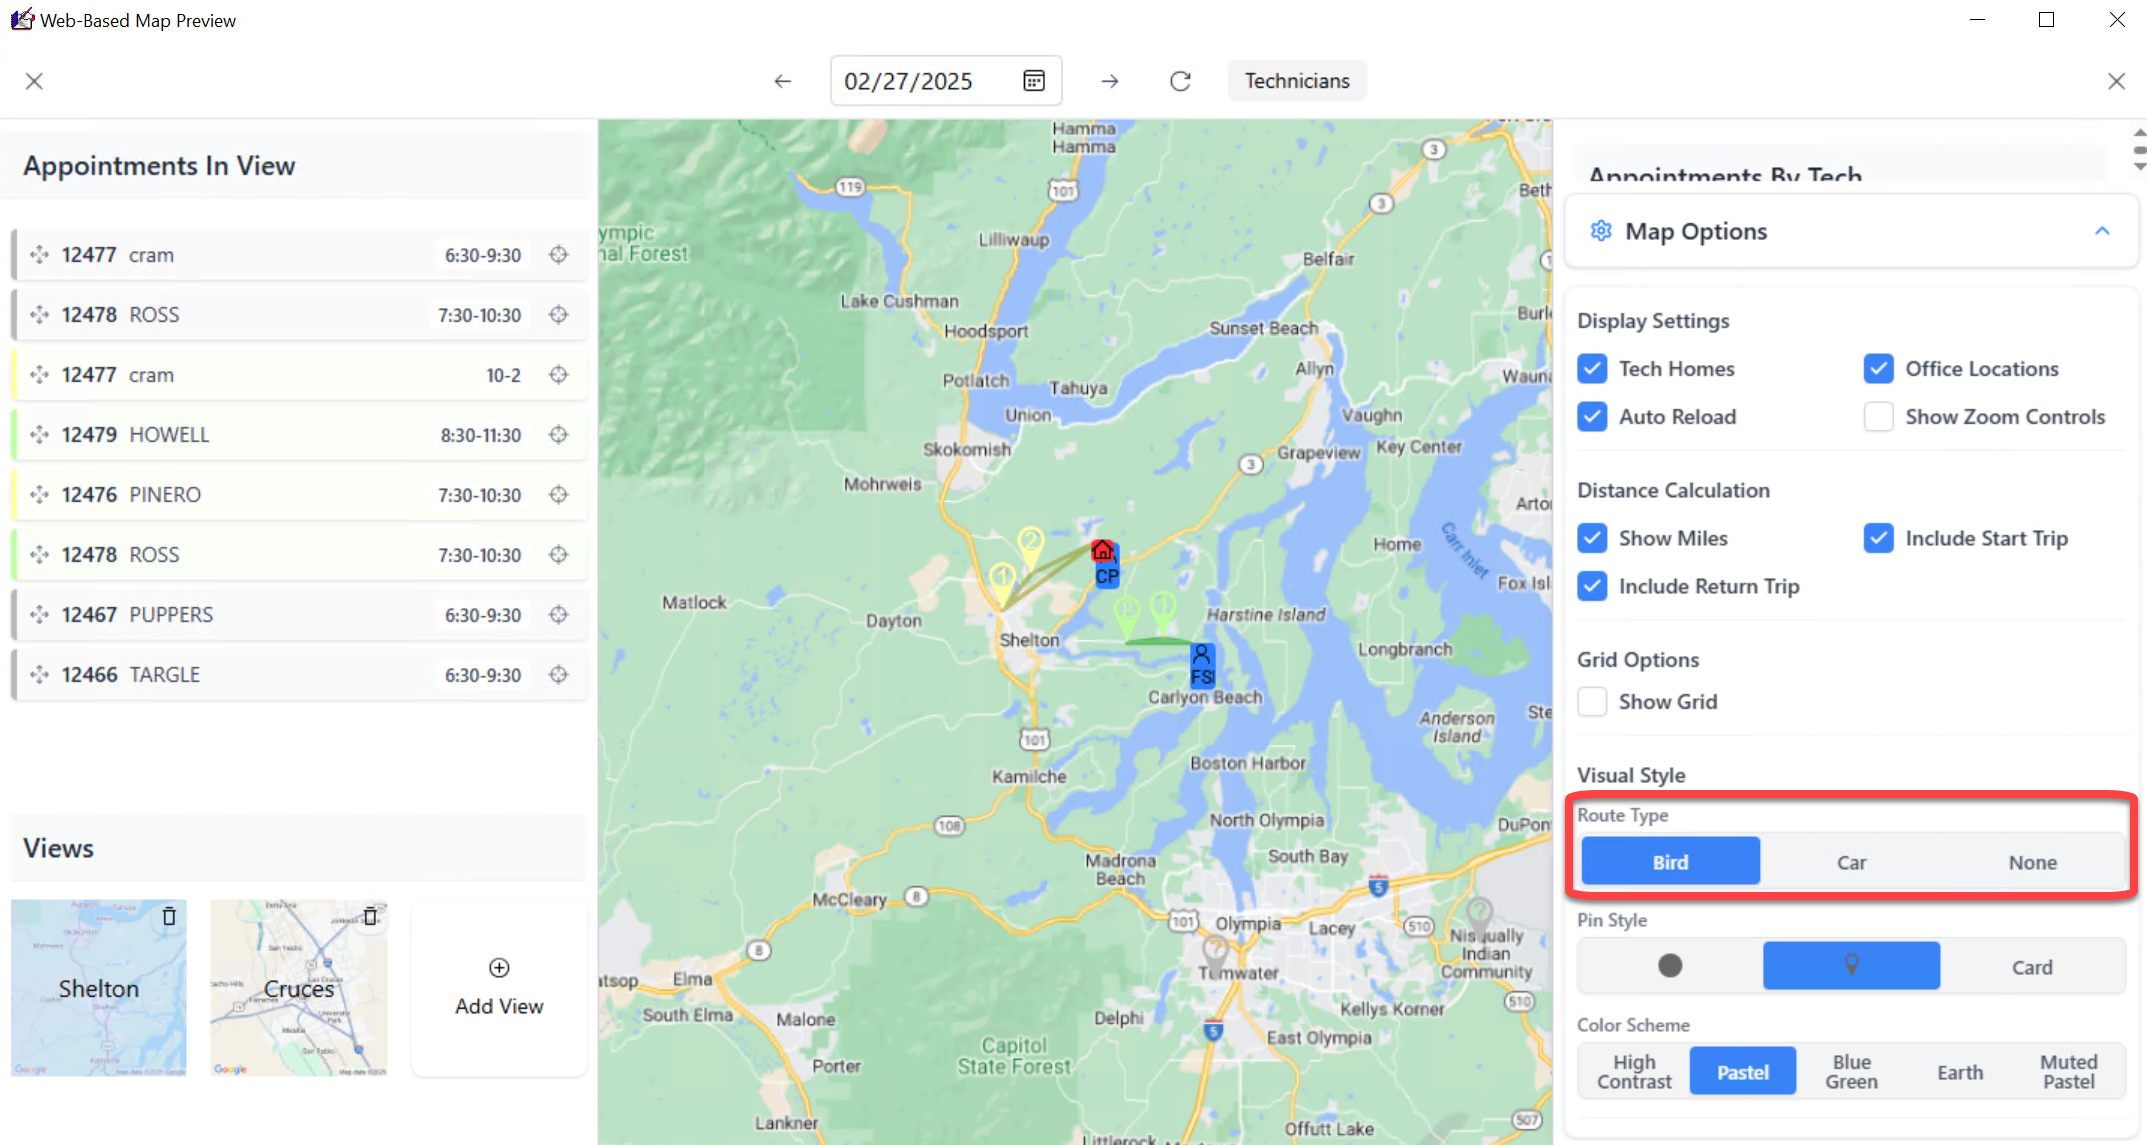
Choose how to display routing lines as Bird, Car, or None.
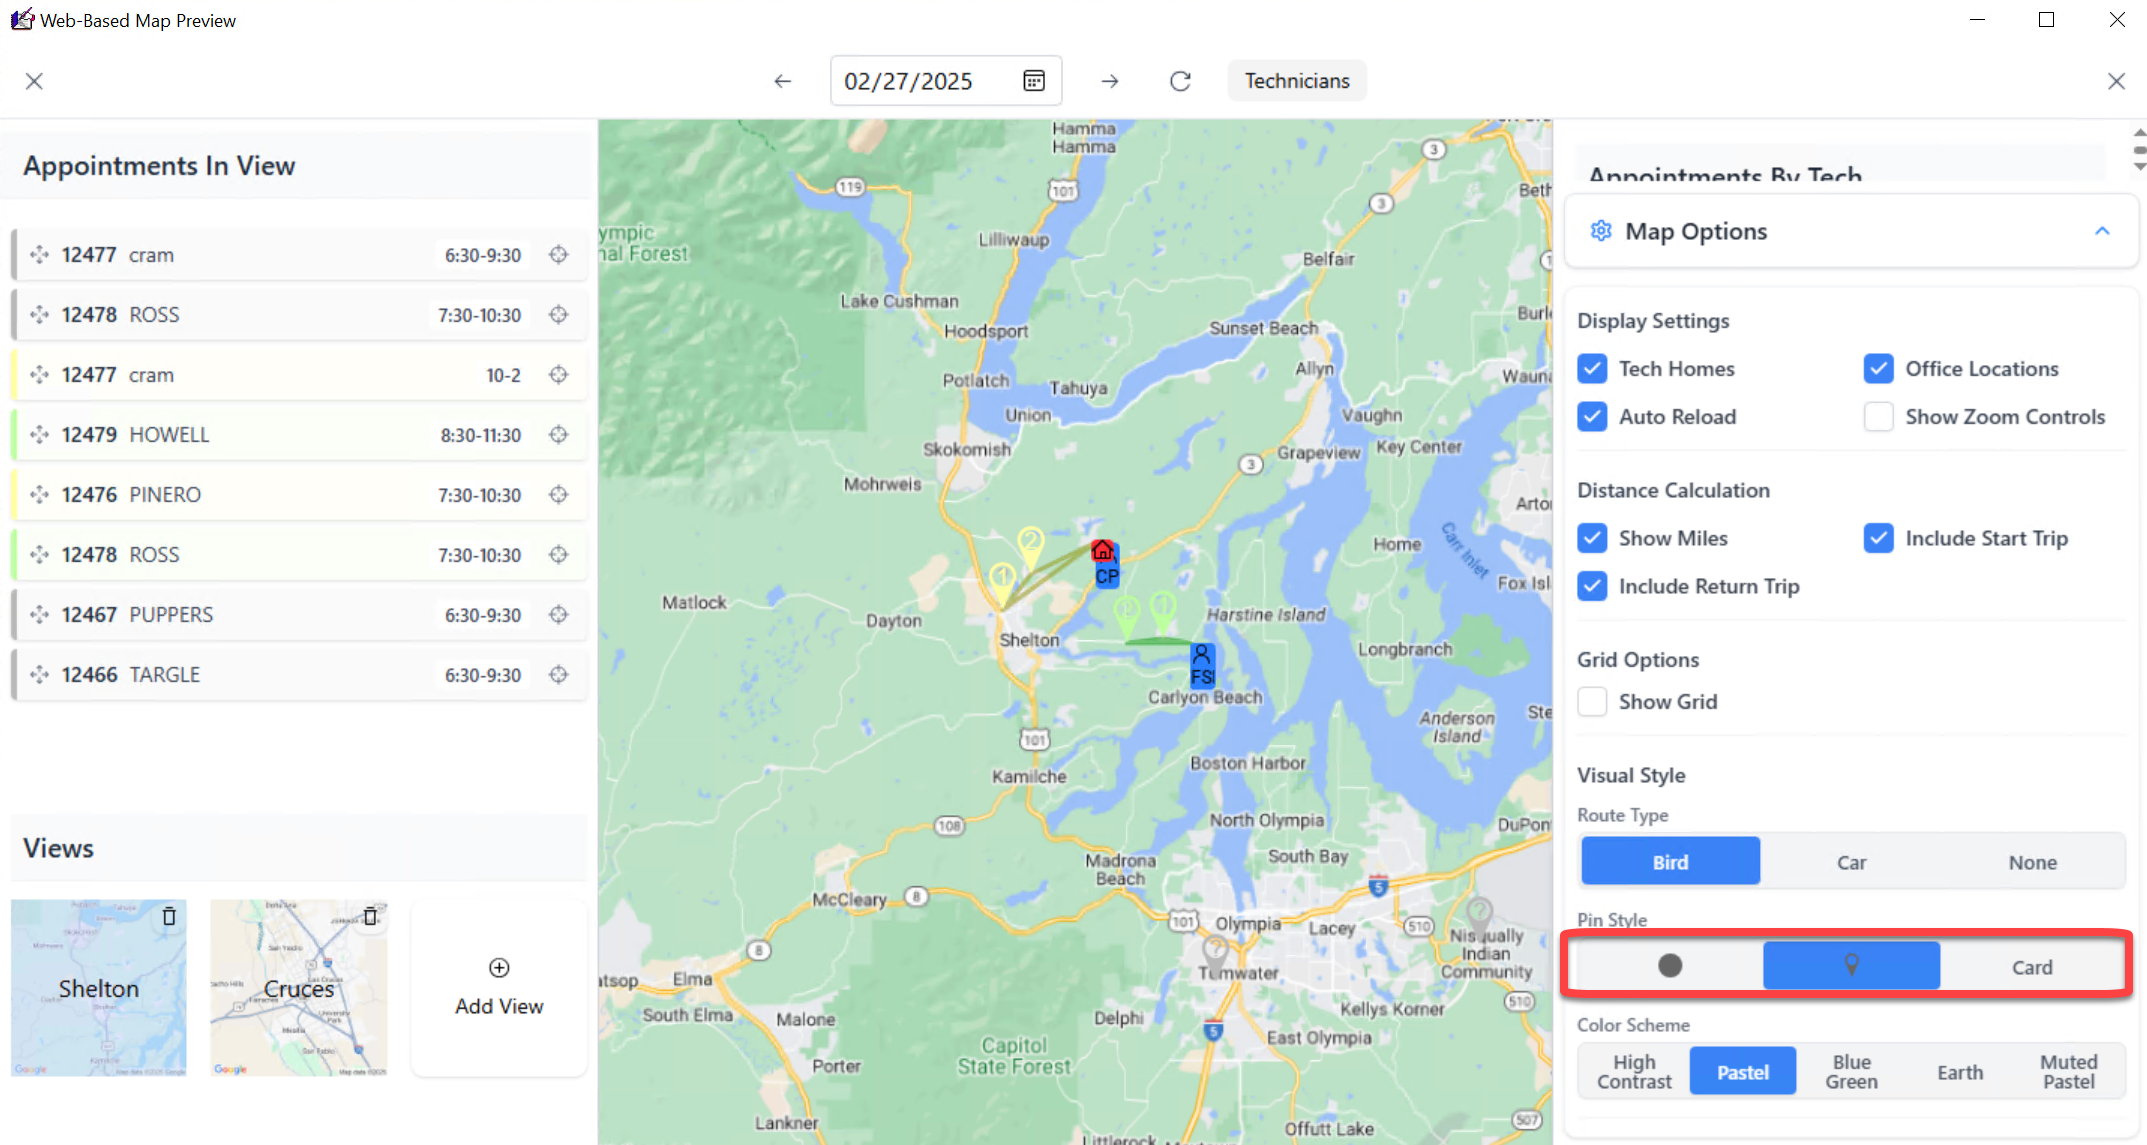
Select circle icons, pins, or cards for the map icons.
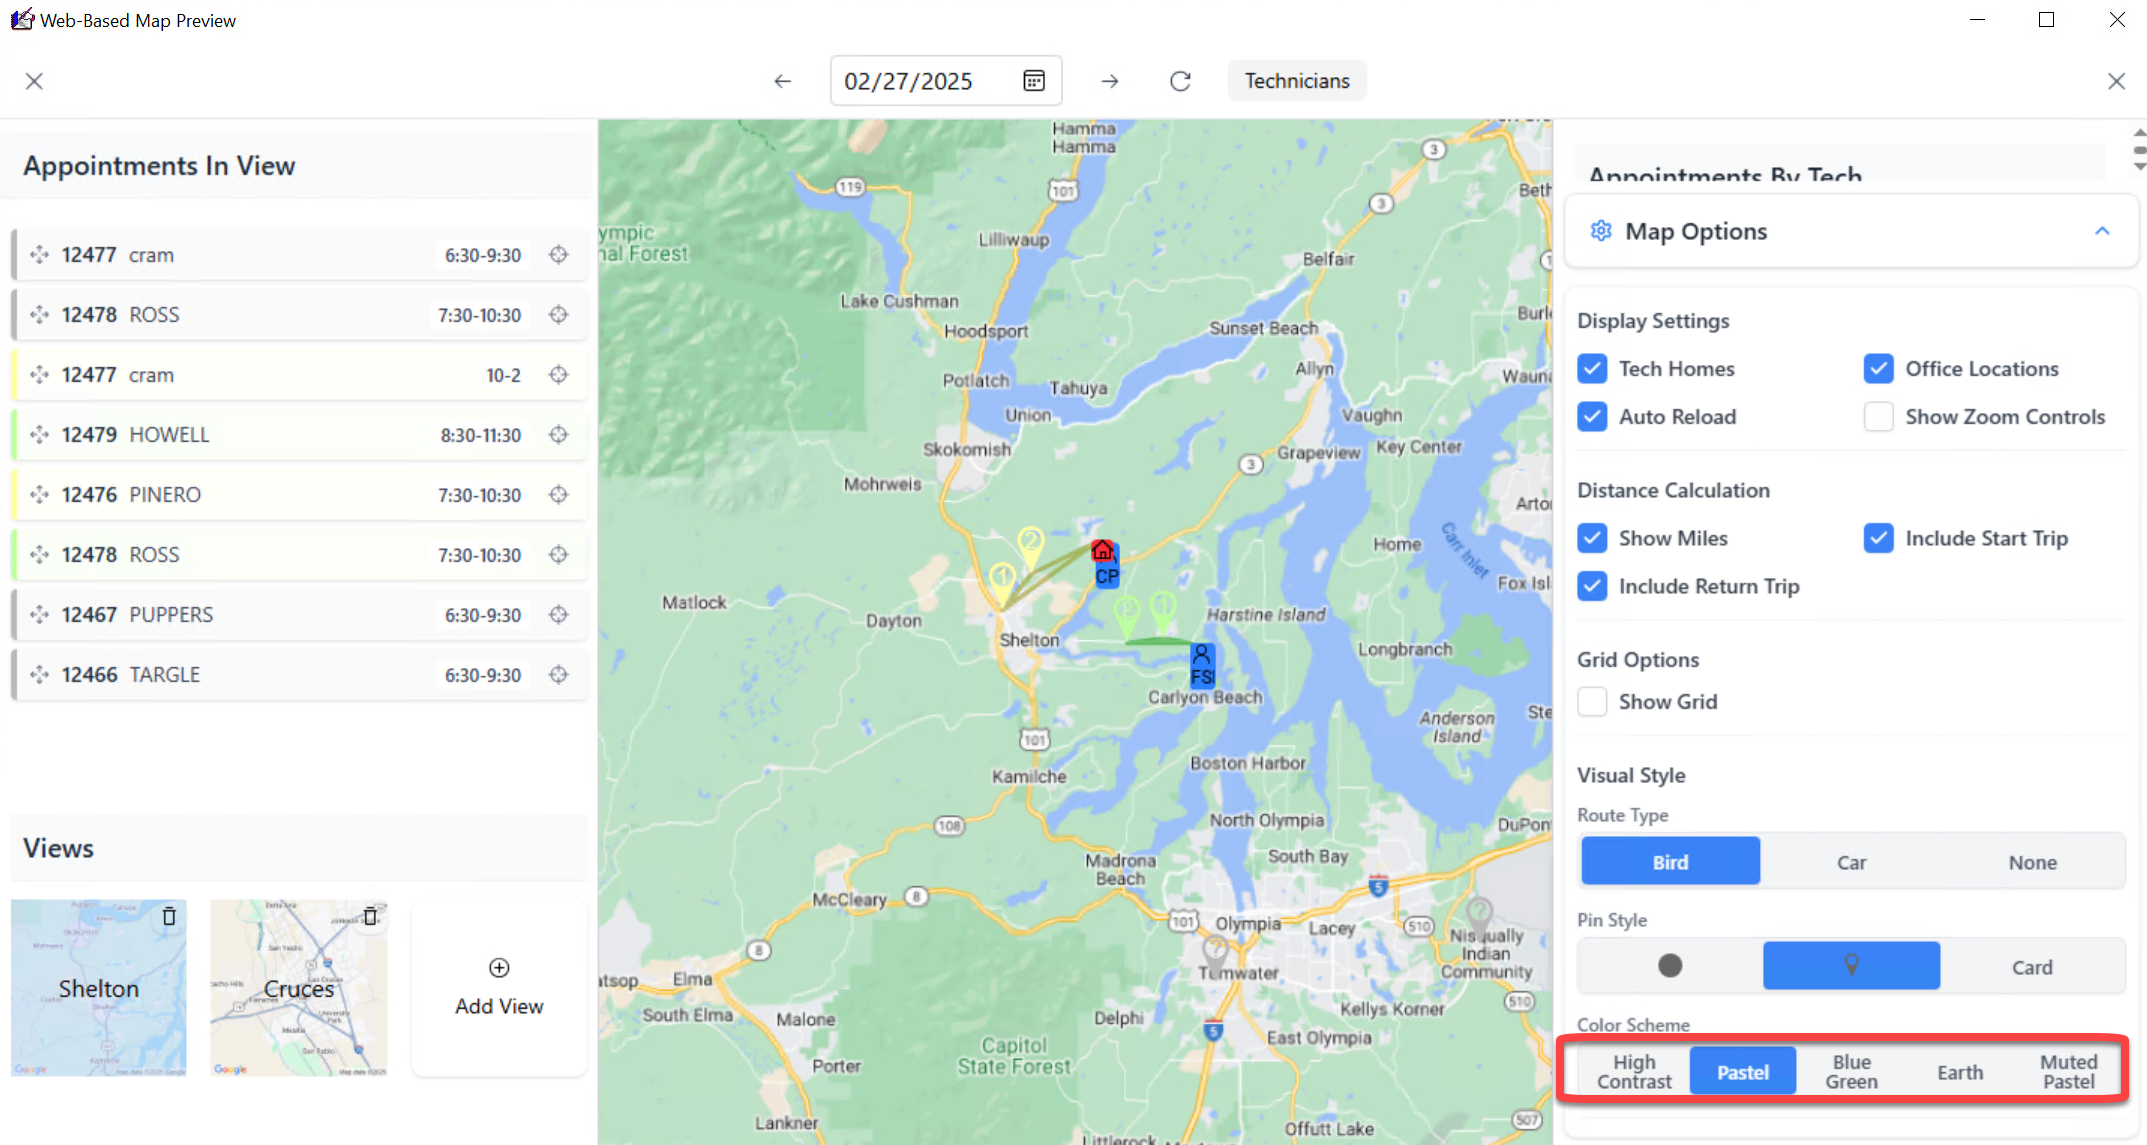
Select the display theme for the map image.
Legacy DispatchMap
If you need to disable the web-based version of the DispatchMap, follow the steps below.
Open the Settings Form (CTRL+F1).
Uncheck the box labeled, 'Enable Web-based Map Preview.'
Left-click on the button labeled 'DispatchMap' or press F5.
Use DispatchMap as usual.