Security Settings Form
The Security Settings Form creates and administrates user permissions for password-protected SD-Security contexts.
Security Settings Form navigation
Access the Security Settings Form by pressing (SHIFT + F11).
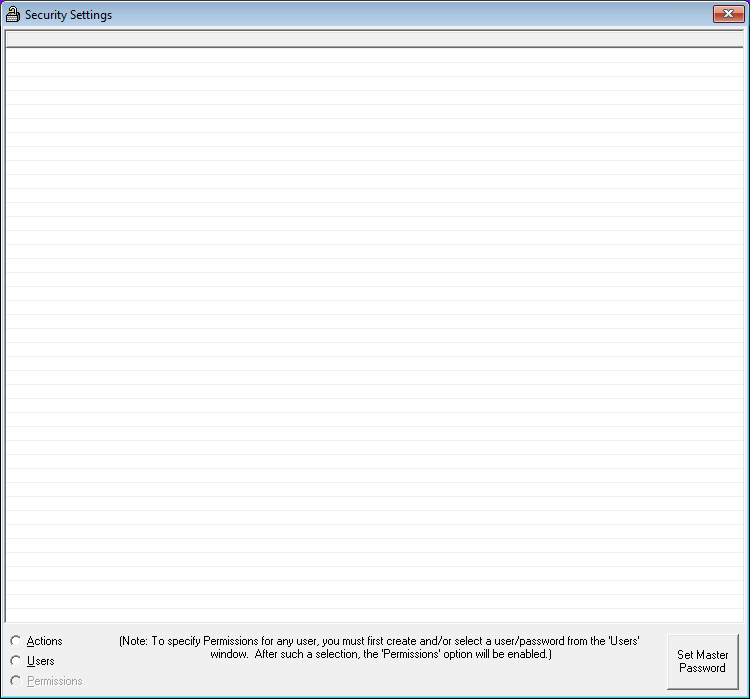
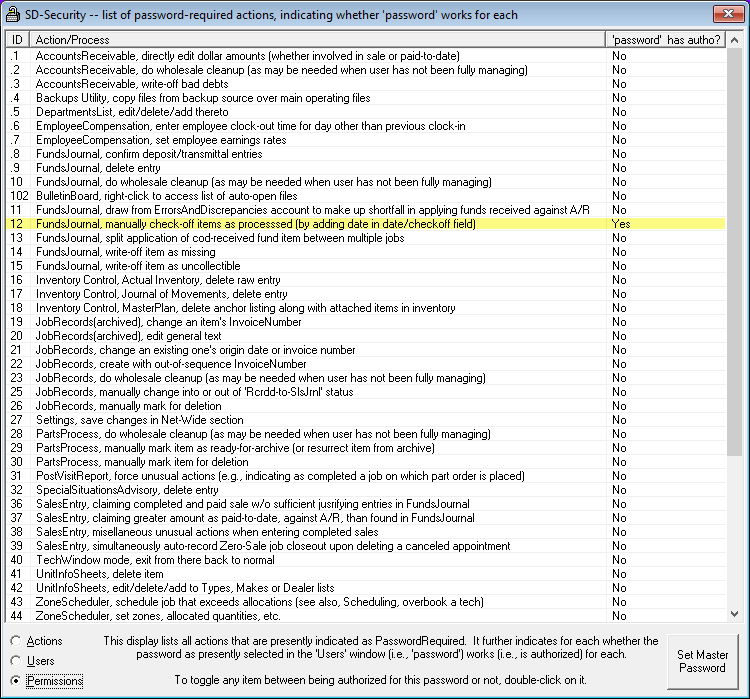
This is the Security Settings Form interface. Here, you control which actions require a password, create passwords for desk users, and manage permissions for individual users.
Actions
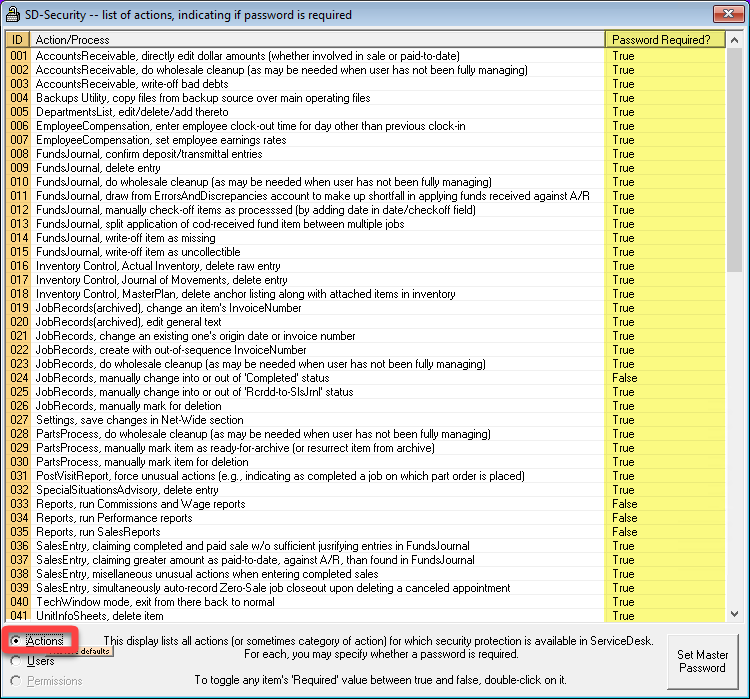
Selecting the 'Actions' radio button will load the list of actions.
The column labeled 'ID' is used to identify the SD-Security context number.
The column labeled 'Action/Process' describes the action or process.
The column labeled 'Password Required' on the right will have either a True or False value. Setting that value to True means that the action will require a password.
To change a value from True to False or vice versa, double-click on the True or False value in that column.
Move to the steps below under Users and Permissions or, press the ESC key, or click the 'X' in the upper-right corner to close the form and save your edits.
Users
Please beware that the password is on the left, and the user name is on the right.
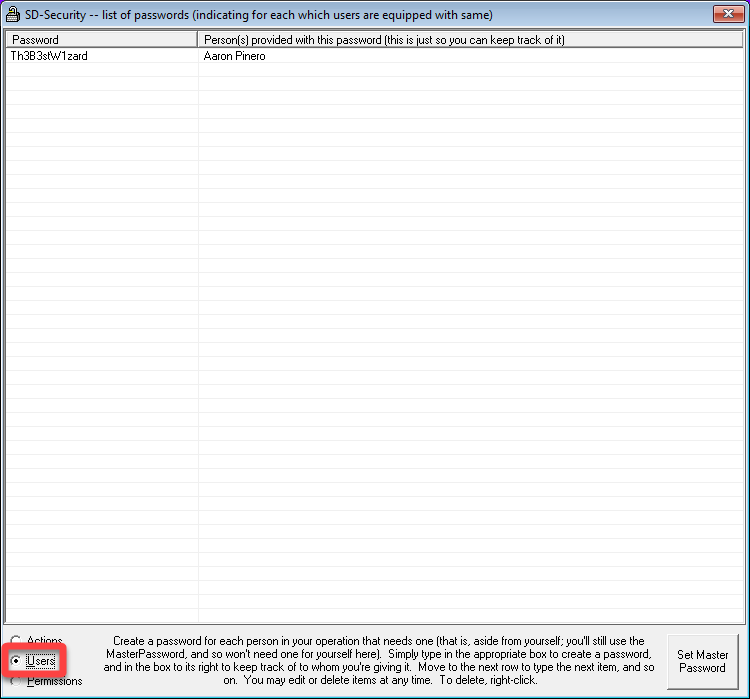
Selecting the 'Users' radio button will display the list of users with a password associated with their ServiceDesk desk user name.
The column labeled 'Password' is where you insert the user's password. There are no specific criteria for this password, but remember to practice good password creation (uppercase, lowercase, alpha, and numeric characters) for solid security. Instruct the user to keep their password secure and refrain from sharing it with others.
The column labeled 'Person(s) provided with this password' is where you provide the ServiceDesk user name.
Start by typing the password for a specific user in the first column. Press TAB to move to the next field.
Enter the ServiceDesk user name. This should be spelled precisely as their desk user name appears in the Settings Form (CTRL F1).
If entering another user name and password, pressing the ENTER key will move your cursor to the next line.
Move to the steps below under Permissions to set specific permissions for this user's password or, press the ESC key, or click the 'X' in the upper-right corner to close the form and save your edits.
Permissions
Ensure your cursor is active in the password field for the specific user in the step above (Users) BEFORE clicking on the 'Permissions' radio button.
This is how you select Permissions for that specific user.
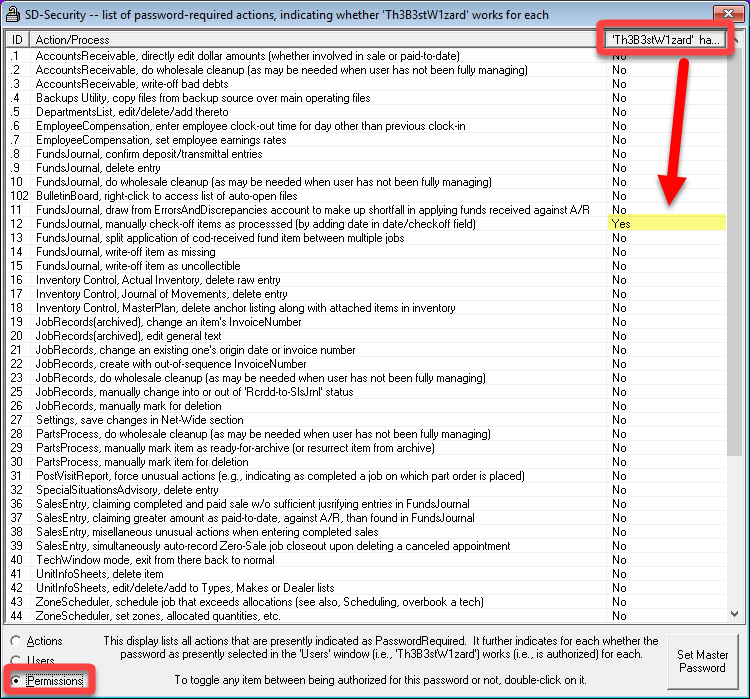
Selecting the 'Permissions' radio button will display all of the actions and processes that are set to require a password (as configured in the Actions tab).
The column labeled 'ID' identifies the SD-Security context ID.
The column labeled 'Action/Process' describes the action or process that is password protected.
The third column will determine whether or not that specific user password will allow the task to be completed. The user password will not authorize the completion of the action or process if it is set to 'No.' The user password will authorize completing the action or process if it is set to' Yes.'
To change a value from No to Yes or vice versa, double-click the No or Yes value in that column.
Press the ESC key or click the 'X' in the upper-right corner to close the form and save your edits.
An example scenario
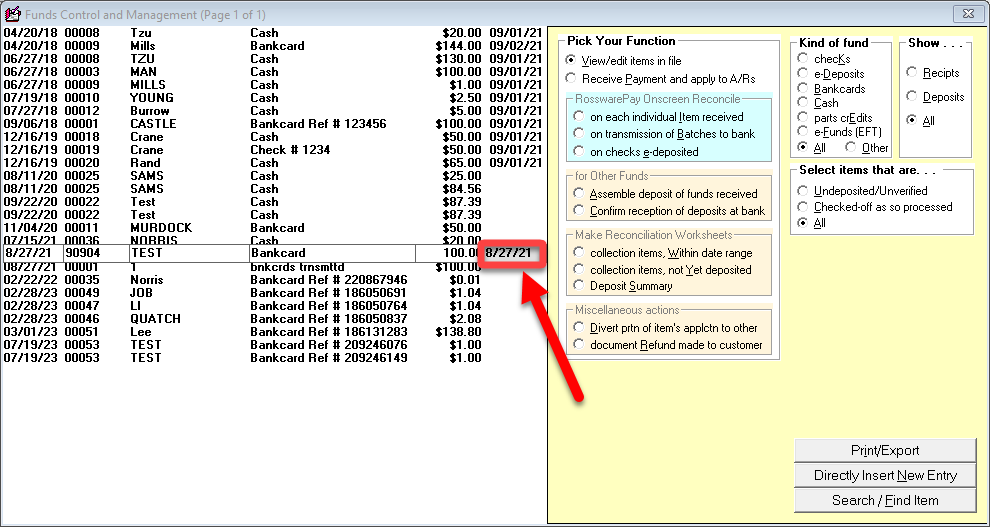
In this example, our user wants to remove the date indicating a Funds Journal entry was deposited. This is a highly unusual action; in rare instances, a manager may deem this necessary to correct a clerical error.
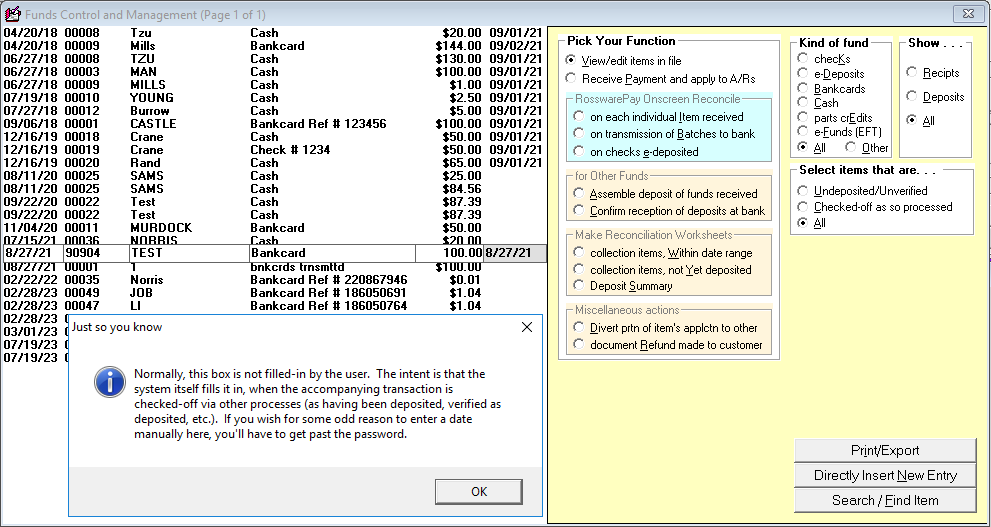
When attempting to remove that date, the desk user will be given a message to let the user know they must put in a password.
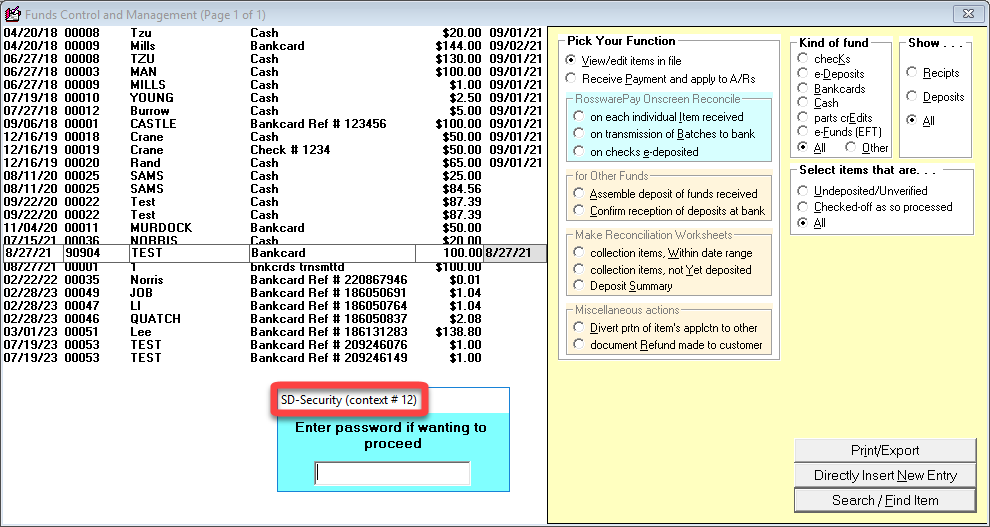
In the password prompt that follows, we will be able to observe the SD-Security context number.
The configuration in the Security Settings Form determines whether the user's specific password will be allowed to complete this task.
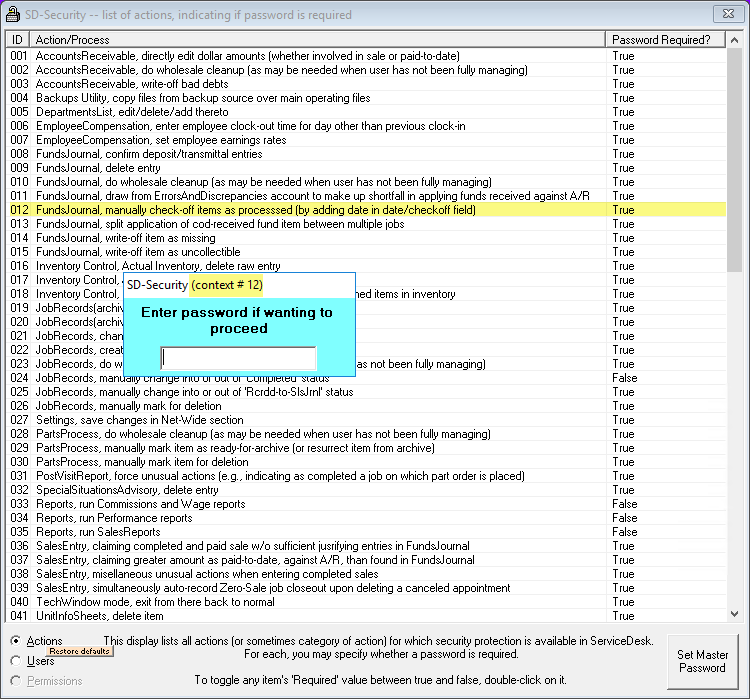
First, we match the SD-Security context number to the user's permissions list. The image below shows that the context will require a password.
In the image below, we will see the user permissions for this user are set to Yes in the column labeled 'password has autho?'. The user can complete this task after inputting their password into the prompt.
Master Password
It is essential that ONLY the business owner or a high-level manager know the Master Password. It should NOT be provided to other staff.
Critical points regarding Master Passwords:
A Master Password is vital to keep your data secure.
Anyone with the Master Password can change the Master Password.
Anyone with the Master Password can change any and all security settings in ServiceDesk.
The Master Password can be entered into any security prompt within ServiceDesk, authorizing the action to be completed.
The Master Password is the only password that can be used to authorize an SD-Security context 0 Prompt.
Setting the Master Password.
Open the Security Settings Form (SHIFT + F11)
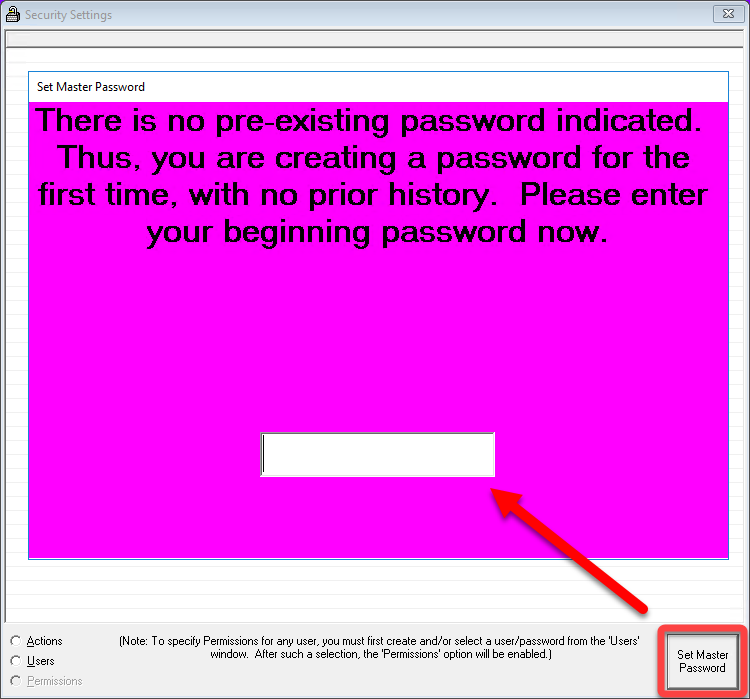
Click on the 'Set Master Password' button.
Type in a secure Master Password. You will be instructed to type it a second time to ensure it is typed precisely as you intended.
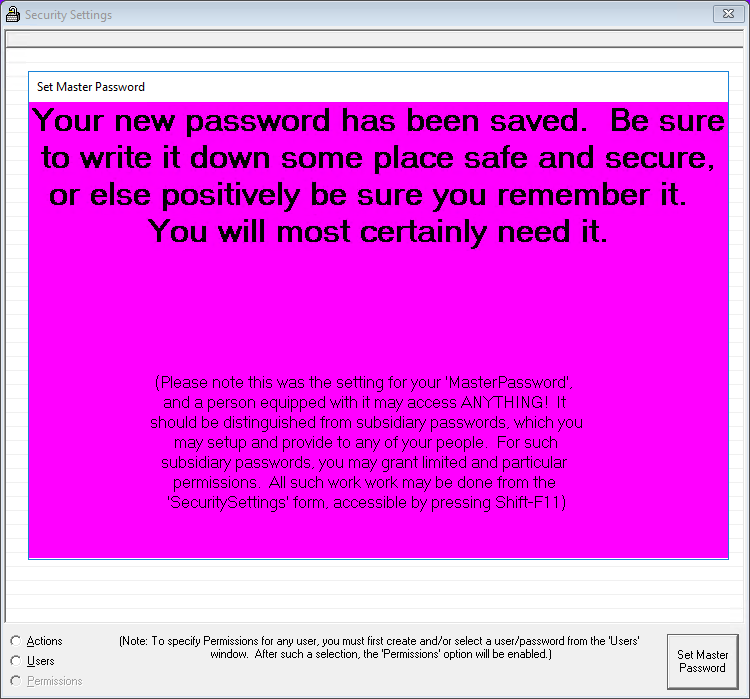
If done correctly, you will receive a confirmation that your password has been saved. Once you see the image below, you can exit the window.
Resetting the Master Password.
Open the Security Settings Form (SHIFT + F11).
Click on the 'Set Master Password' button.
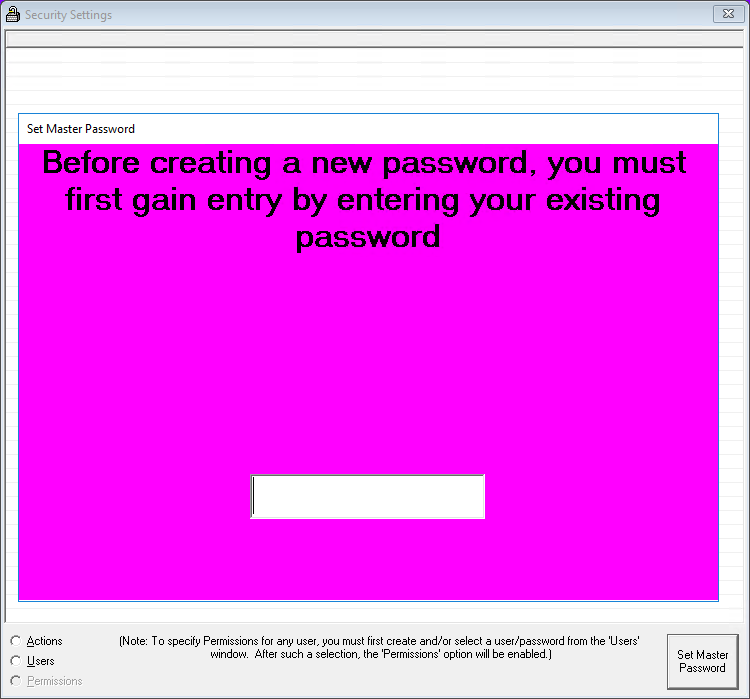
The following window will inform you to change the Master Password you must input the current Master Password.
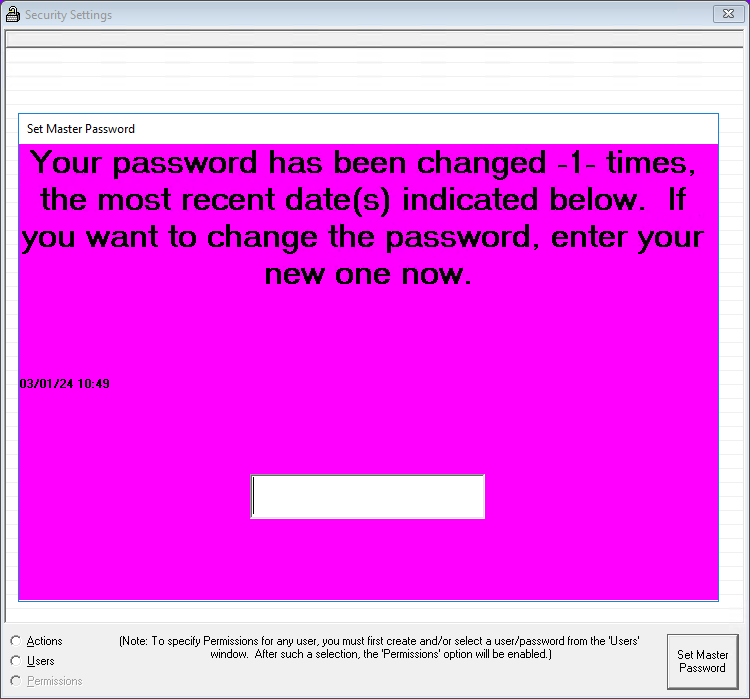
If the current Master Password is input correctly, you will be asked to type a new Master Password. This screen will also inform you how many times the Master Password has been changed and provide the dates those changes we made.
What if I forgot my Master Password?
For your security and data safety, the support team cannot reset or change the Master password without management authorization. We appreciate your patience and understanding.
What do I do if the Master Password has been lost, forgotten, or changed unexpectedly:
The business owner or high-level manager must contact our support team.
The support team members will reach out to Rossware Management.
Rossware Management will assist the business owner or high-level manager.
Hints and tips
A desk user should never share their password with other users.
Make passwords unique and refrain from including the desk user name in the password.
Refrain from using passwords with patterns or easy-to-guess characters (i.e., desk1, desk2, desk3, and so on).
You can sort any column by clicking on the column header.
Don’t store passwords in insecure locations such as the ServiceDesk Rolodex.
You can easily target a specific SD-Security context by referencing the context number at the top of the password prompt.

