Creating multiple NARDAs for handling additional parts
There are instances where a job may contain more than fifteen parts used for the repair. This guide will assist you through the process of handling this situation.
Steps to create multiple NARDAs
In the NARDA FinishedForm context (Alt+F4), you may save different versions of a ticket under the same Invoice/Job Number.
Creating the first NARDA
From the JobRecord (F7) load the NARDA FinishedForm by clicking on Print Options > F for 'a Finished-Form Document' > Press N for 'Narda'.
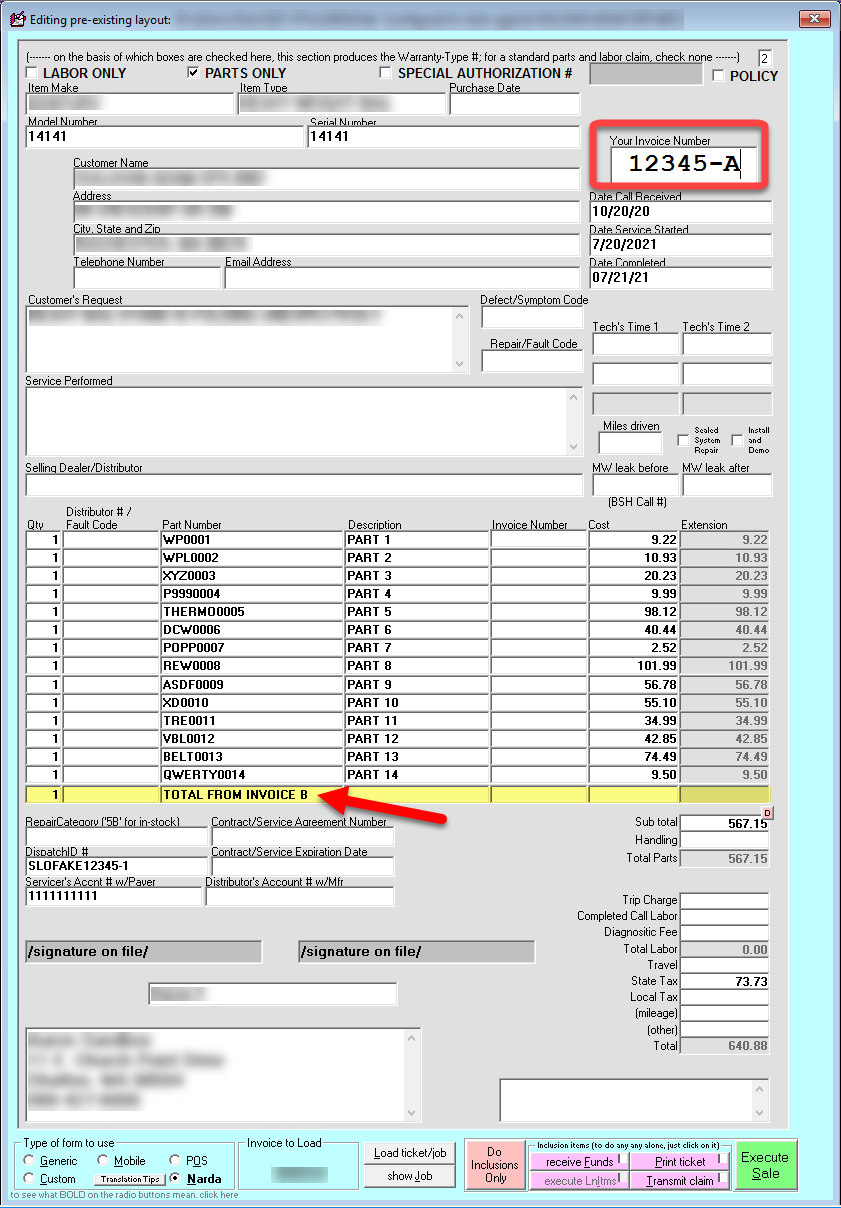
Formulate the contents of the NARDA as desired, populating the first fourteen parts line items per normal.
In the fifteenth parts line, type "Total from Invoice B." Leave the parts cost for this line item blank for now.
In the NARDA's InvoiceNumber box (top-right corner), add a hyphen and the letter A.
For example, change "12345" to "12345-A".
Invoke a save of the current NARDA.
So long as you've retained the same base number, and made sure the first character immediately following is non-numeric, the system will save your work as an independent edit.
Next time you go to load that form type with that particular job number, the system will ask which of the edits (if any) you want to load.
Creating the second NARDA
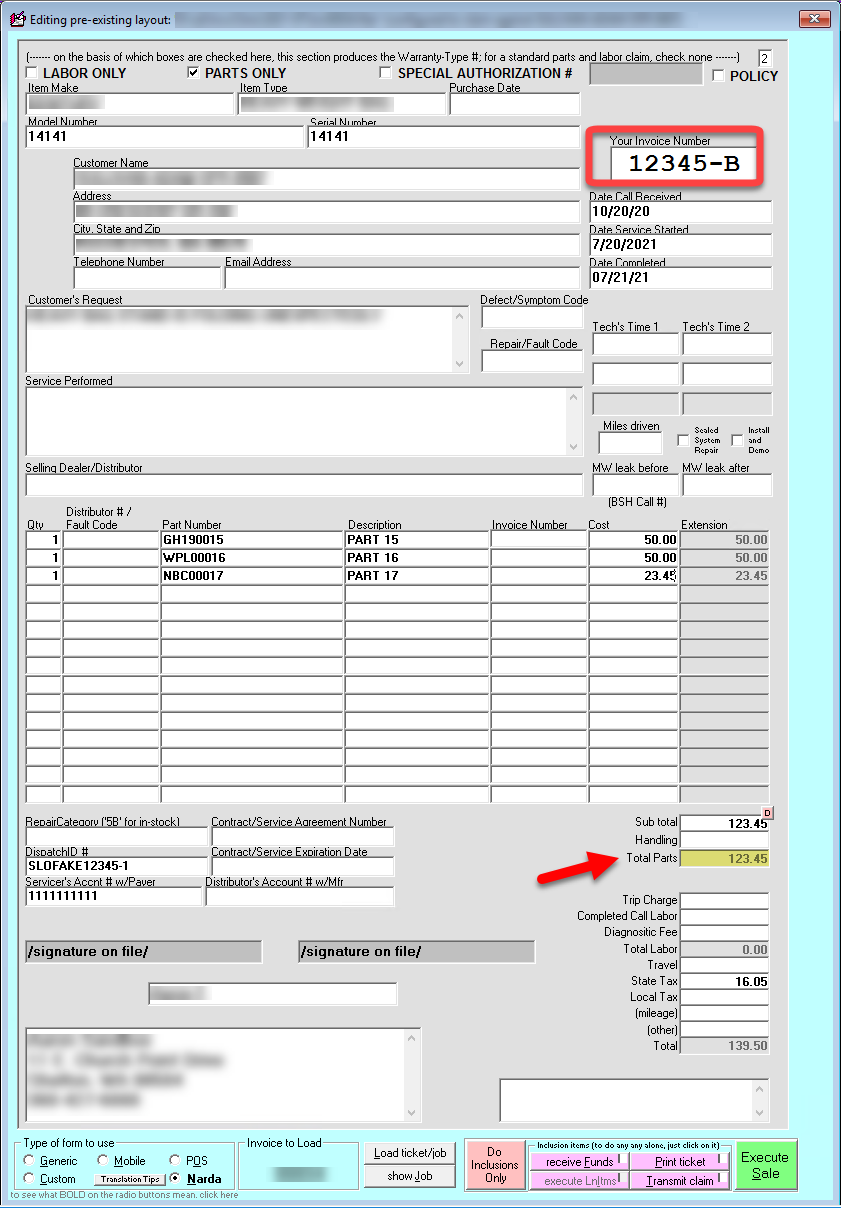
After saving 12345-A, change the invoice number from 12345-A to 12345-B.
Remove the fifteen line items from the parts line item section.
Populate the parts line items with the parts that could not fit on 12345-A.
Note the total value of the parts from 12345-B.
Invoke a save for the NARDA you are currently working with (12345-B).
Finalizing the first NARDA for warranty submission
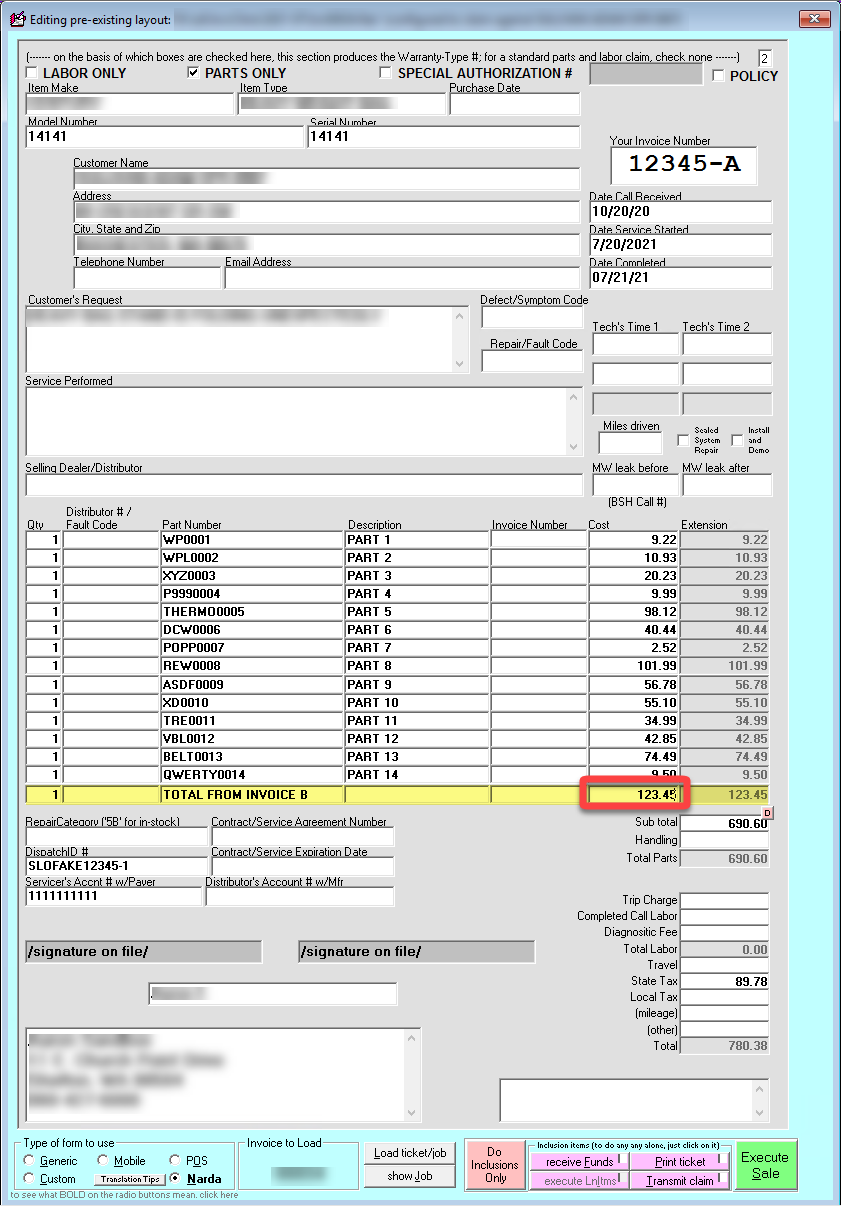
Click on "Load ticket/job" button in the lower middle portion of the finished form.
Load the saved NARDA 12345-A.
Insert the total value of the parts from 12345-B into the parts cost field of the fifteenth parts line item in 12345-A.
Verify all other information is accurate and ready to submit for a warranty claim.
Submit the NARDA for the warranty claim as you normally would.
You must submit the additional parts manually.
You will need to log into the website for the entity that you submitted the claim to. Once you have logged in and located the submitted warranty claim, it will be necessary to manually add each of the parts listed on 12345-B. This is due to the claim submission channels only allowing a set number of parts line items.


