ServiceDesk - Vendor management
Enhanced vendor management
From the start in ServiceDesk, there has been a simple list of your vendors. This list lets you choose from a drop-down when you order or receive an item to show which vendor is involved.
Please make sure to create this list as needed. If the vendor you need isn't on the list, you type the name or abbreviation you want. A dialog asks if you want to add this vendor to the list. If you say yes, the dialog asks for the full name if you typed an abbreviation, or vice versa.
This system has been so simple that we never provided a way to edit the list later. Historically, there has been little demand for more features.
Recently, there has been a need for more options.
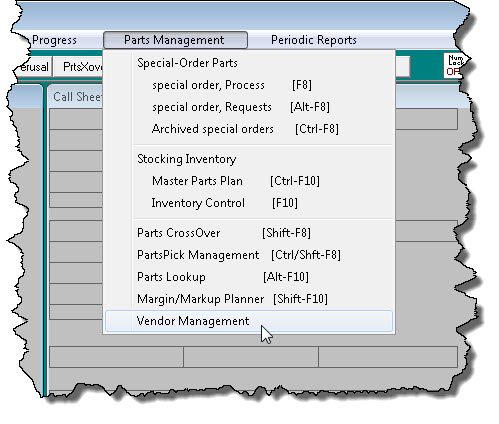
So, there is now a new option in the MainMenu, as shown here:
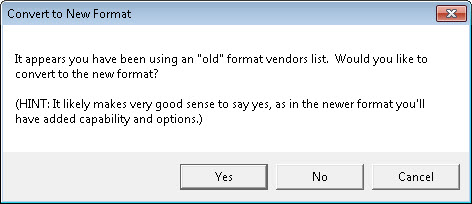
When you first pick that option, you'll see this dialog.
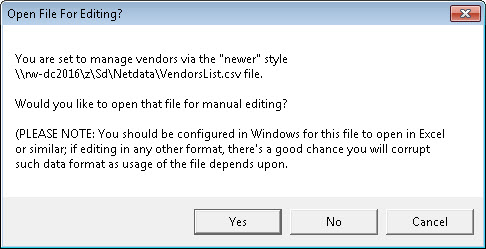
If you agree to switch to the upgraded method, the system will do just that. It will replace the old file used to track your s with a new file called sList.csv in your NetData folder. This new file will have more features and be easy to edit. After you accept this option, if you choose the same MainMenu item again, you'll see this:
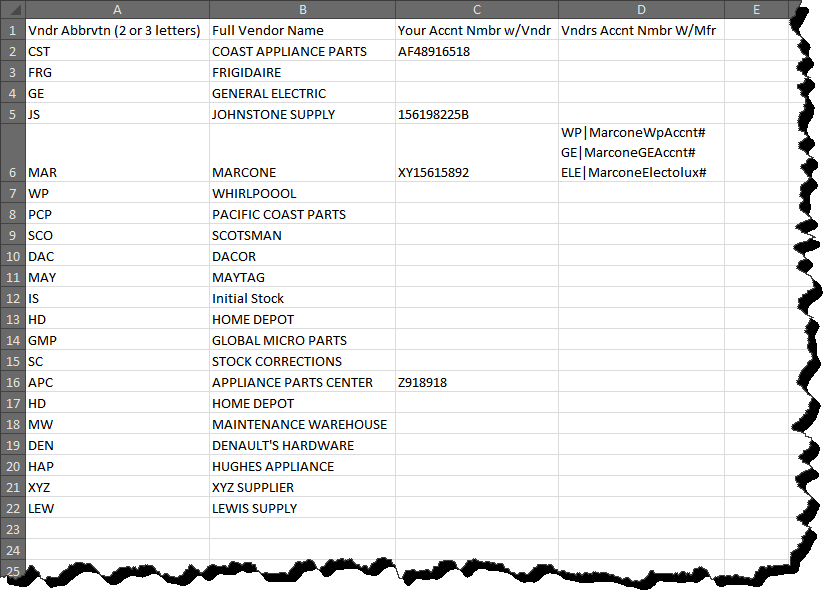
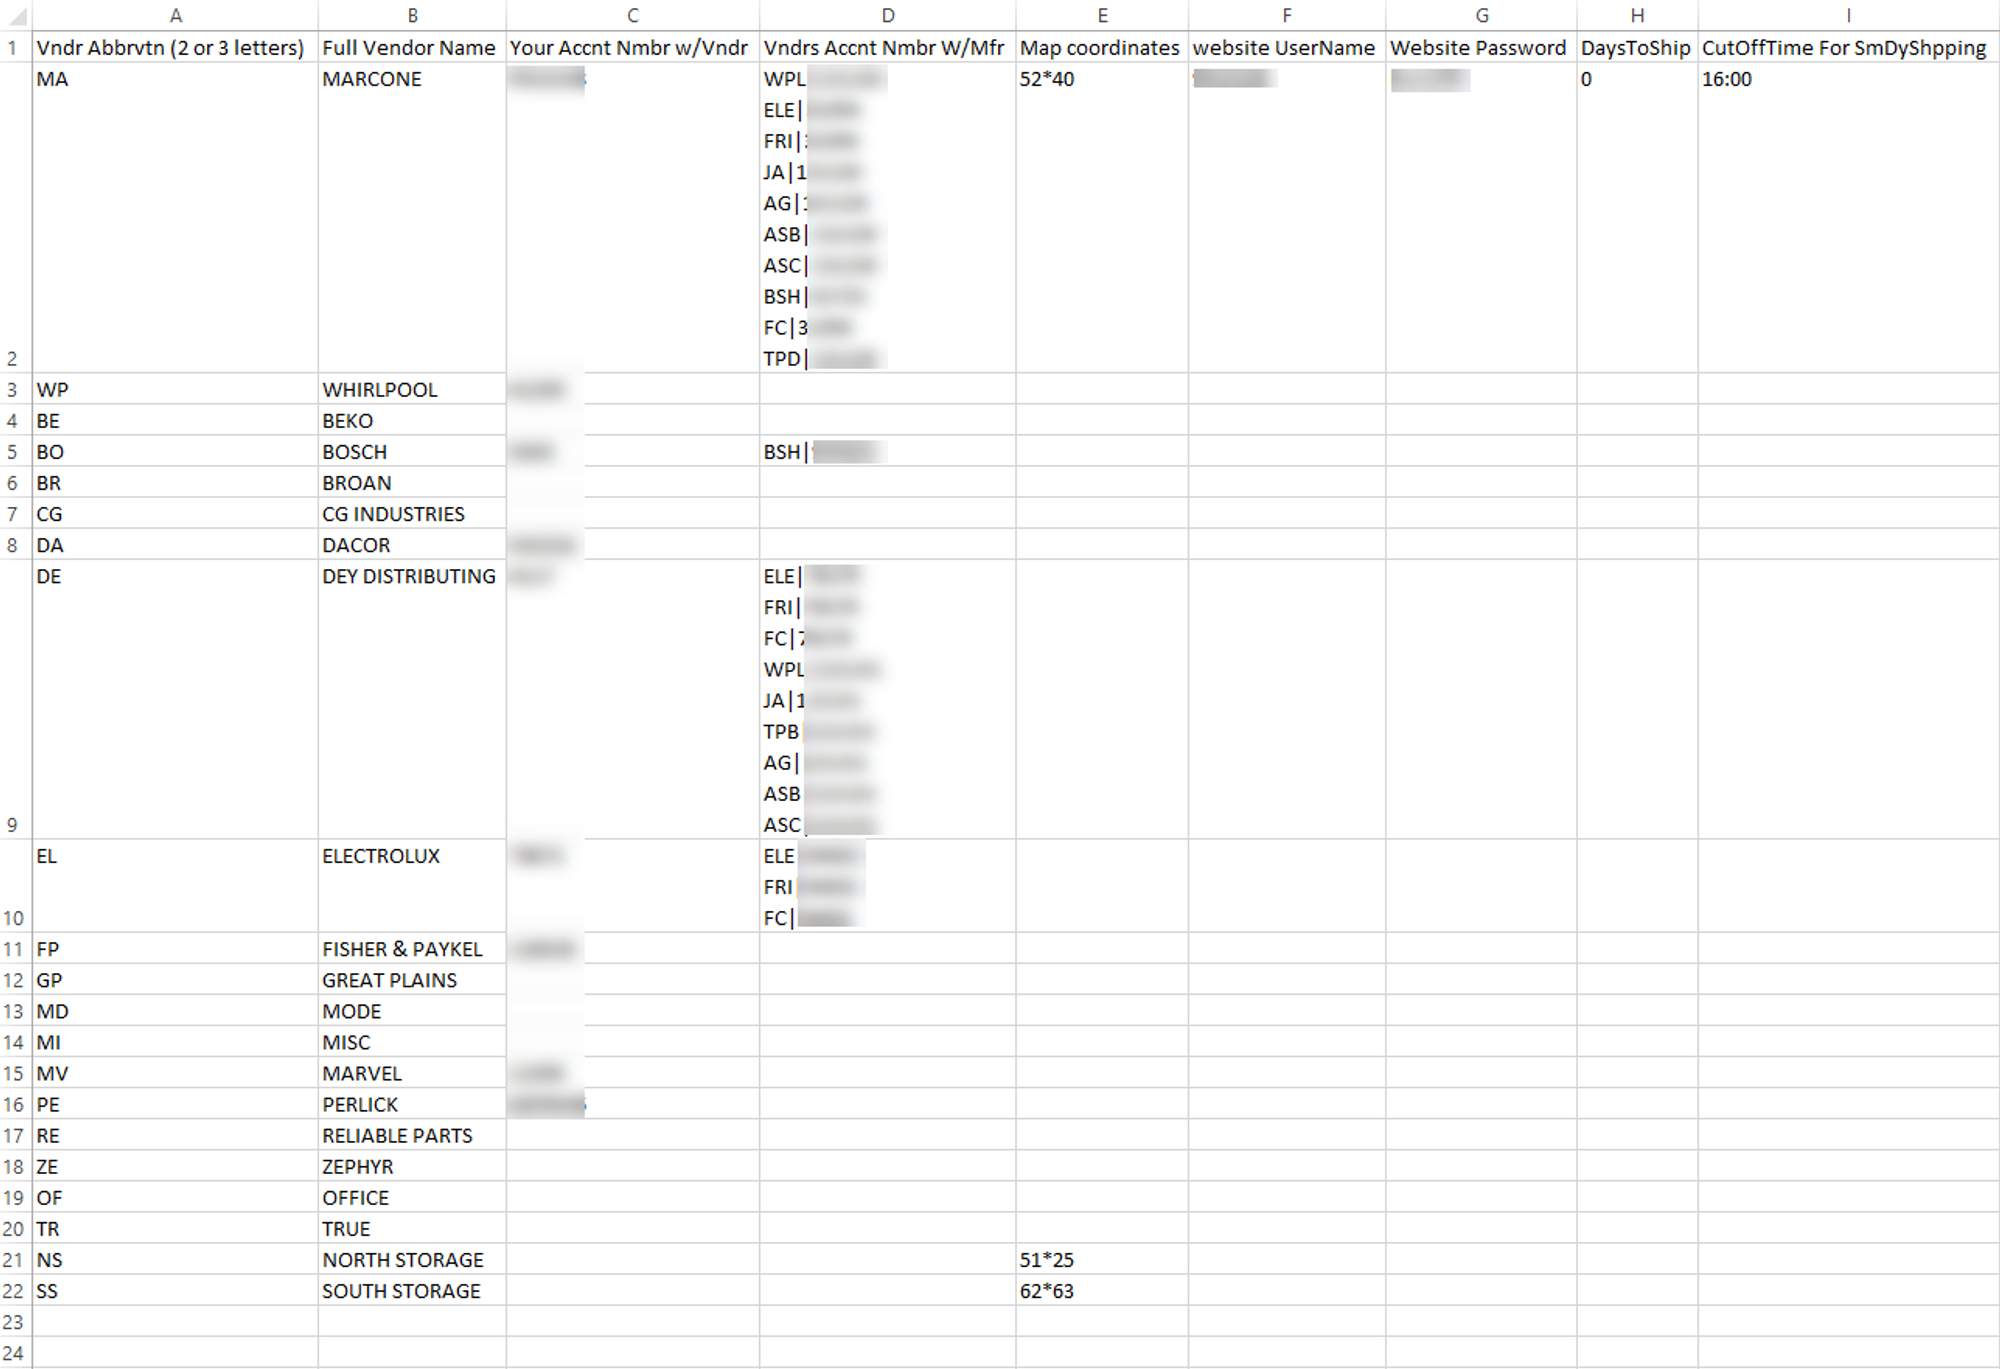
Consent to let ServiceDesk open the upgraded file for you, and it will do so. You'll find this file opens in Excel or similar (at least it should, assuming your Windows is appropriately configured). So opened, it should look something like this:
This file is organized in rows and columns for easy editing.
There is a column for your company's account number with each .
More importantly, there is a column for each 's distributor account number with manufacturers.
Why is this important?
When you make warranty claims, the manufacturer must know where you bought the part. The manufacturer reimburses the , who can then credit you.
So, indicate each vendor's distributor number with each manufacturer.
This raises a question.
How do you list multiple distributor numbers for one vendor and show which manufacturer each number is for?
For (a), put multiple lines in a single cell.
For (b), use a QET abbreviation for the manufacturer, followed by a bar symbol.
Example:
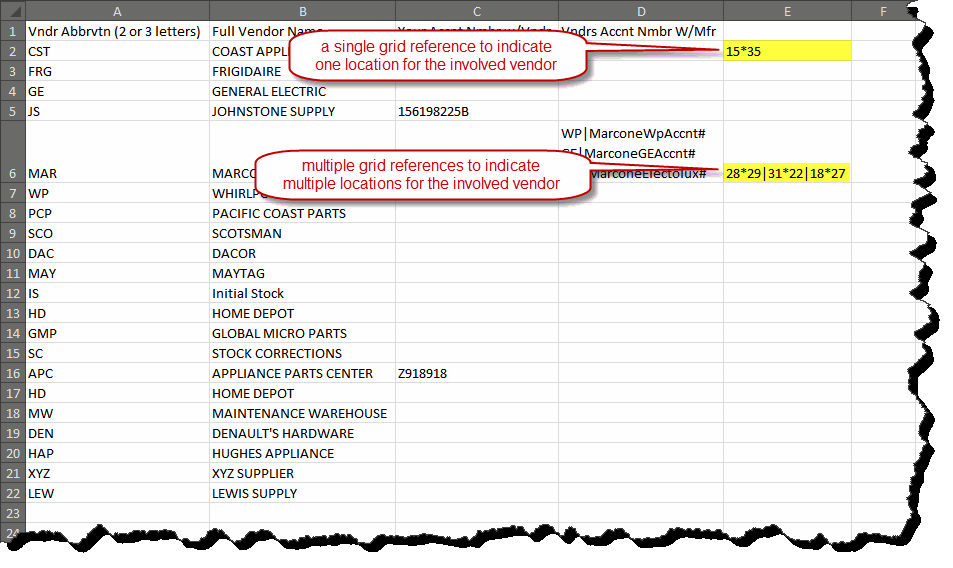
Suppose Marcone is a vendor for Whirlpool, GE, and Electrolux. In the cell for Marcone (in Column D under "Vndrs Accnt Nmbr w/Mfg"), type the QET abbreviation for Whirlpool, the bar symbol ("|"), and Marcone's distributor account number with Whirlpool. Press Alt-Enter to create a new line. Repeat for GE and Electrolux. Your cell will look similar to Cell D-6.
You must adjust column widths and row height to see all the text. Use real account numbers and your own QET abbreviations.
Important: Do not change the abbreviation for any vendor already used in ServiceDesk. Changing it will break the link to existing records.
After editing, save the file as usual. Excel will warn about losing formatting, but this is normal for .CSV files. Don't worry about this warning.
Enhanced IQ when fill-in of on-screen NARDA decides which particular vendor's account number information should be inserted
If you do warranty work, you must submit warranty claims to get paid. If you use parts for this work, your claims must mention these parts to get paid for them. You will likely get credit back from the vendor you bought the parts from if your claim is approved.
When you submit a claim, it involves several steps to get these credits back to you. You make your claim to the manufacturer (sometimes through third-parties like ServiceBench or ServicePower). The manufacturer needs to know which vendor you bought each part from. This allows them to reimburse the vendor, who then credits your account. The manufacturer also needs to know your account number with the vendor and the invoice number for your purchase, so they can tell the vendor how to apply the credit.
Each claimed part must have information that tells the manufacturer which vendor was involved in buying it (specifically, the vendor's "Distributor Account Number" with the manufacturer).
ServiceDesk has been designed to include this information in claims, but there was a limitation.
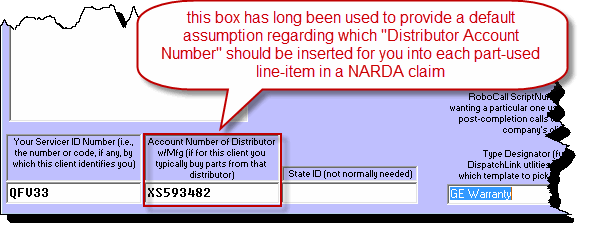
Before this release, ServiceDesk did not directly identify the vendor you got the parts from. Instead, it assumed the vendor you usually get parts from for each OEM. When making a claim, it assumed this usual vendor supplied the parts used on the job. You set up this usual vendor in the QuickEntryTemplate (QET) for each client. This is done in the box shown here:
The problem with this setup is that you may not always buy parts for a specific manufacturer from one vendor. Even for a single job, you might get parts from different vendors. This practice is becoming more common, making it surprising that our simple "default-assumed-vendor" system has lasted so long.
We are overdue to move past this old limitation. The main reason for our Enhanced Vendor Management System, as described above, is to overcome this issue.
This upgrade allows ServiceDesk to do more than assume each part was bought from your default vendor. With the new Enhanced Vendor Management system, ServiceDesk will check which vendor supplied the part and insert that vendor's Distributor Account Number from your Enhanced Vendor List.
Show vendors in DispatchMap
We give credit for this to Daniel Bierle at Appliance Repair Specialists. In Daniel's operation, CSRs often need a technician to pick up parts from a vendor depot. They want to see where the vendors are on the DispatchMap compared to where a technician is driving.
Now, this is easy to do.
In your VendorsList.csv file, use the fifth column (Column E) to show the DispatchMap grid reference for each vendor's location. If you want to show multiple locations for a single vendor, list multiple grid references separated by a bar symbol:
With such locations indicated, they will display in your DispatchMap as grey dots, with the applicable vendor abbreviation within each (similar to the following):
Formatting of the VendorsList.CSV file.
Column A - Vndr Abbrvtn (2 or 3 letters): This will be a two- or three-letter abbreviation (as will be seen in the dropdown in F8, the yellow "Vendor" box in the special order parts line item), and the vendor list in F10 when checking in parts (and subsequently the raw inventory screen).
Column B - Full Vendor Name: The long spelling of the vendor name.
Column C - Your Accnt Nmbr w/Vndr: The servicer account number with the vendor. (This is used to upload special order parts to the Encompass website.)
Column D - Vndrs Accnt Nmbr W/Mfr: This will be a two- or three-character abbreviation (to match the HVC abbreviation in the matching QET) followed by a pipe character, followed by the account number with the manufacturer.
Column E - Map Coordinates: A value here will allow this vendor to be displayed on the DispatchMap at the grid coordinates provided in this field.
Column F - UserName: This is used to upload special order parts to the following websites: Marcone, Trible, V&V
Column G - Password: This is used to upload special order parts to the following websites: Encompass, Marcone, Trible, V&V
Column H - DaysToShip: Indicates how many days the vendor takes to ship parts to the servicer.
Column I - CutOffTimeForSmDyShppng: The value here indicates when same-day shipping can no longer occur.
TIP! Direct-ordering from Encompass will require an account number to be present in column C.

